In this lesson, you will learn how to export your artwork for different purposes, such as web use, printing, and sharing.
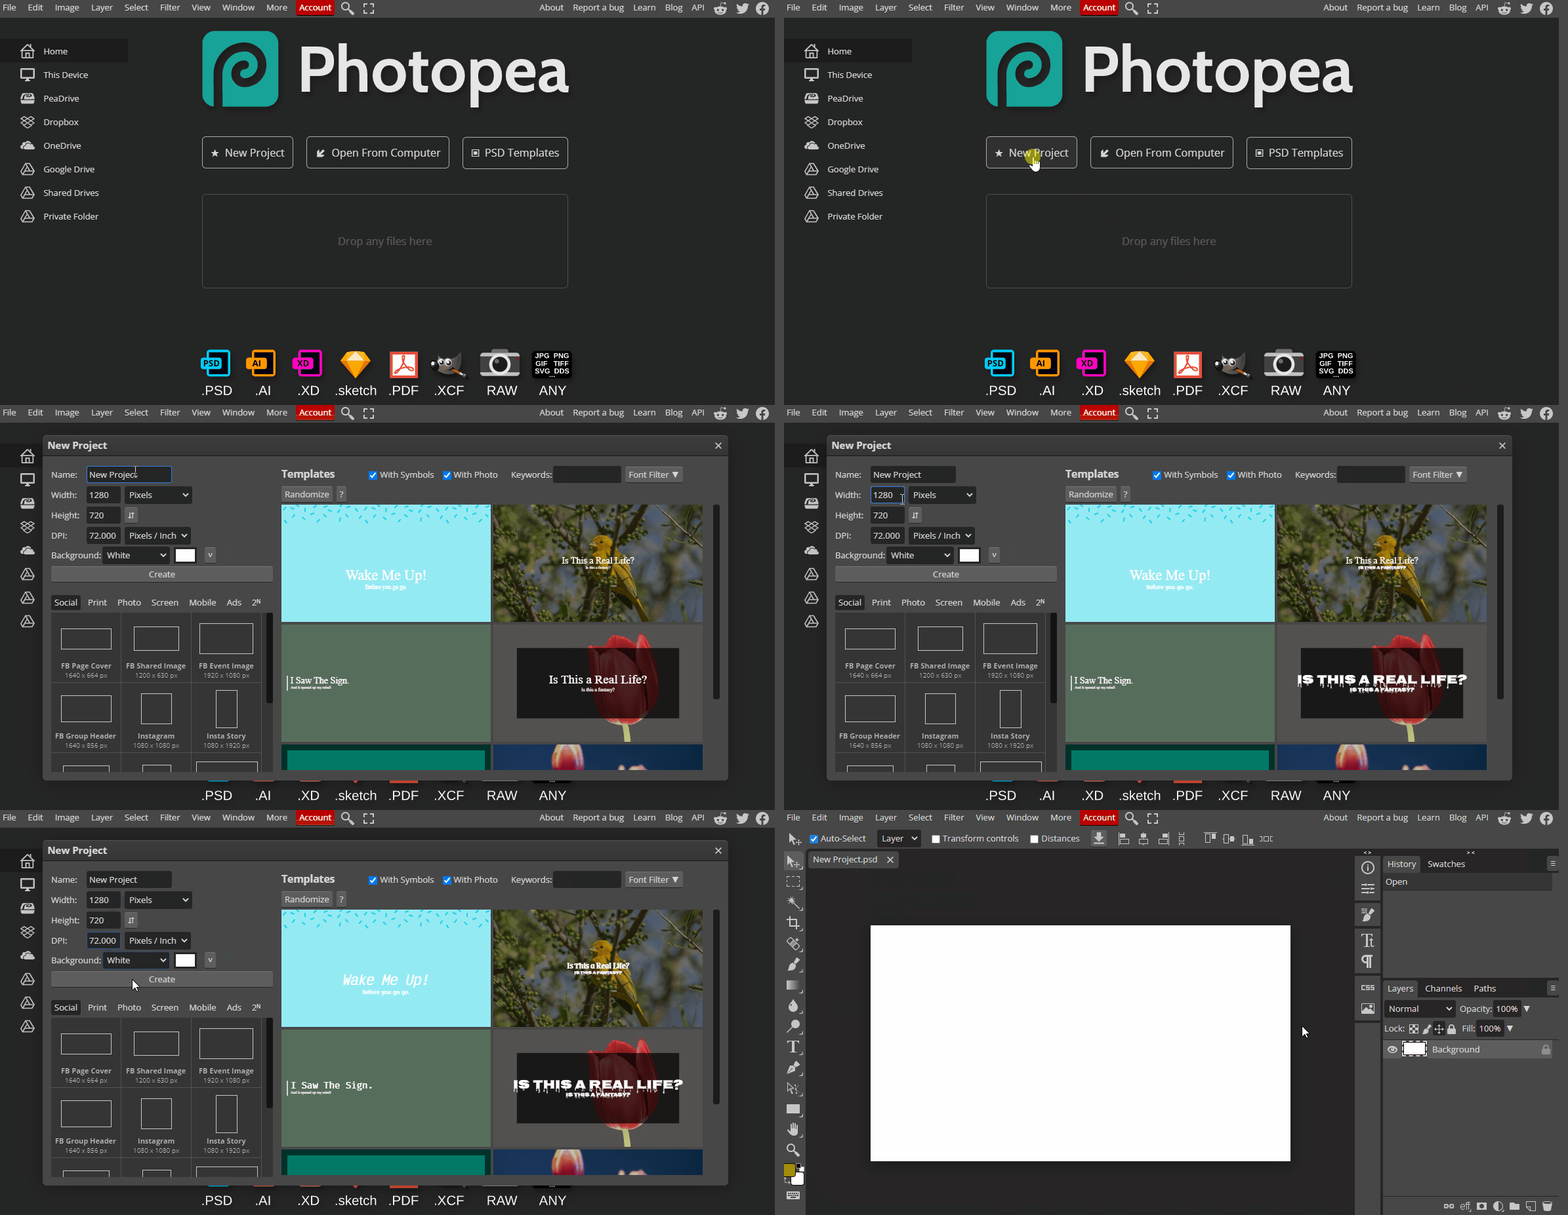
Let's take a look and try out some digital software called Photopea. Open the website photopea.com and create a new project.
To create a new project in Photopea, open the website photopea.com and:
Before exporting your artwork, you must first create it using the techniques you have learned in previous lessons. These techniques may include using different tools, layers, effects, and other features available in Photopea.
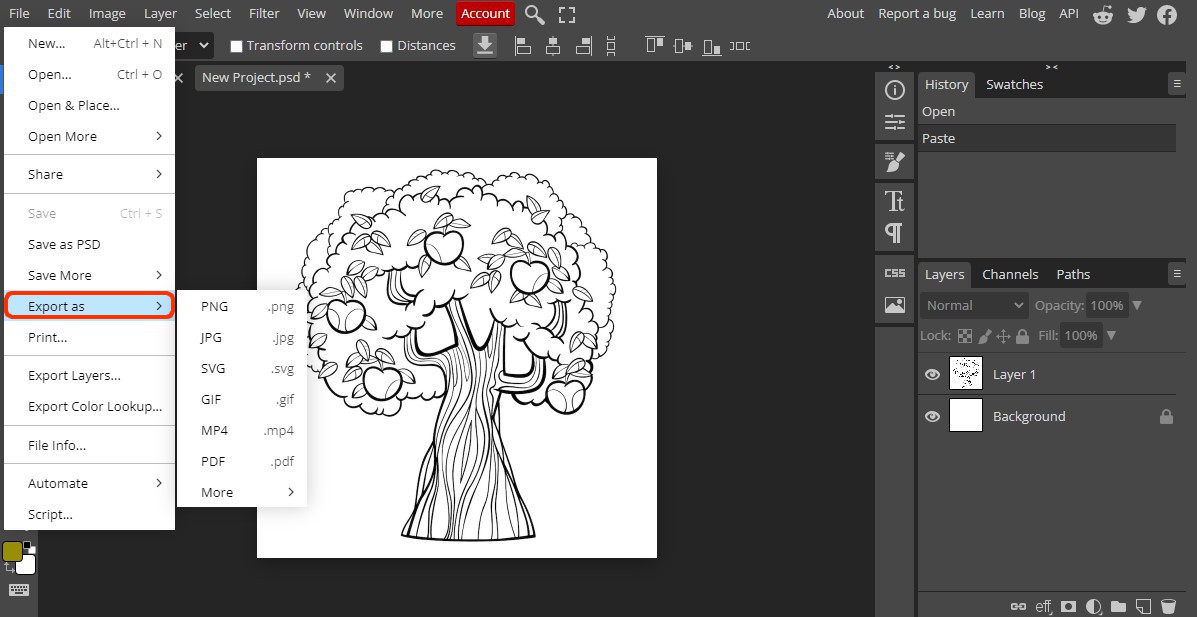
Once you have created your artwork, you can export it in various file formats using the "Export As" feature in Photopea. This allows you to save your artwork in a format that is suitable for its intended use.
To export your artwork, follow these steps:
When exporting your artwork, it is important to choose a file format that is appropriate for its intended use. Different file formats have different strengths and weaknesses, such as file size, image quality, and compatibility with different devices and software.
To choose a file format for your artwork, consider the following:
You're previewing this lesson. Get full access to this lesson and hundreds more — each one ready to teach, with interactive activities, printable resources and pupil progress tracking built in.