Beginner
20 mins
Teacher/Student led
+70 XP

What you need:
Chromebook/Laptop/PC

Disco Shape Layering

In this lesson, you will learn how to layer shapes, group, and arrange them to create visually appealing designs for your school disco poster. You will also practice formatting text, including font, size, color, and styles.

Teacher Class Feed

Load previous activity

    1 - Open your Disco Poster

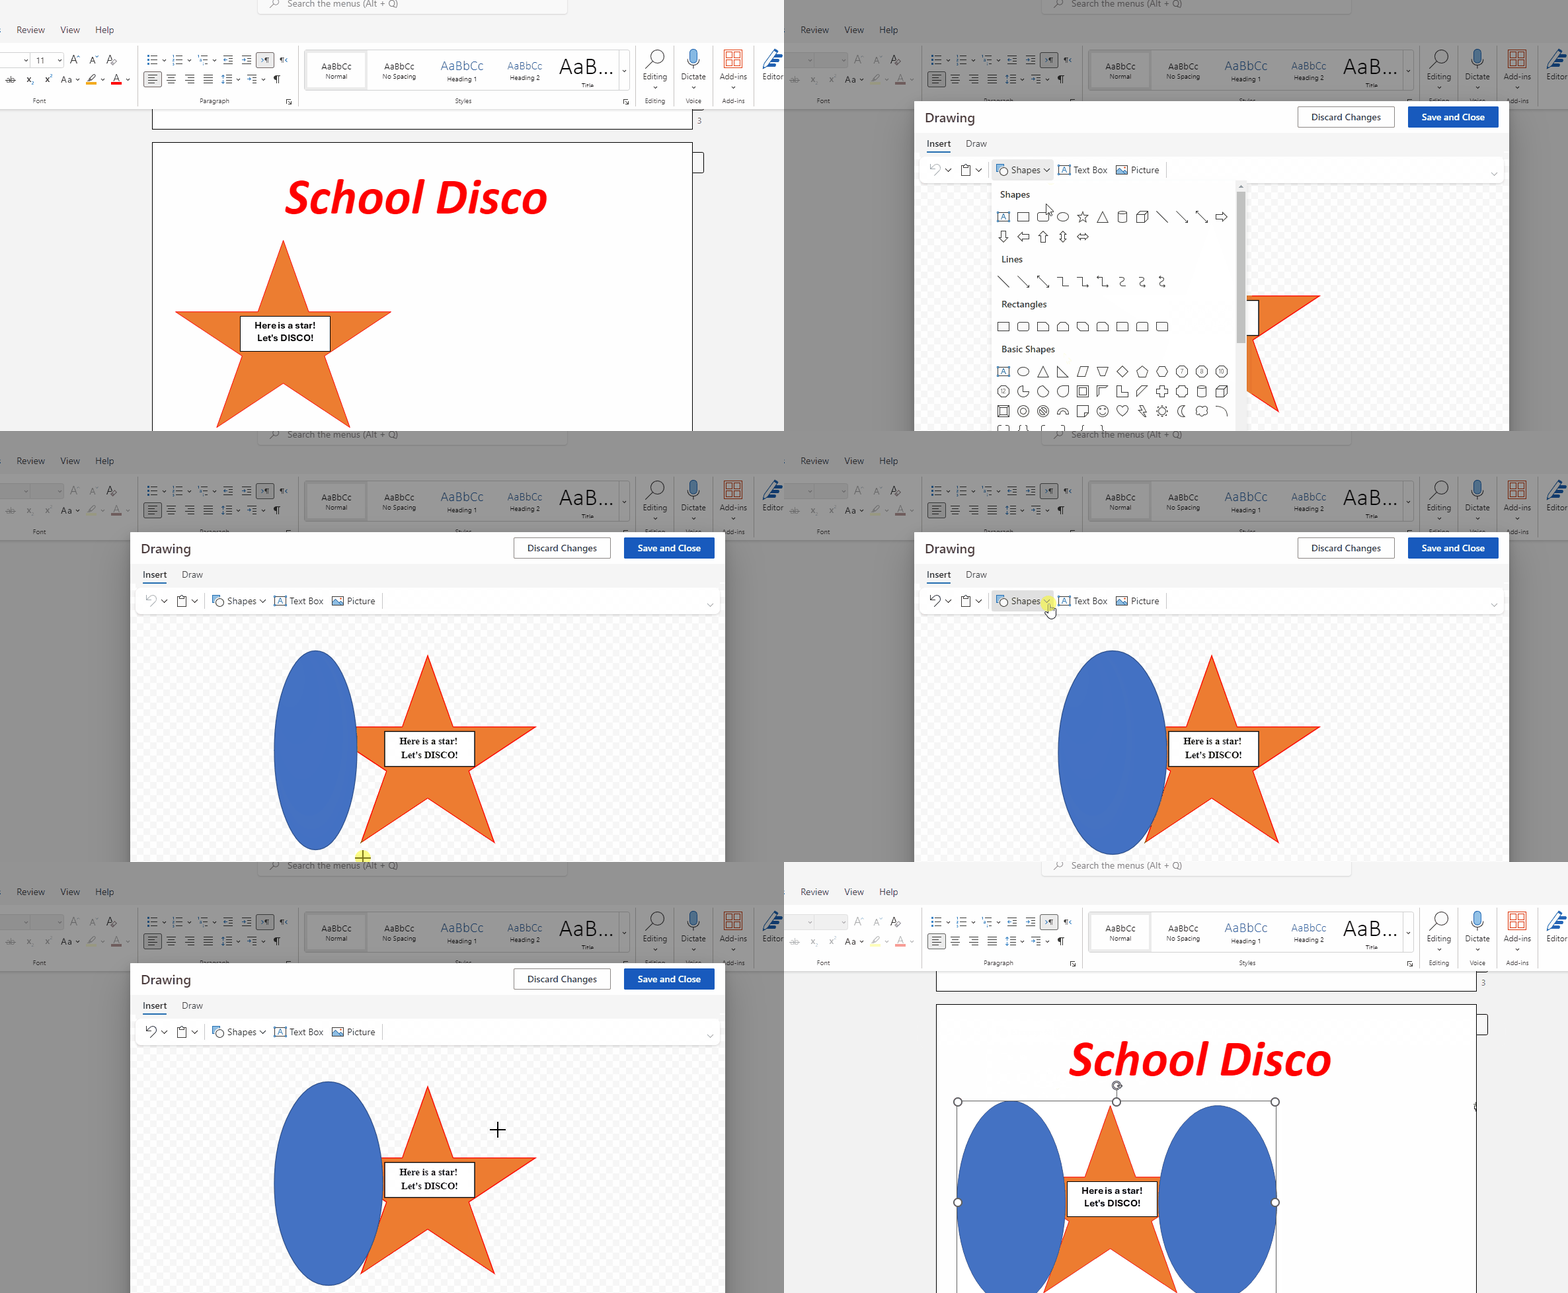
    In this lesson you will learn how to add more shapes to add layers. This is to add more design elements to your poster. 


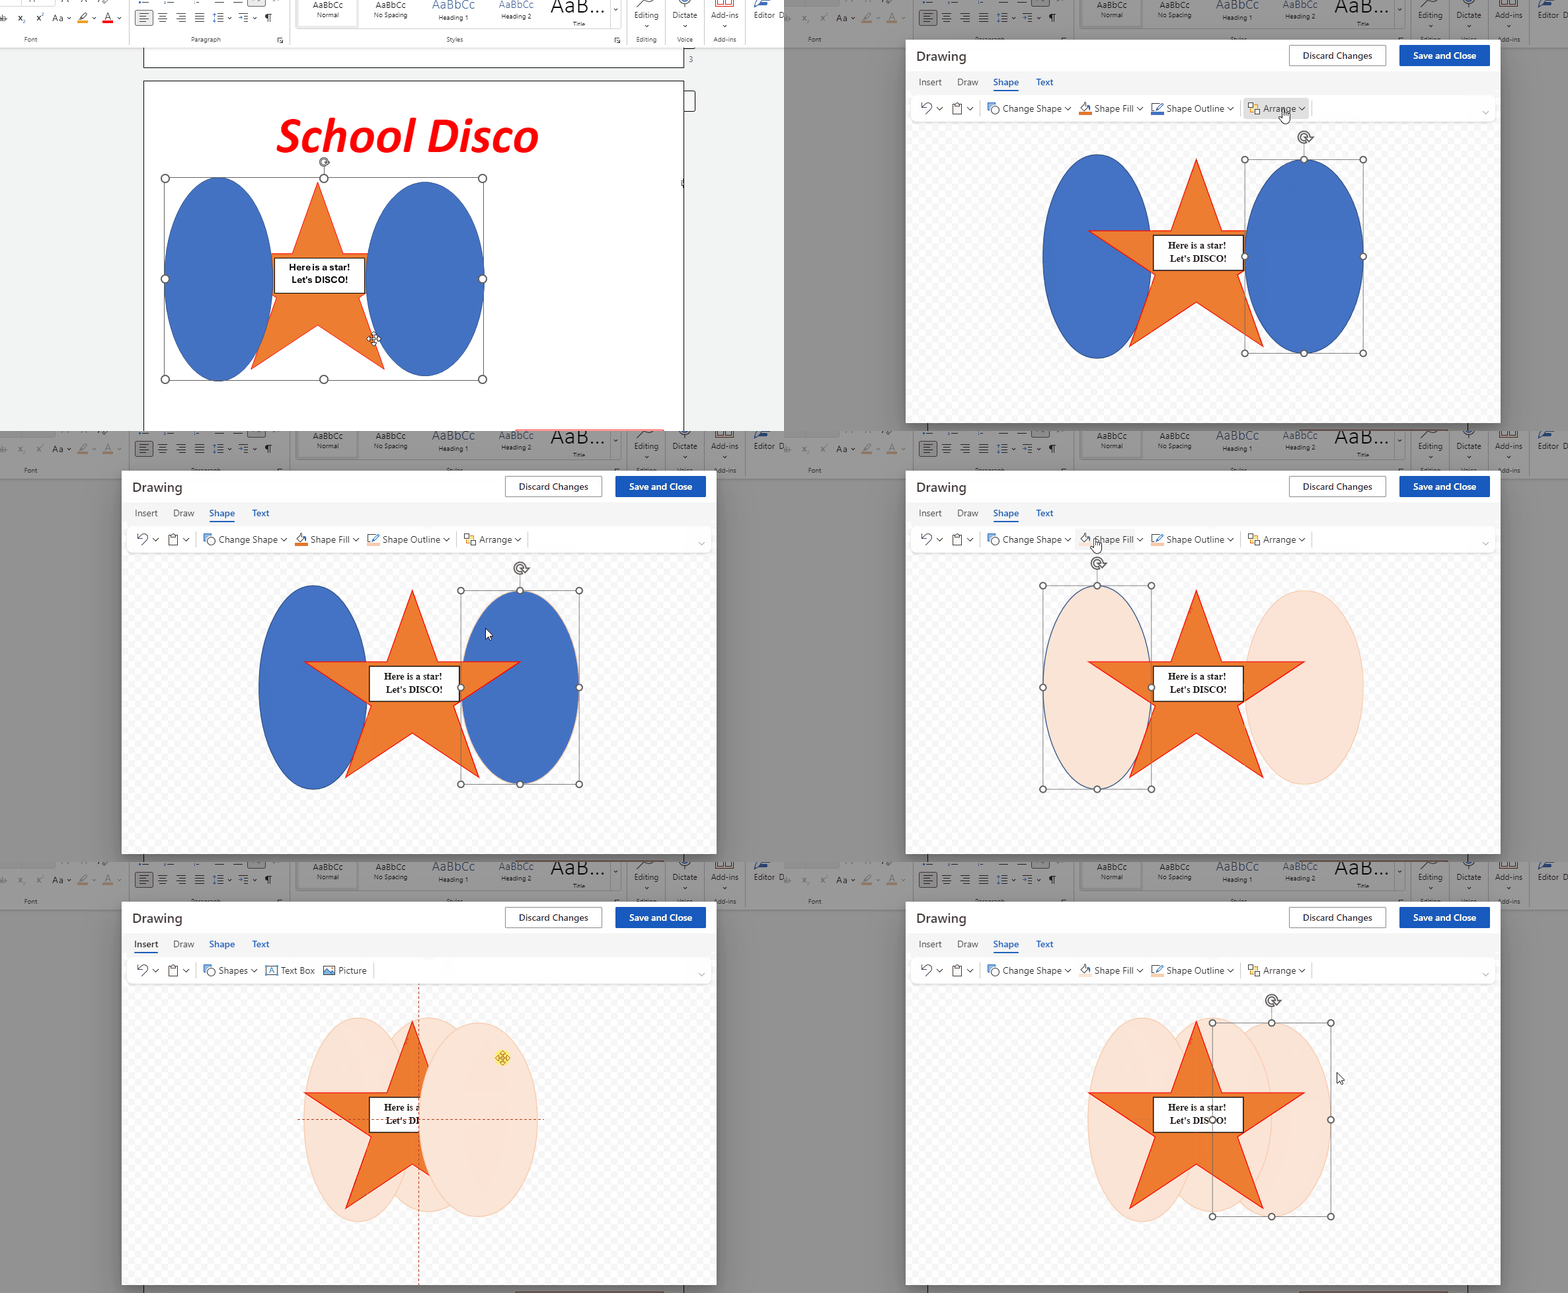
    2 - Layer Multiple Shapes

    In this step, you will layer multiple shapes to create an interesting design for your school disco poster. Follow the instructions below:

    1. Click on the 'Insert' tab in the Microsoft Word ribbon.
    2. Select 'Shapes' and choose a shape you would like to add to your poster. Click and drag to draw the shape on your document.
    3. Repeat steps 1 and 2 to insert additional shapes, making sure to overlap them to create a layered effect.
    4. Click on a shape to select it. You will see a 'Format' tab appear in the ribbon. Click on this tab.
    5. Under the 'Shape Styles' section, choose a color and style for your shape. Experiment with different colors and styles to create a visually appealing design.
    6. To change the order of the shapes, select a shape and click on the 'Arrange' button in the 'Format' tab. Choose 'Bring Forward' or 'Send Backward' to adjust the layering of the shapes.
    7. Continue adjusting the colors, styles, and arrangement of your shapes until you are satisfied with the design.

    3 - Arrange the Shapes

    1. Click on one of the shapes you have inserted in your document to select it.

    2. Once the shape is selected, you will notice a new tab called 'Shape Format' appears on the ribbon. Click on this tab to access the shape formatting options.

    3. In the 'Shape Format' tab, locate the 'Arrange' group. Click on the 'Arrange' button, which will open a dropdown menu with layering options.

    4. To change the layering order of your shapes, choose either 'Bring Forward' or 'Send Backward' from the dropdown menu. 'Bring Forward' will move the selected shape one layer up, while 'Send Backward' will move it one layer down.

    5. Continue adjusting the layering order of your shapes by selecting each shape and using the 'Bring Forward' or 'Send Backward' options until they overlap in an appealing way.

    6. If you want to duplicate a shape, click on the shape you like and press 'Ctrl+C' on your keyboard to copy it. Then, click on the area where you want to place the copied shape and press 'Ctrl+V' to paste it.


    123learn · Online learning platform

    Unlock the full learning experience

    You're previewing this lesson. Get full access to this lesson and hundreds more — each one ready to teach, with interactive activities, printable resources and pupil progress tracking built in.

    Hundreds of curriculum-aligned lessons
    Interactive activities in every lesson
    Printable resources & progress tracking
    Copyright Notice
    This lesson is copyright of Coding Ireland 2017 - 2026. Unauthorised use, copying or distribution is not allowed.
    🍪 Our website uses cookies to make your browsing experience better. By using our website you agree to our use of cookies. Learn more