 You can already place content on a page and change how it looks. Today you will build an interactive quiz game for the web with HTML, CSS and JavaScript.
You will set up a CodePen project, show questions and answer buttons, check each choice, keep a score, and finish by writing five quiz questions of your own on a subject you choose.
Before you run anything, look at the first build step and think: what do you expect to see on the page when the starter structure is in place?
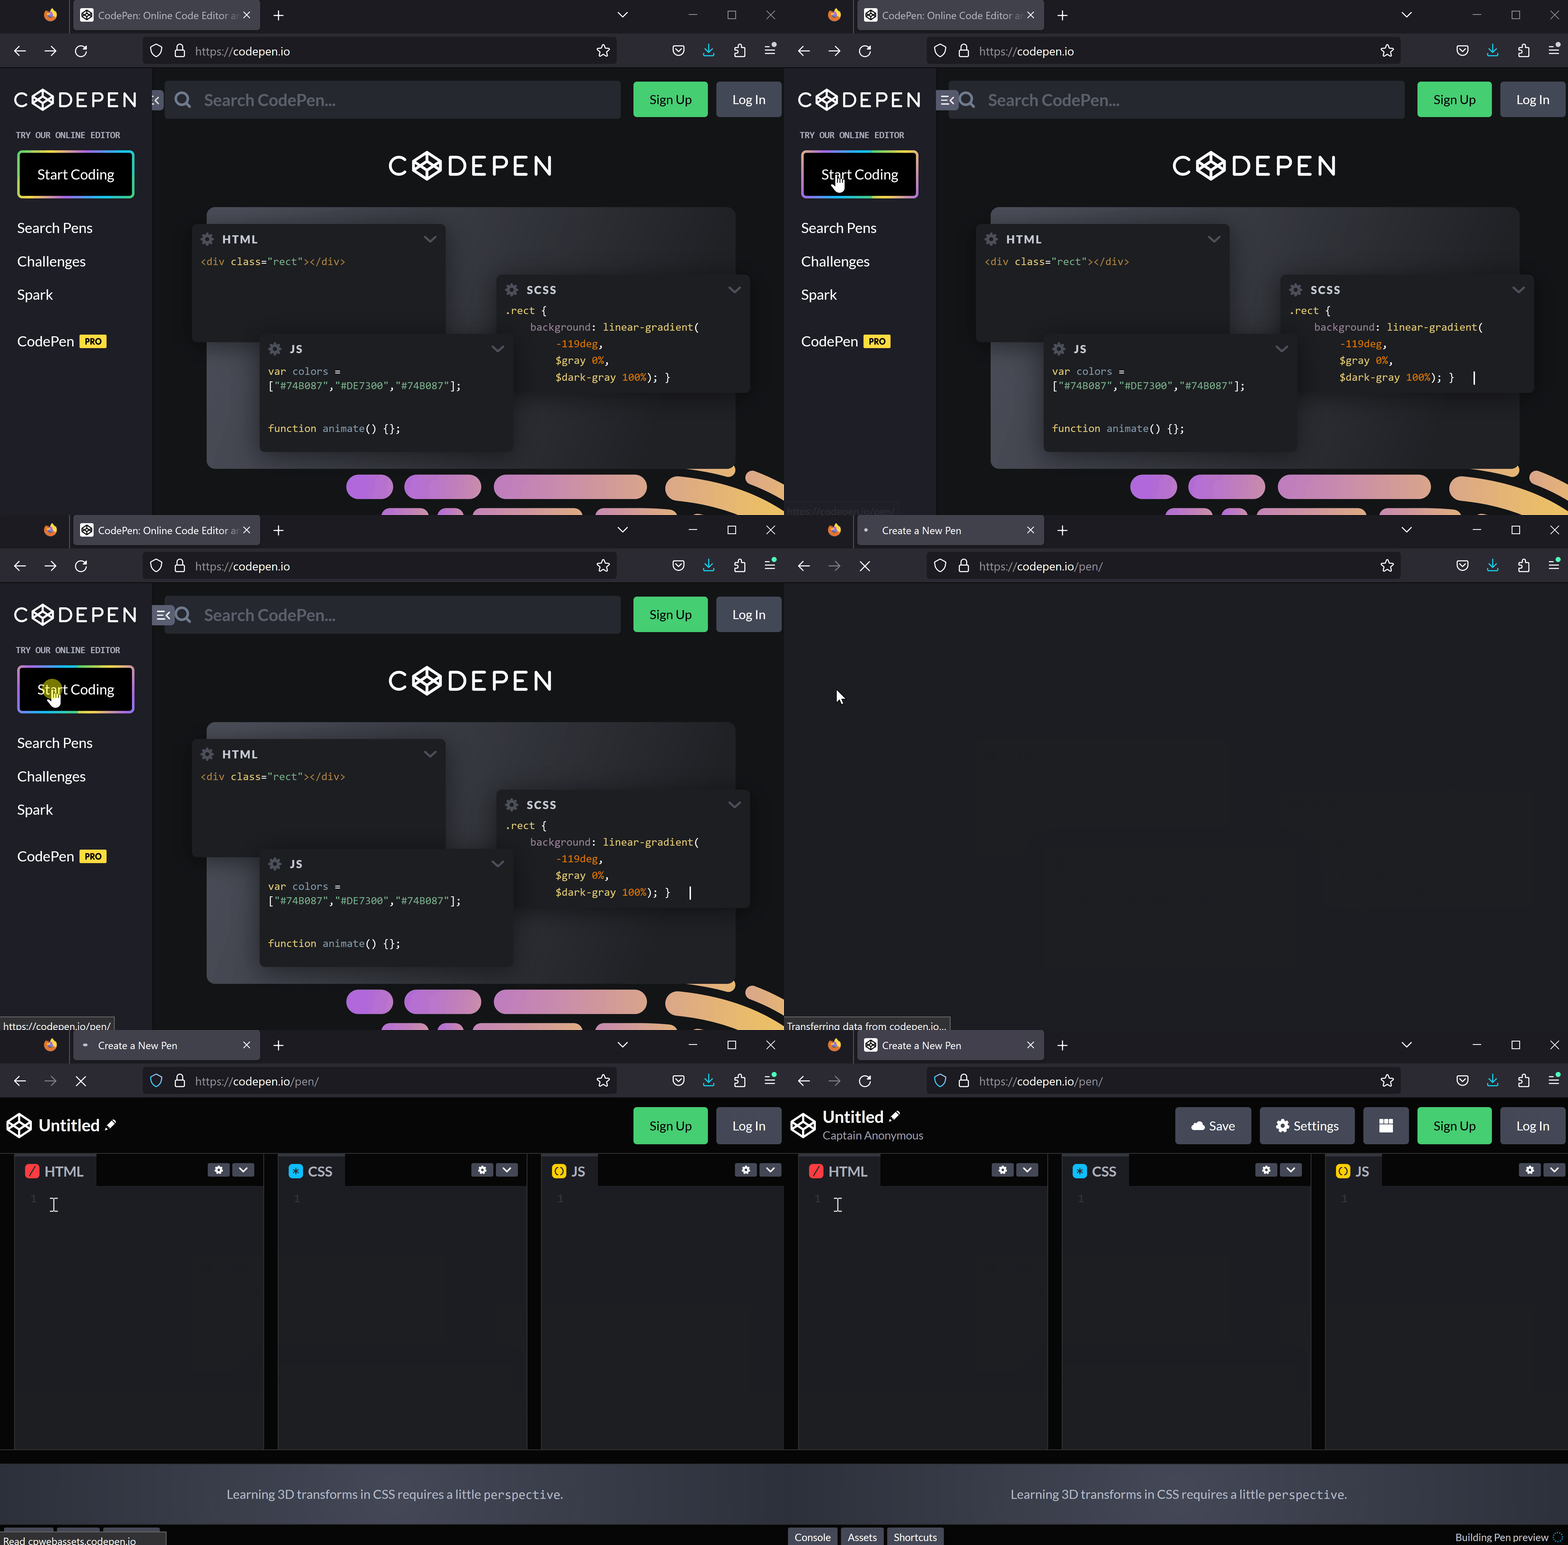
First, open CodePen by visiting https://codepen.io and create a new project.
To create a new project or 'pen' in CodePen, open the website codepen.io and:
- Click the 'Start Coding' button
- This will create a new project (or 'pen') and bring you to online editor.
In this step, we will add the HTML structure for our Interactive Quiz Game. Add the following HTML code to the HTML section of your CodePen:
<h1>Interactive Quiz Game</h1>
<div id='quiz'></div>
<div id='result'></div>
<div id='score'></div>
Here's a brief explanation of each element:
<h1>Interactive Quiz Game</h1>: This is the main heading of our quiz game.<div id='quiz'></div>: This div will contain the questions and answer options for our quiz.<div id='result'></div>: This div will display the result of the user's answer, whether it's correct or incorrect.<div id='score'></div>: This div will show the user's score when they complete the quiz.
Now let's add some styling to our HTML elements to make them look better.
Add the following CSS code to the CSS section of your CodePen:
body {
  font-family: Arial, sans-serif;
  background-color: #f0f0f0;
  padding: 20px;
}

h1 {
  text-align: center;
}

#quiz {
  background-color: #fff;
  padding: 20px;
  border-radius: 5px;
}

.answer {
  display: block;
  margin: 20px auto;
  background-color: #007bff;
  border: none;
  color: #fff;
  padding: 10px 20px;
  border-radius: 5px;
  cursor: pointer;
}

.answer:hover {
  background-color: #0056b3;
}

#result, #score {
  text-align: center;
  font-size: 24px;
  font-weight: bold;
}Before we can use jQuery in our JavaScript, we need to add the jQuery library to the project. In CodePen this is a setting rather than code:
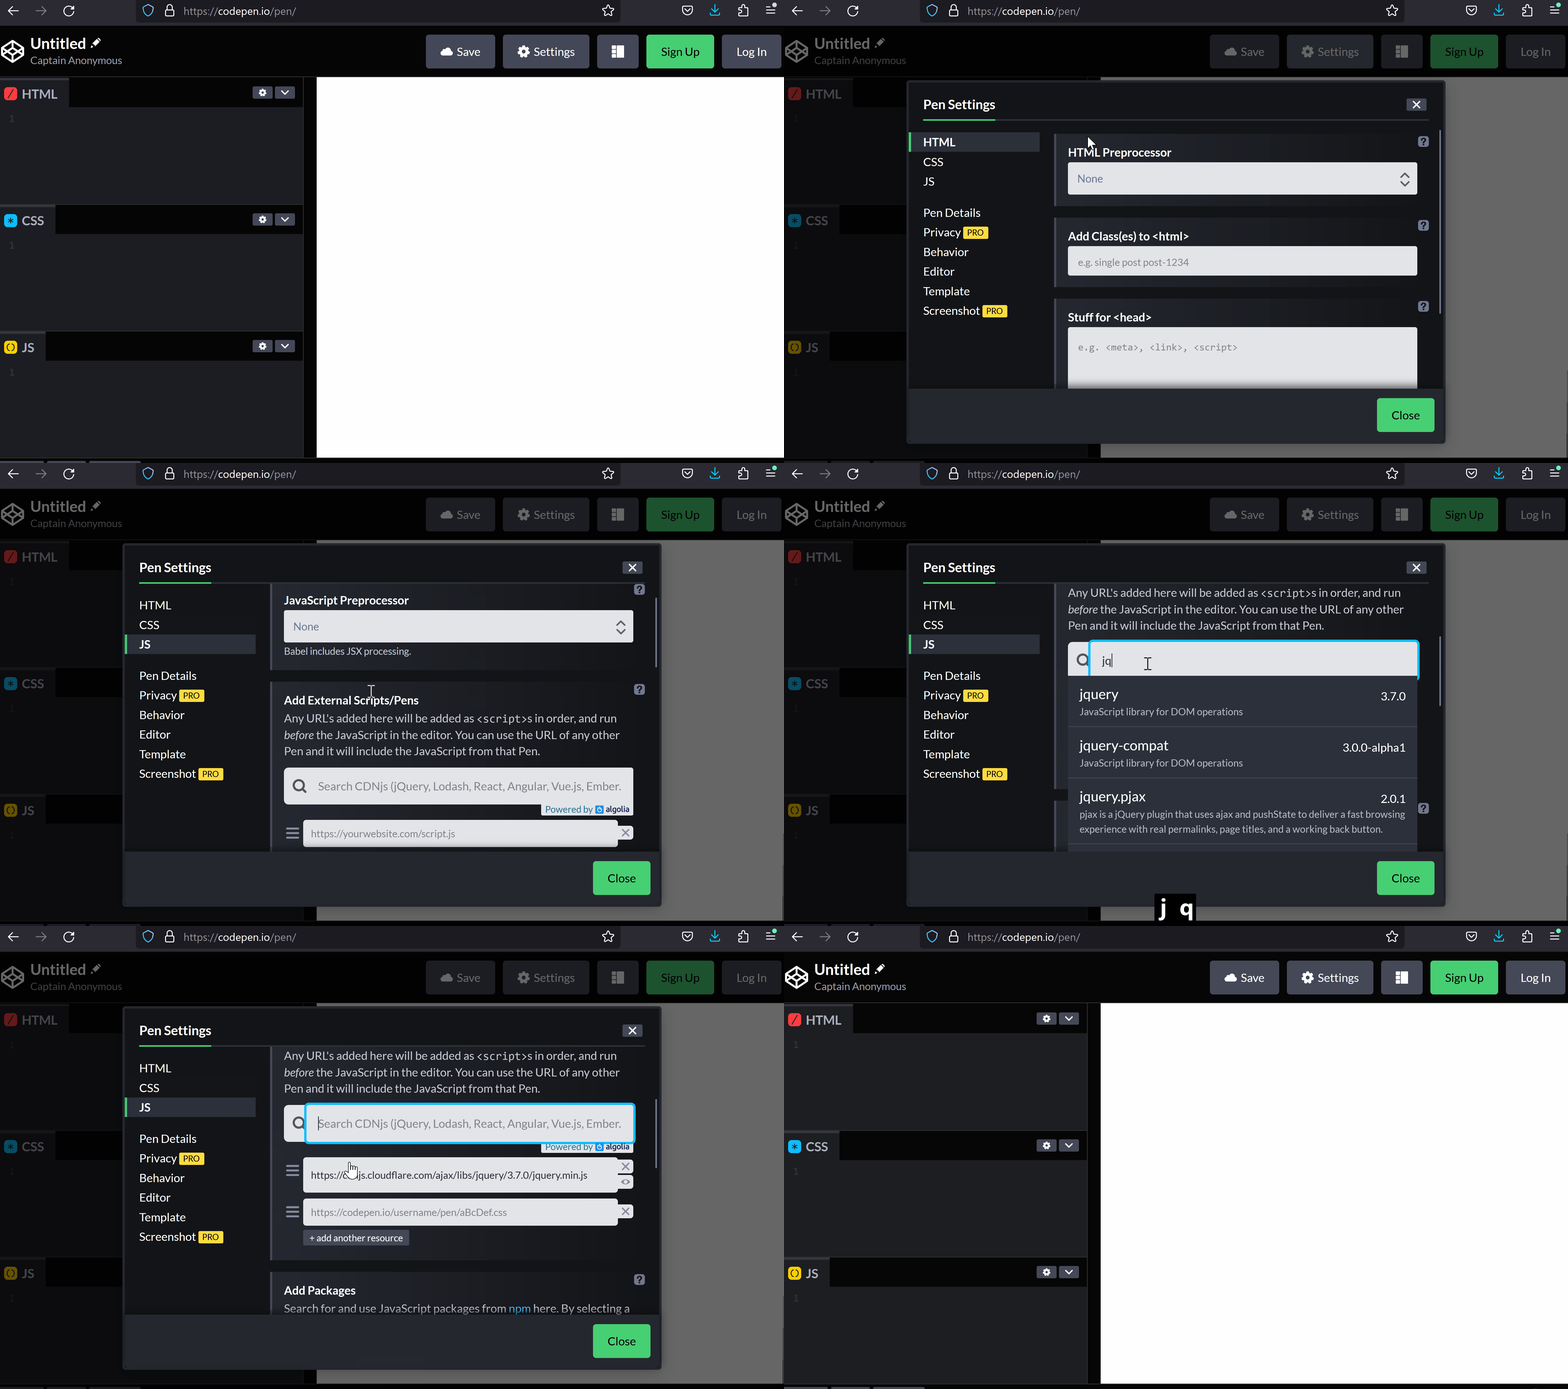
- Click the Settings button at the top of CodePen and choose the JS tab (or click the gear icon on the JS panel).
- Under Add External Scripts/Pens, type jquery into the search box.
- Select jquery from the list that appears, then click Save & Close.
jQuery is a popular JavaScript library that makes it much easier to select parts of the page and change them — you'll recognise it by the $ symbol in the code we write next.
To add a JavaScript library to your CodePen project, follow these steps:
- Click on the 'Settings' button.
- Click on 'JS' for the JavaScript settings.
- In the 'Add External Scripts/Pens' section search for the JavaScript library you wish to add i.e. jQuery.
- Click on the library you wish to add in the results that show.
- Click the 'Close' button and the library is now available in your project.
Unlock the full learning experience
You're previewing this lesson. Get full access to this lesson and hundreds more — each one ready to teach, with interactive activities, printable resources and pupil progress tracking built in.
This lesson is copyright of Coding Ireland 2017 - 2025. Unauthorised use, copying or distribution is not allowed.