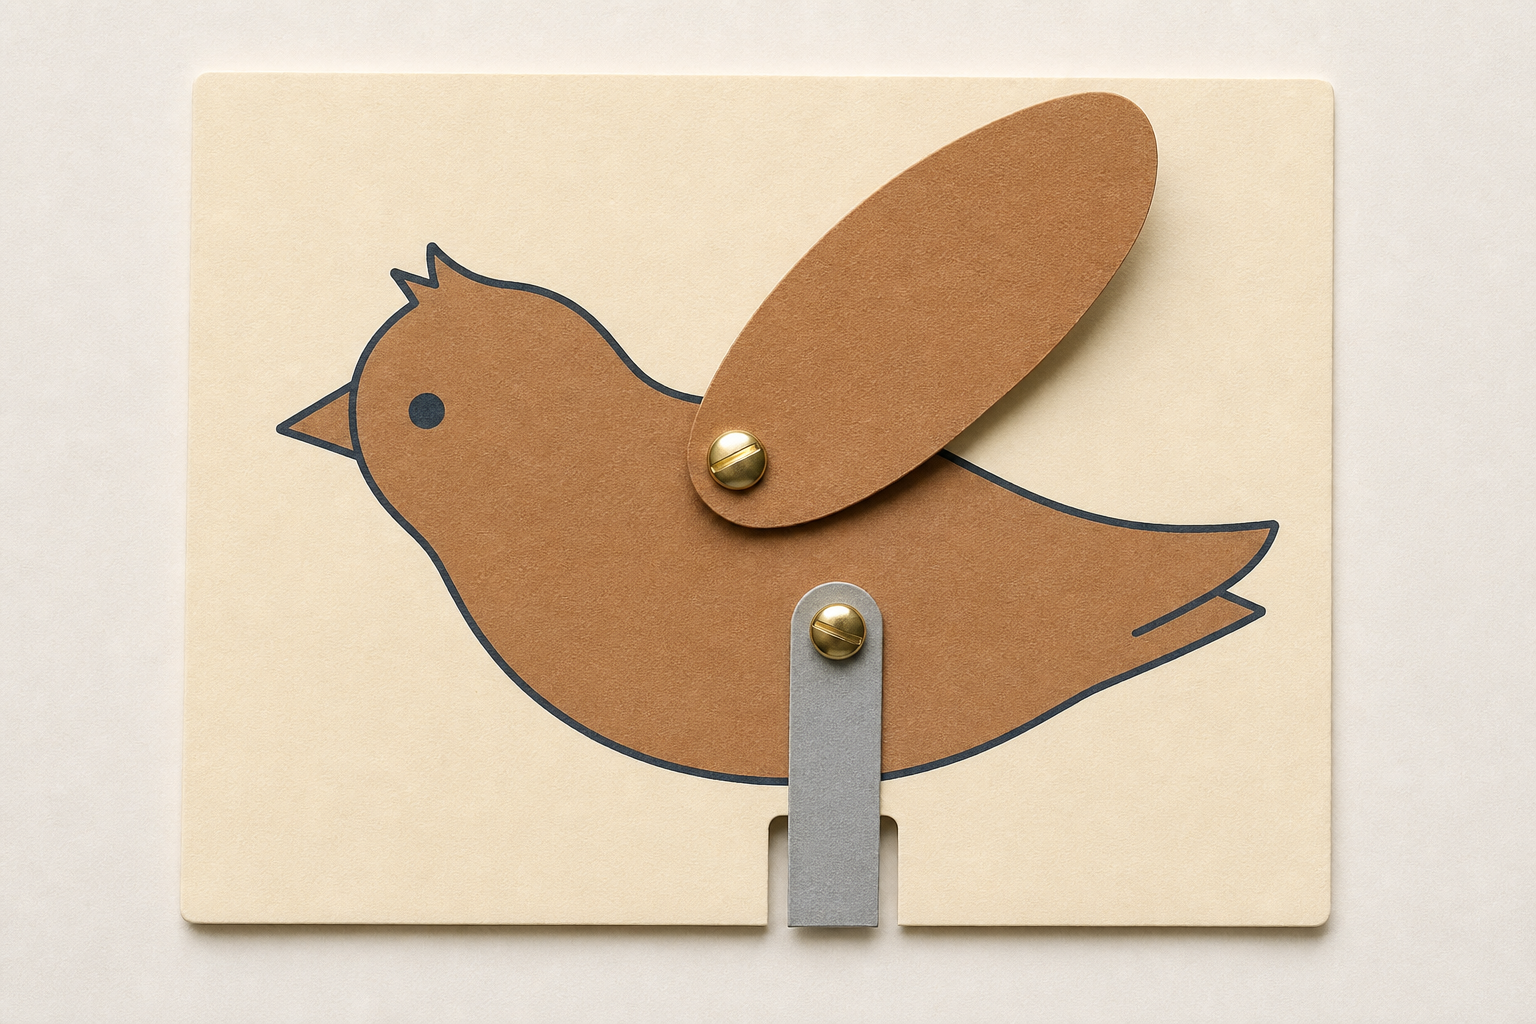
 Watch this. One small push at the side makes something else move. How can a push in one place make a different movement somewhere else?
Hands up: what everyday things turn one movement into another?
 That push on the strip is the input. The wing going up is the output. The split pin that lets the wing swing is a pivot. All the parts working together make a mechanism: parts that transfer movement from one place to another.
Watch the bird again. Where does the movement start, and where does it end?
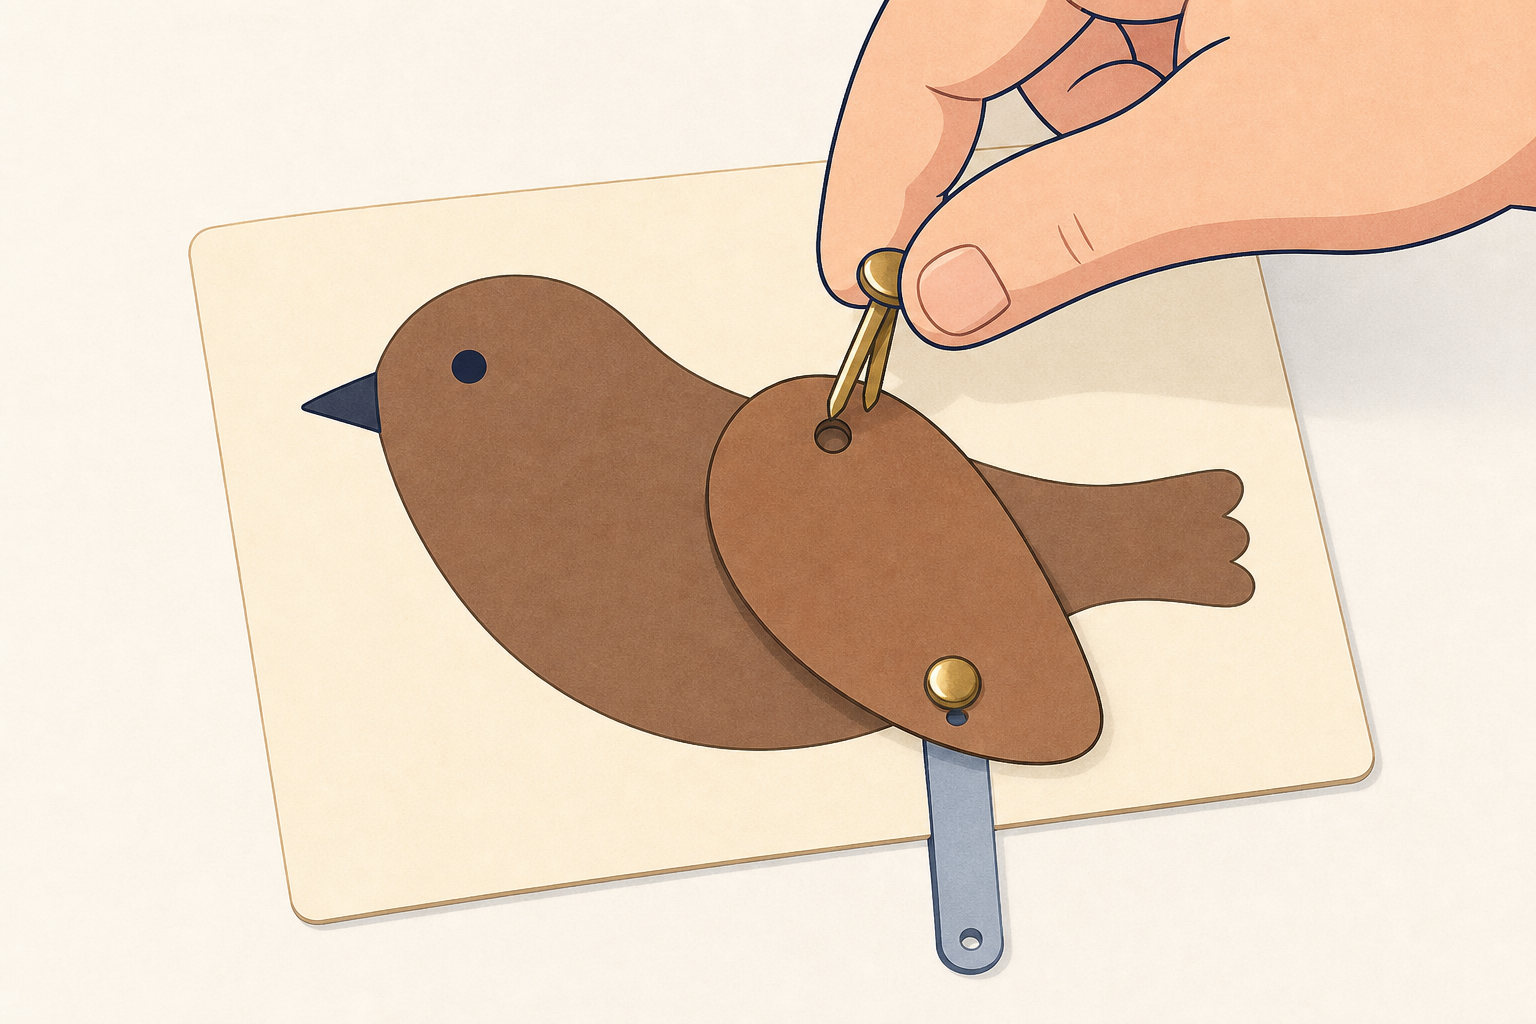
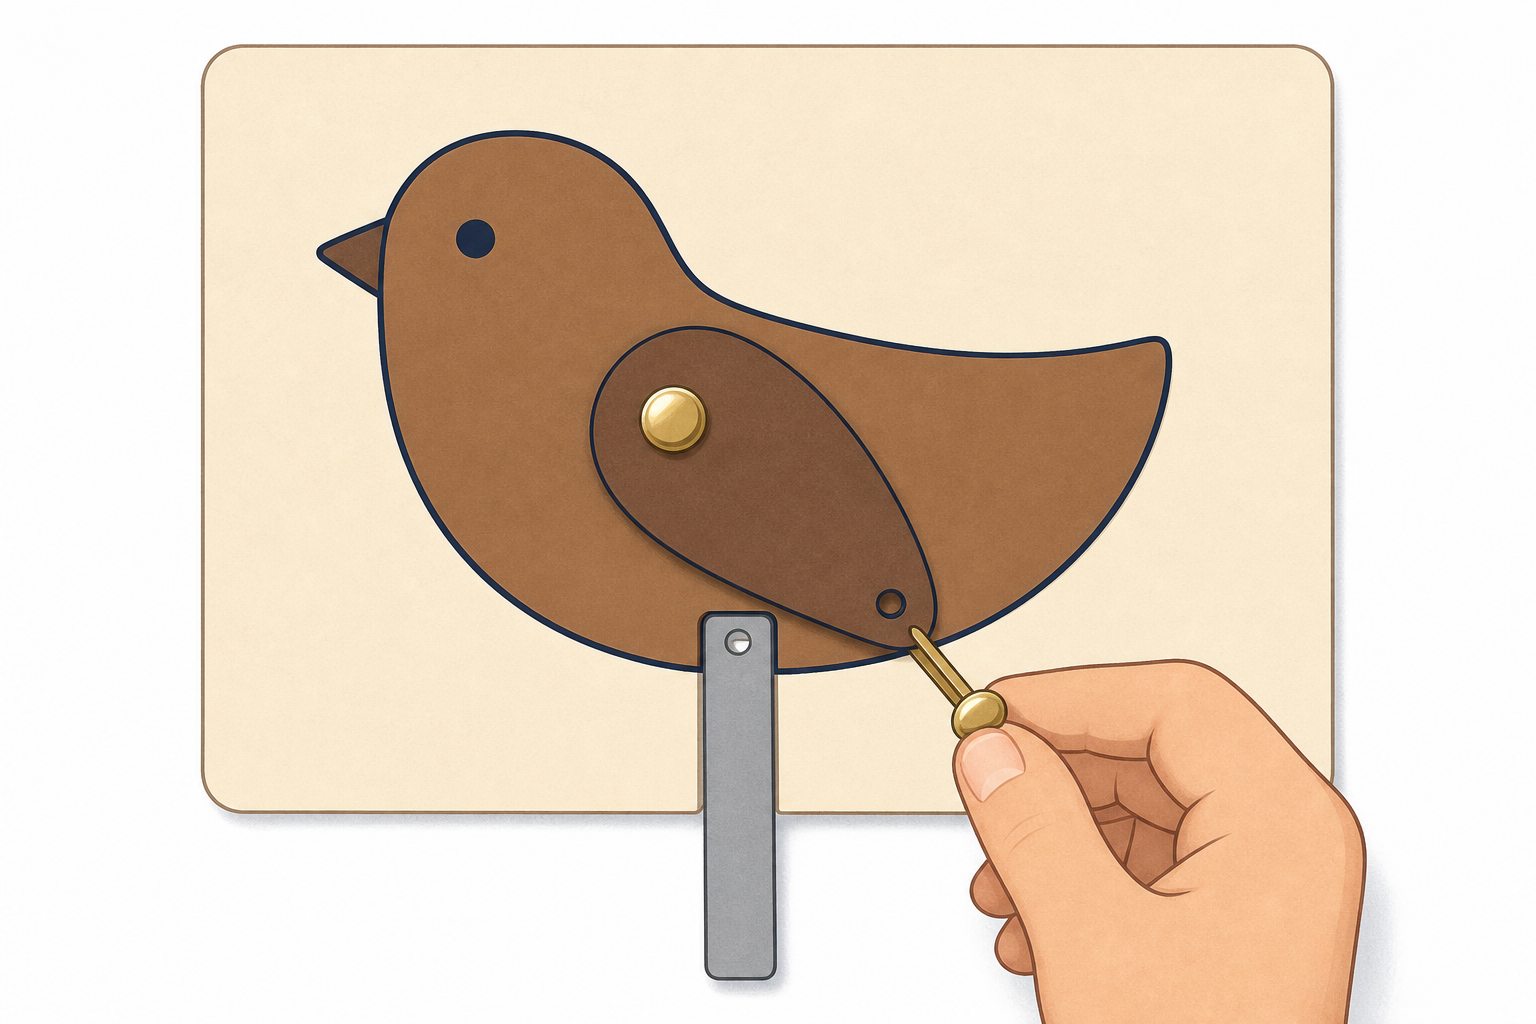
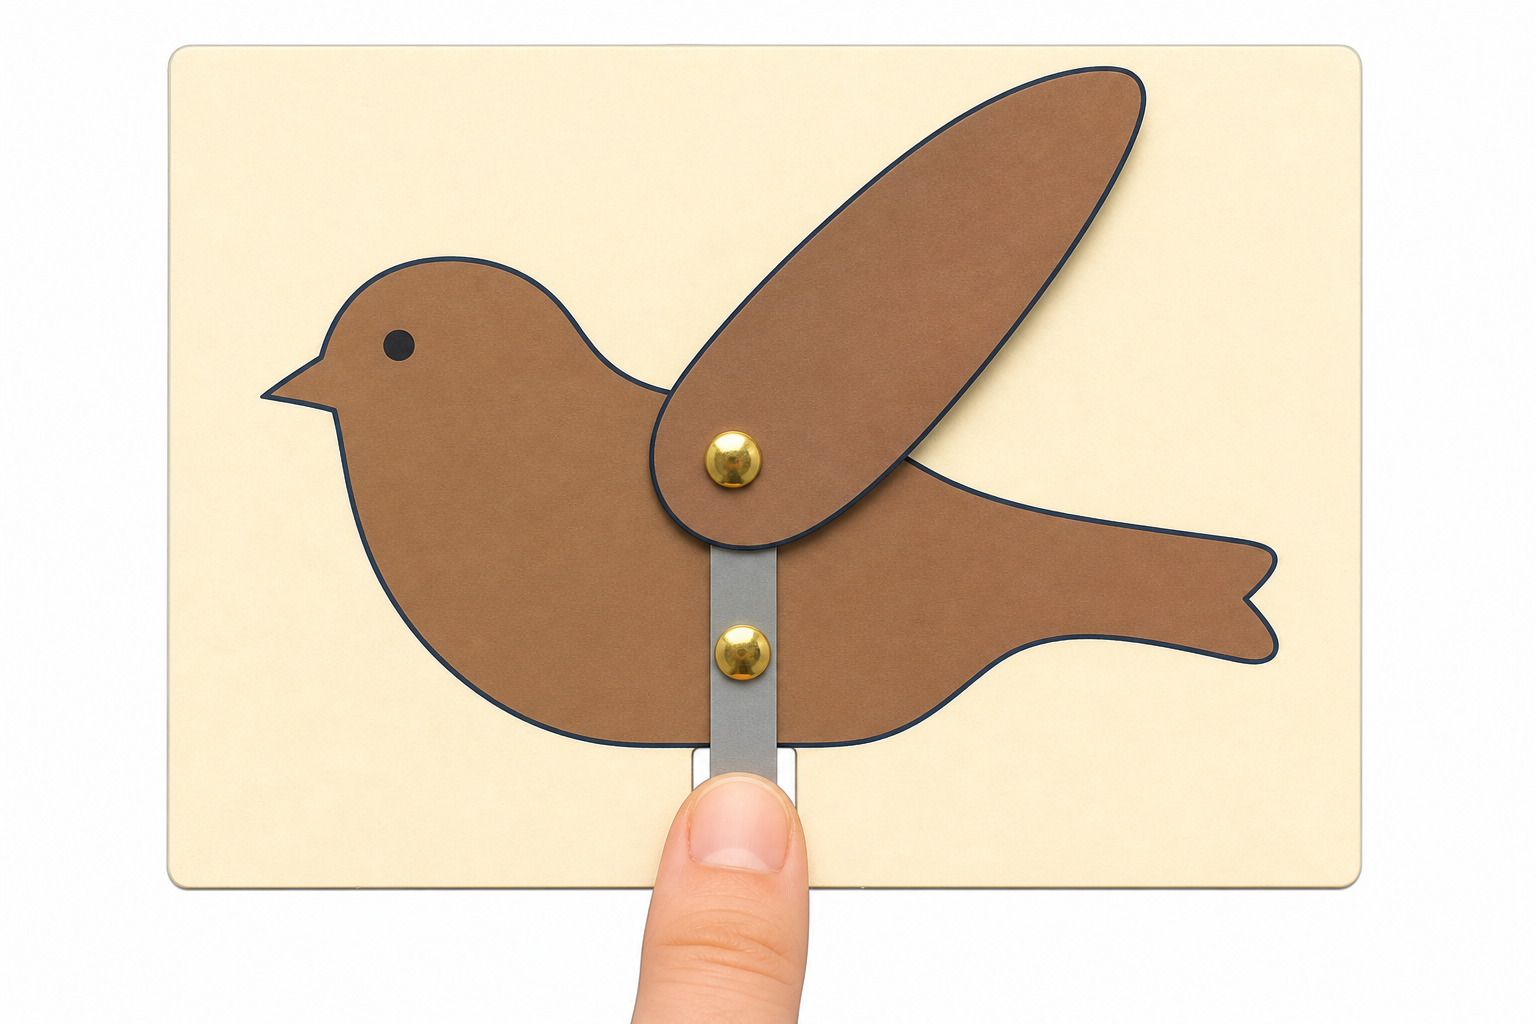 Watch carefully while a simple moving picture is joined together. When the strip is pushed, which part of the bird will move?
In your group, build a lever-and-linkage moving picture so one input movement makes a clear output movement. Use at least one pivot. It is fine if the first pin position is awkward: adjusting is part of the engineering. Work in this order:
- Agree what your scene is and what should move (for example a bird wing or a waving arm).
- Use the pre-cut base and strip if you have them, or sketch lightly on card and cut the parts.
- Join the moving part to the base with a split pin so it can swing.
- Pin on the input strip the user will push or pull.
- Test gently and adjust until the output is clear. Stop when you can name the input and the output.
If your group finishes a working linkage early and the finished cam model is on the side table, you may try a simple cam toy. A cam needs three parts: an axle, an off-centre disc on that axle, and a follower that rests on the disc and bobs. Use the finished model as your guide.
Take your Investigation Journal page now and keep it beside you for the test and drawing steps.
Now investigate your own mechanism. You are the tester: change one thing and see what the mechanism tells you. Choose one thing about the input to change: how far you push, how fast you move, or which direction you go. Predict what the output will do, then try it. Try a second change after the first. On your Investigation Journal page, jot a quick prediction and what you noticed; you will draw the mechanism later.
Unlock the full learning experience
You're previewing this lesson. Get full access to this lesson and hundreds more — each one ready to teach, with interactive activities, printable resources and pupil progress tracking built in.
This lesson is copyright of Coding Ireland 2017 - 2025. Unauthorised use, copying or distribution is not allowed.