You're previewing the student experience. You don't need to complete this lesson — your progress and XP aren't saved.
Game Makecode Arcade
Beginner
60 mins
Teacher/Student led
+140 XP
What you need:
Chromebook/Laptop/PC or iPad/Tablet

Introducing MakeCode Arcade

Get started with creating arcade games using a fun and easy-to-use tool. Follow step-by-step instructions to build your first project, design a character, control its movements, and add cool effects to bring your game to life.

Teacher Class Feed

Load previous activity

    1 - What is MakeCode Arcade?

    MakeCode Arcade is a fun and easy-to-use tool that lets us create our own arcade games. It's like a digital playground where we can build and play games right in our web browser.

    With MakeCode, we can use colourful blocks to build our games, just like Scratch.

    If you have a small handheld gaming computer like the BrainPad or GameGo, you can even put the games you make onto it and play them anywhere!


    2 - The Code Editor

    Imagine the MakeCode Arcade code editor as a magical toolbox. It's a lot like the Microbit and Scratch editors you might have used before. Here's what it has:

    1. A simulator, which is like a mini TV screen where you can watch your code come to life and play the games you create.
    2. A toolbox, which is like a chest full of different code blocks. These blocks are sorted into groups so you can easily find what you need.
    3. A code area, which is like your construction site. This is where you build your code.

    3 - Create a new Arcade project

    Let's create our first project!

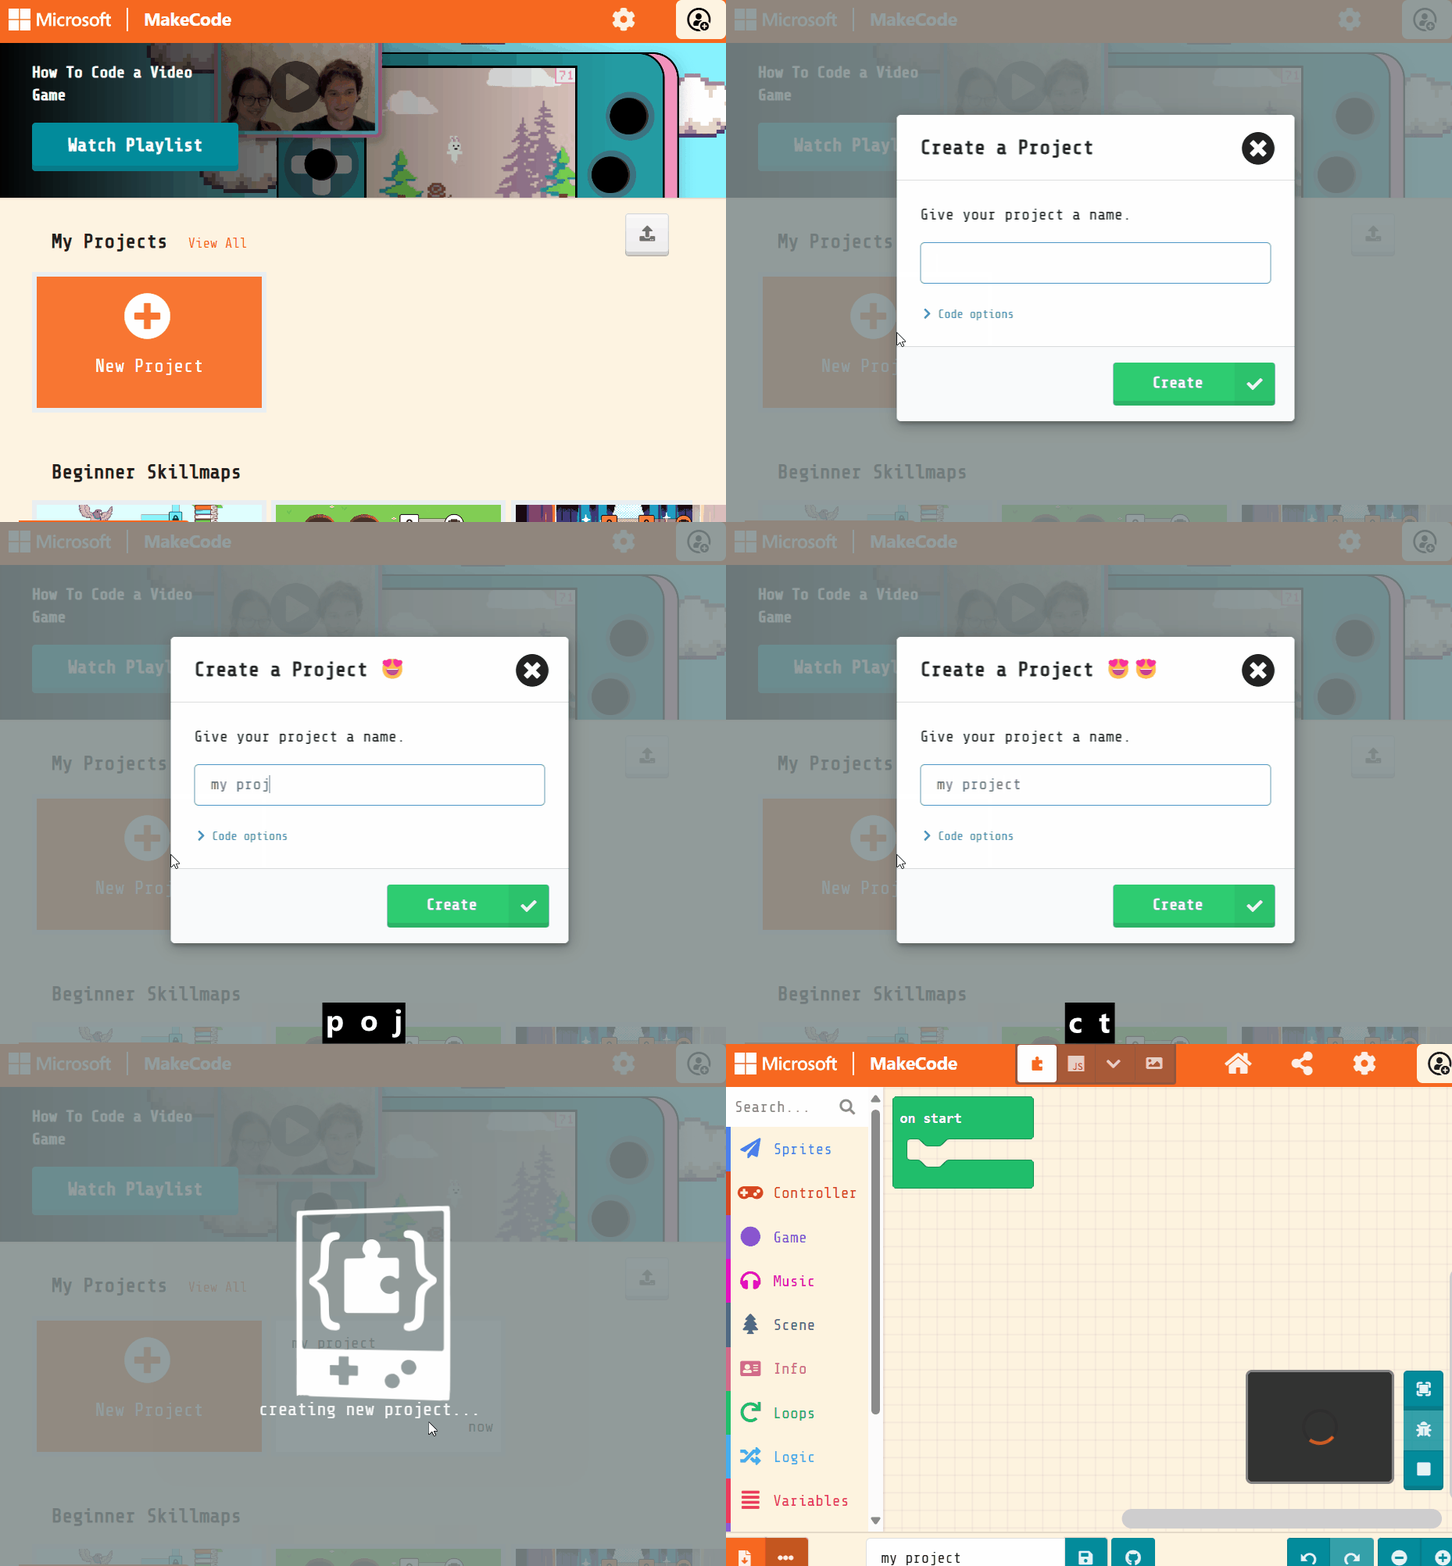
    Go to the Arcade MakeCode website and create a new project. You can call your project anything you want!

    arcade.makecode.com


    4 - Create a sprite

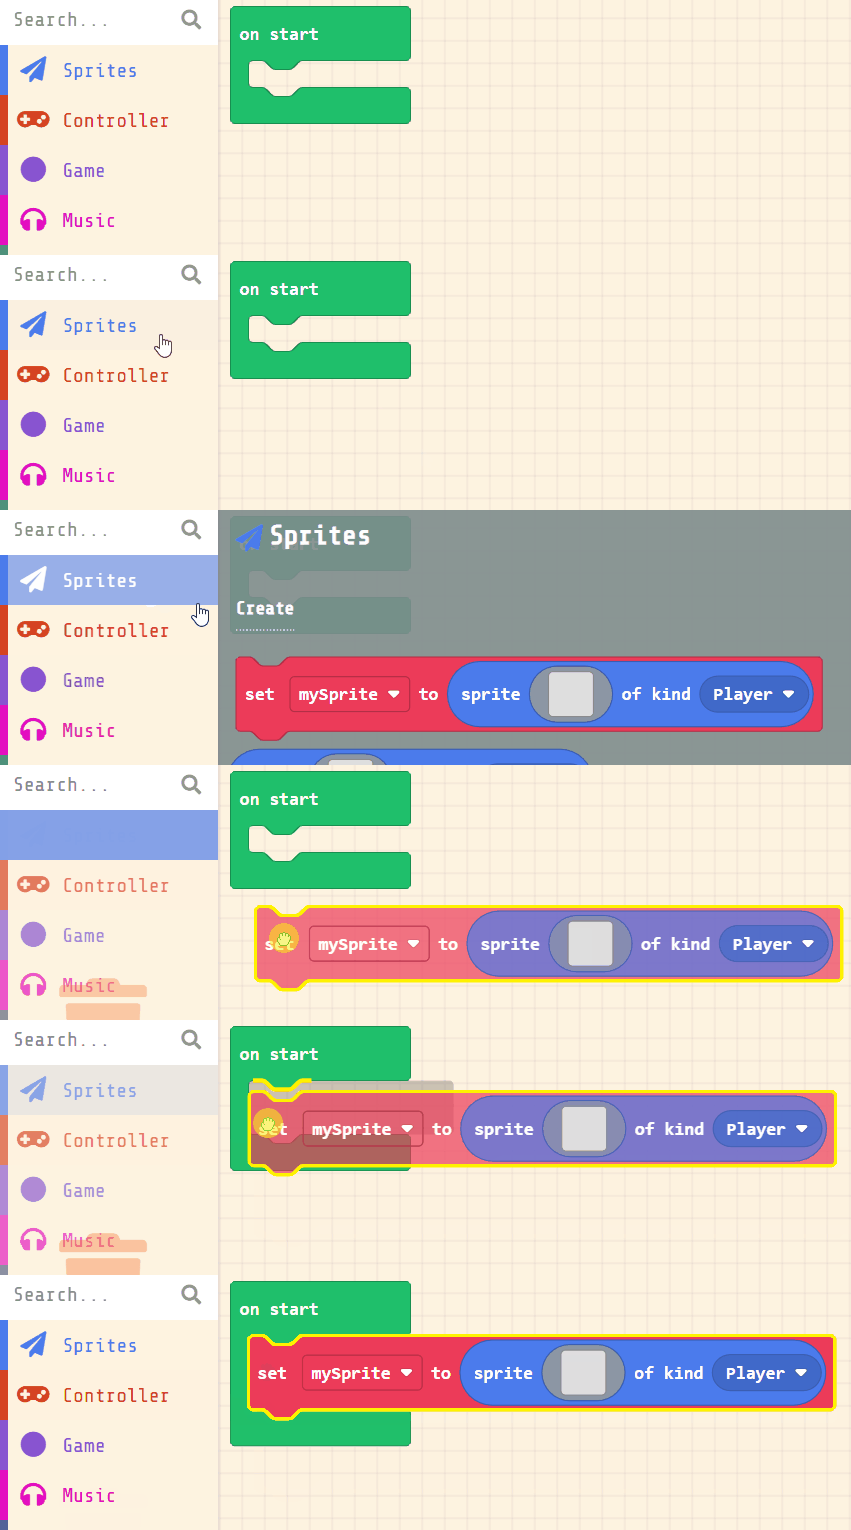
    Let's create a sprite for our game. Add the following code:

    let mySprite = sprites.create(img`
        . . . . . . . . . . . . . . . . 
        . . . . . . . . . . . . . . . . 
        . . . . . . . . . . . . . . . . 
        . . . . . . . . . . . . . . . . 
        . . . . . . . . . . . . . . . . 
        . . . . . . . . . . . . . . . . 
        . . . . . . . . . . . . . . . . 
        . . . . . . . . . . . . . . . . 
        . . . . . . . . . . . . . . . . 
        . . . . . . . . . . . . . . . . 
        . . . . . . . . . . . . . . . . 
        . . . . . . . . . . . . . . . . 
        . . . . . . . . . . . . . . . . 
        . . . . . . . . . . . . . . . . 
        . . . . . . . . . . . . . . . . 
        . . . . . . . . . . . . . . . . 
        `, SpriteKind.Player)


    5 - Design your character

    Now let's design our character!

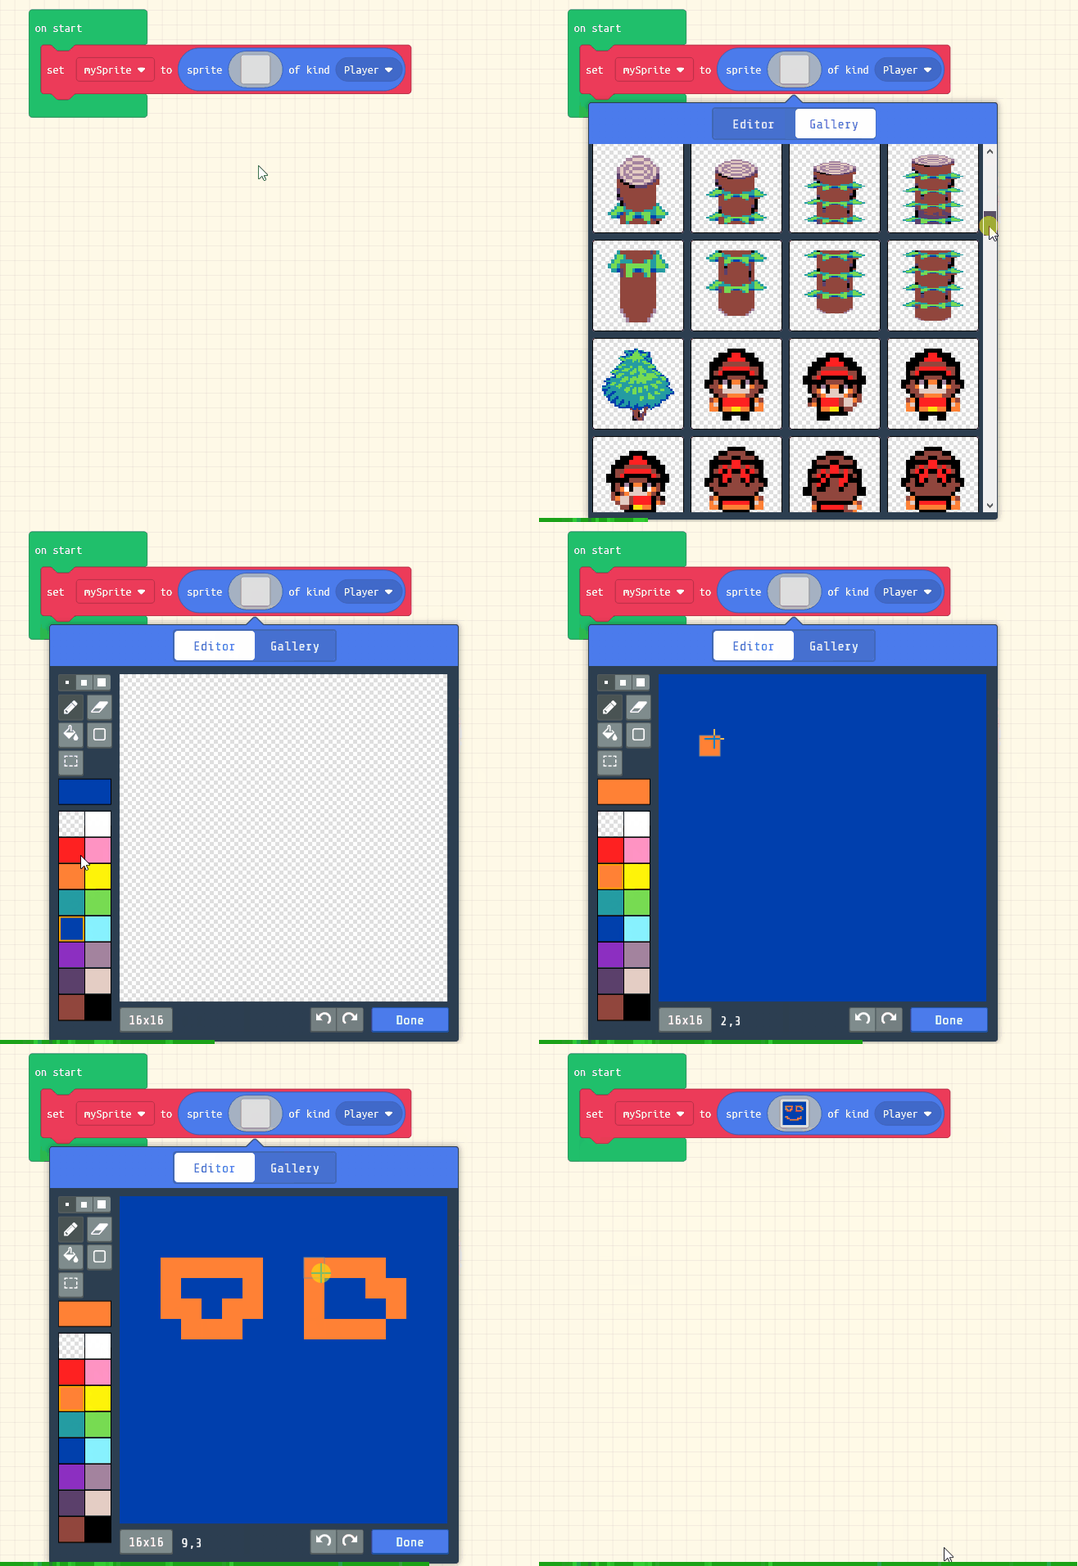
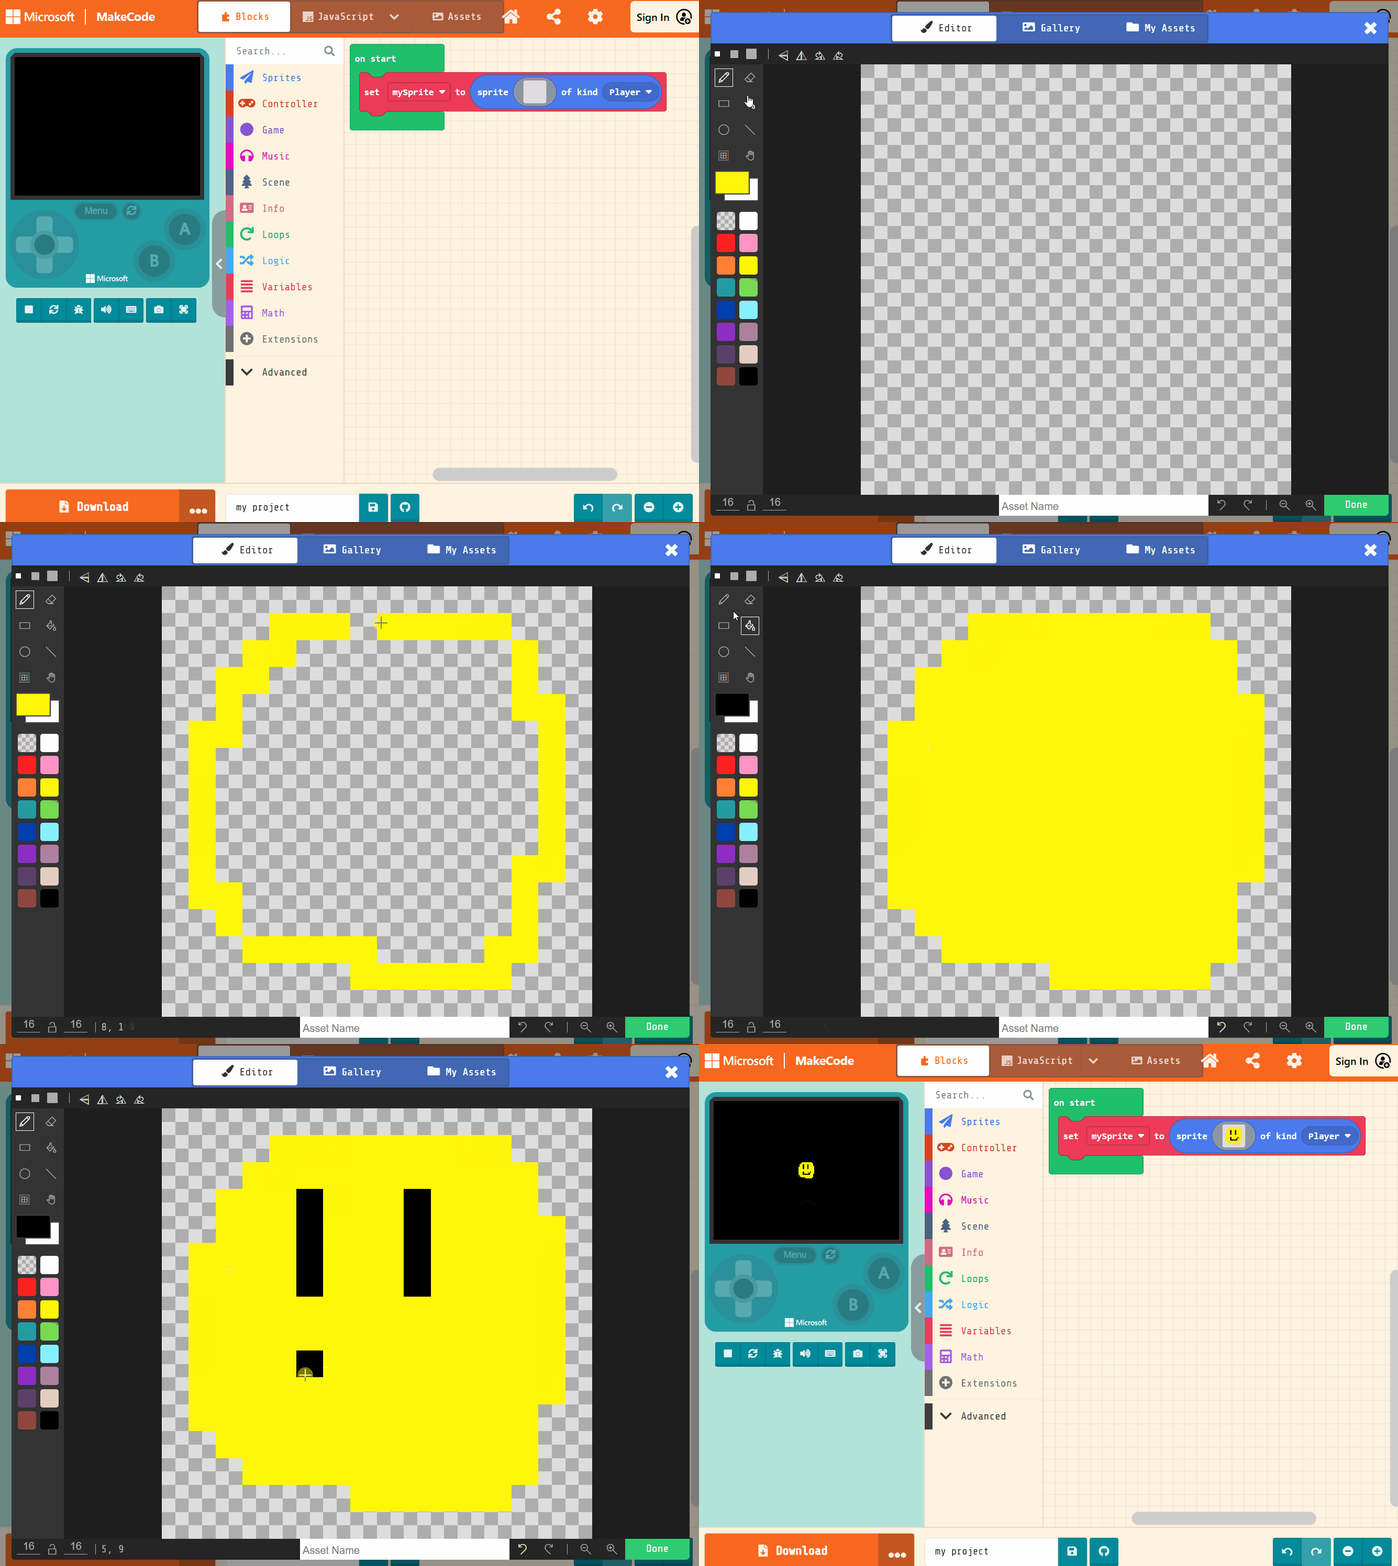
    Click on the grey box in the code block, this will open up the Sprite Editor.

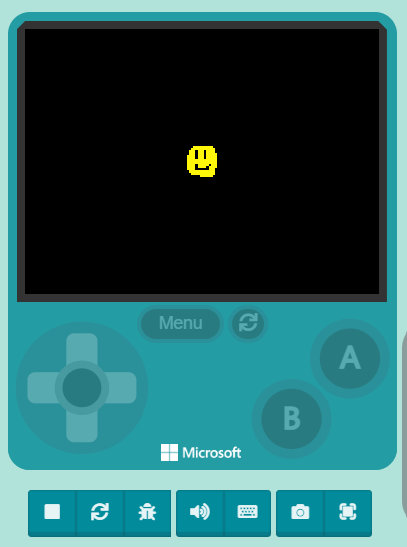
    Use the tools to paint your own character and when you're done click on the green Done button at the bottom right of the screen. You will then see your sprite in the simulator!


    6 - Control your character

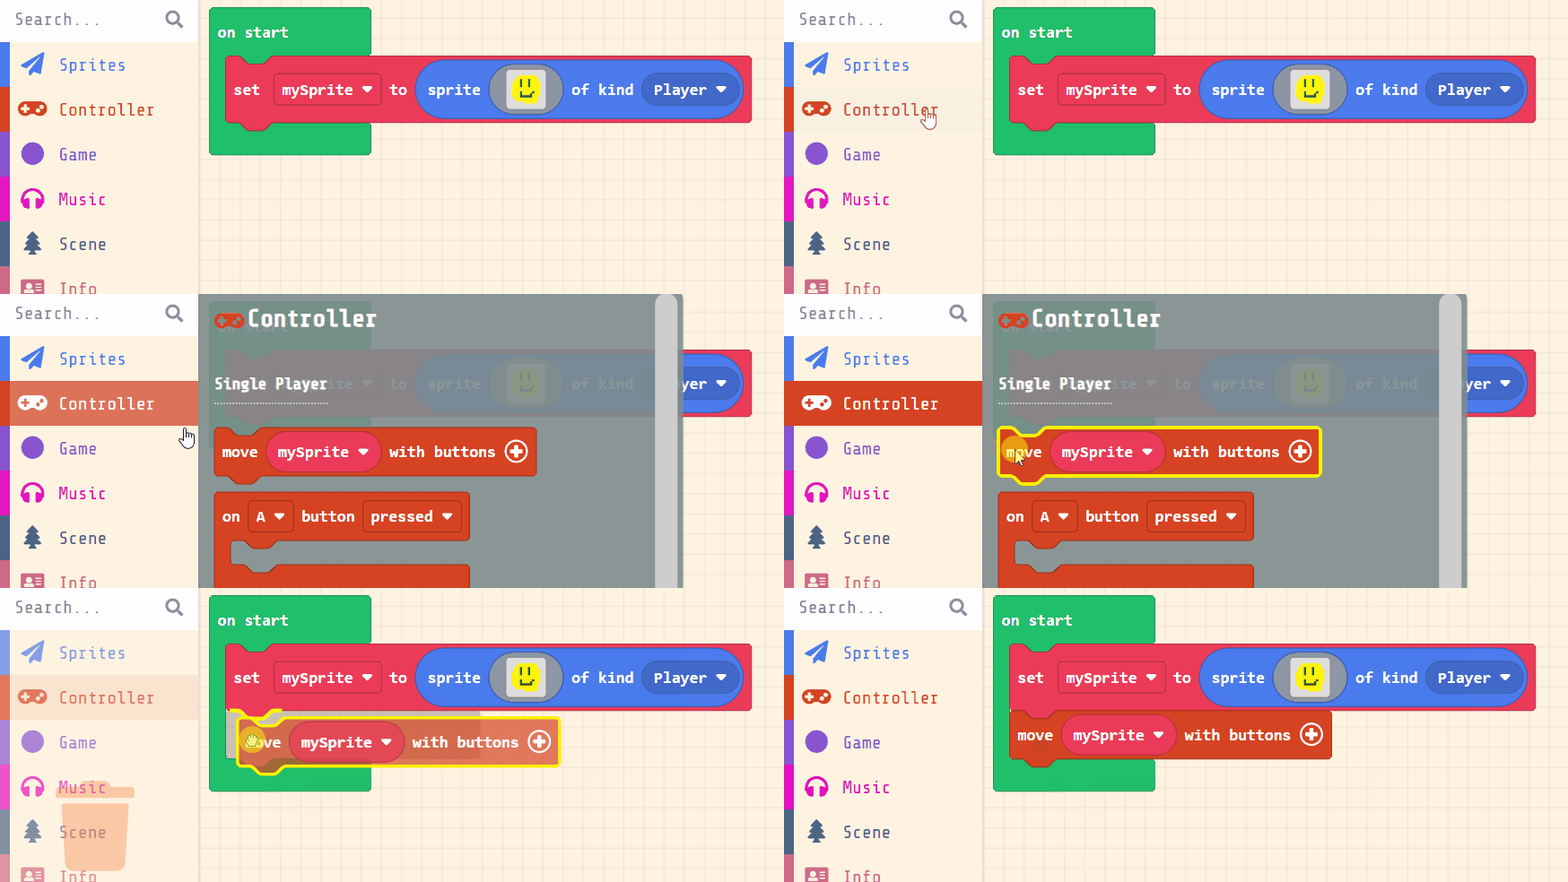
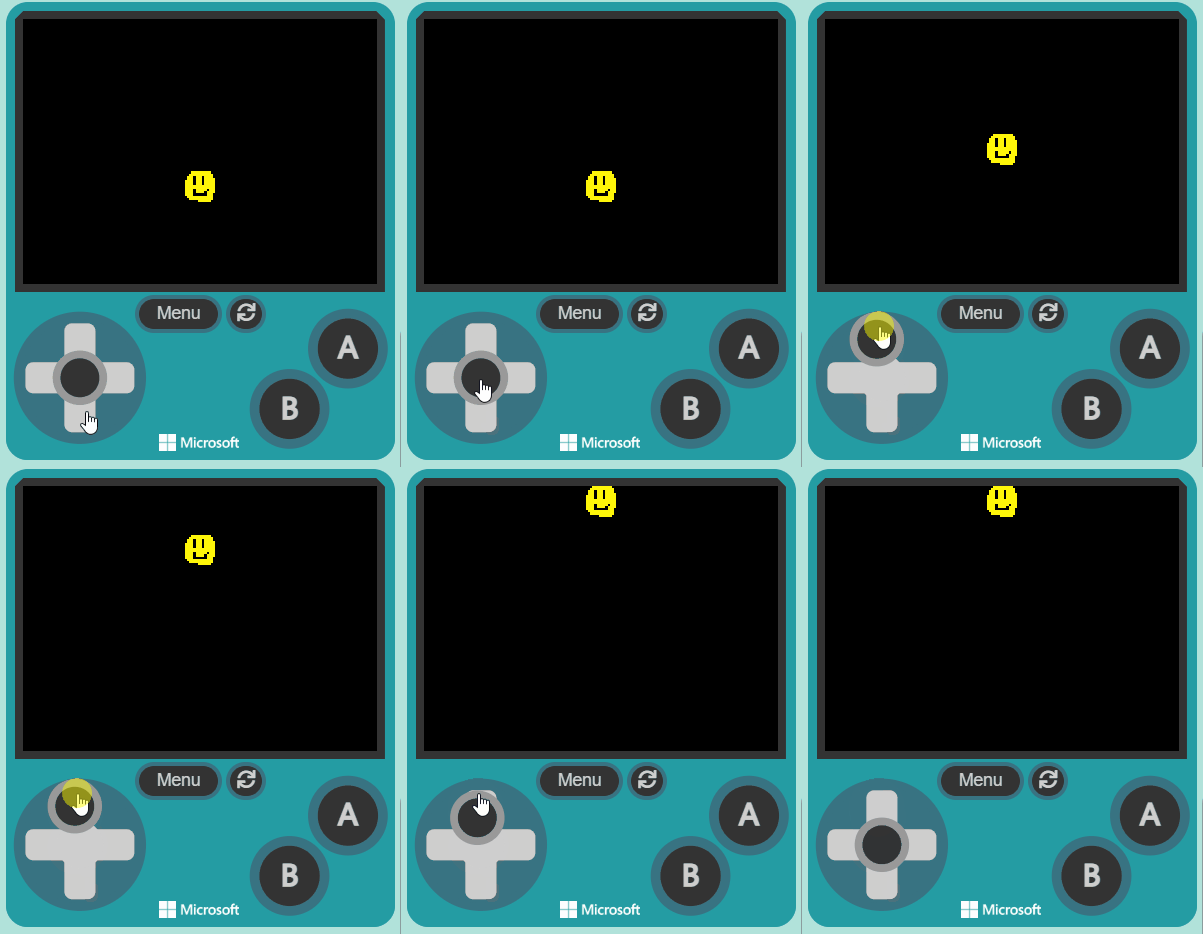
    Next let's add some code so that we can move our character around using the joystick (or the arrows on our keyboard).

    Add the following new code:

    let mySprite = sprites.create(img`
        . . . . . . . . . . . . . . . . 
        . . . . 5 5 5 5 5 5 5 5 5 . . . 
        . . . 5 5 5 5 5 5 5 5 5 5 5 . . 
        . . 5 5 5 f 5 5 5 f 5 5 5 5 . . 
        . . 5 5 5 f 5 5 5 f 5 5 5 5 5 . 
        . 5 5 5 5 f 5 5 5 f 5 5 5 5 5 . 
        . 5 5 5 5 f 5 5 5 f 5 5 5 5 5 . 
        . 5 5 5 5 5 5 5 5 5 5 5 5 5 5 . 
        . 5 5 5 5 5 5 5 5 5 5 5 5 5 5 . 
        . 5 5 5 5 f 5 5 5 5 5 f 5 5 5 . 
        . 5 5 5 5 f 5 5 5 5 f 5 5 5 5 . 
        . 5 5 5 5 f f f f f f 5 5 5 . . 
        . . 5 5 5 5 5 5 5 5 5 5 5 5 . . 
        . . . 5 5 5 5 5 5 5 5 5 5 5 . . 
        . . . . . . . 5 5 5 5 5 5 . . . 
        . . . . . . . . . . . . . . . . 
        `, SpriteKind.Player)
    controller.moveSprite(mySprite)
    
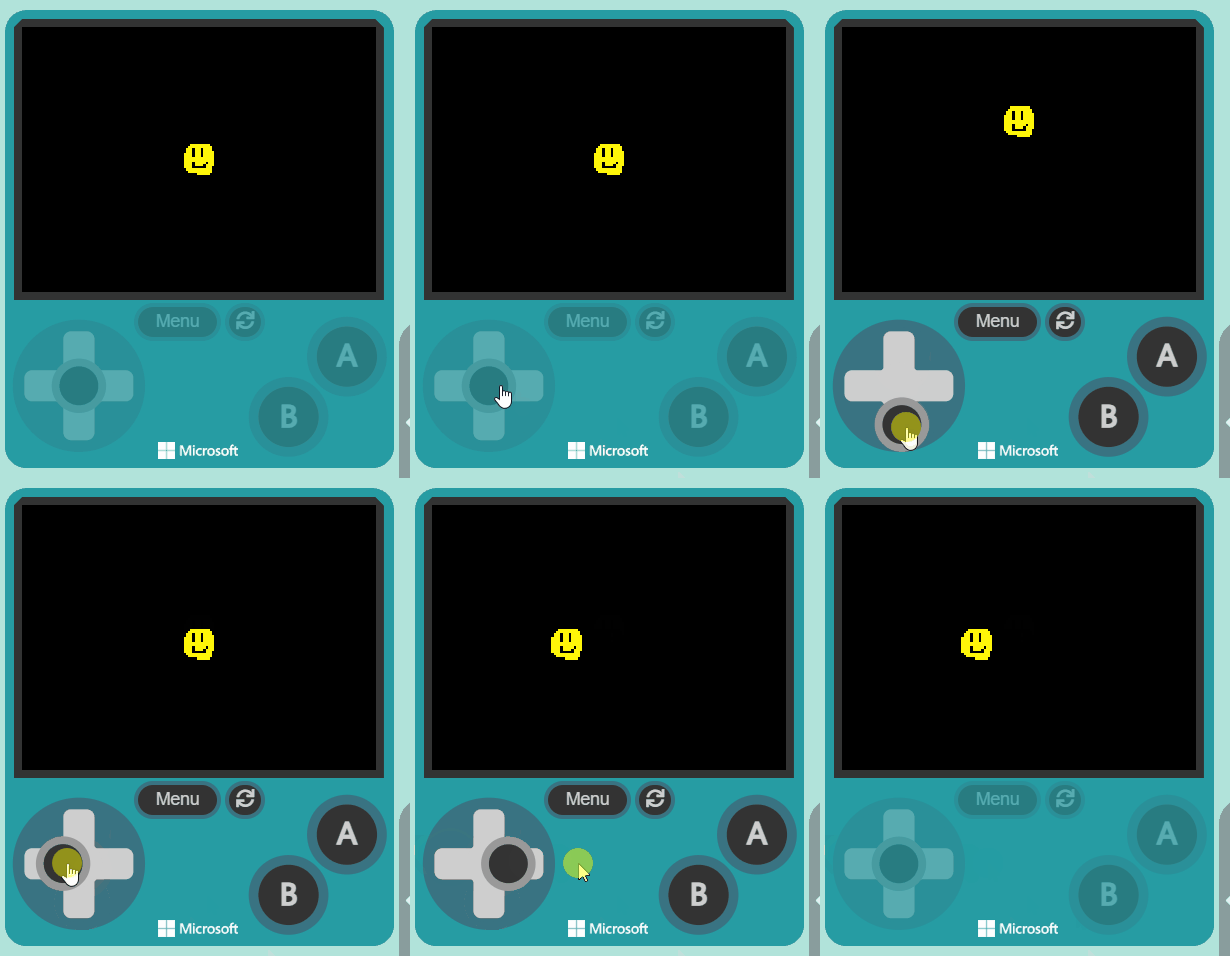
    Once you've added the code, test that you can move your character around using the joystick or your arrow keys on your keyboard.


    7 - Make them stay on the screen

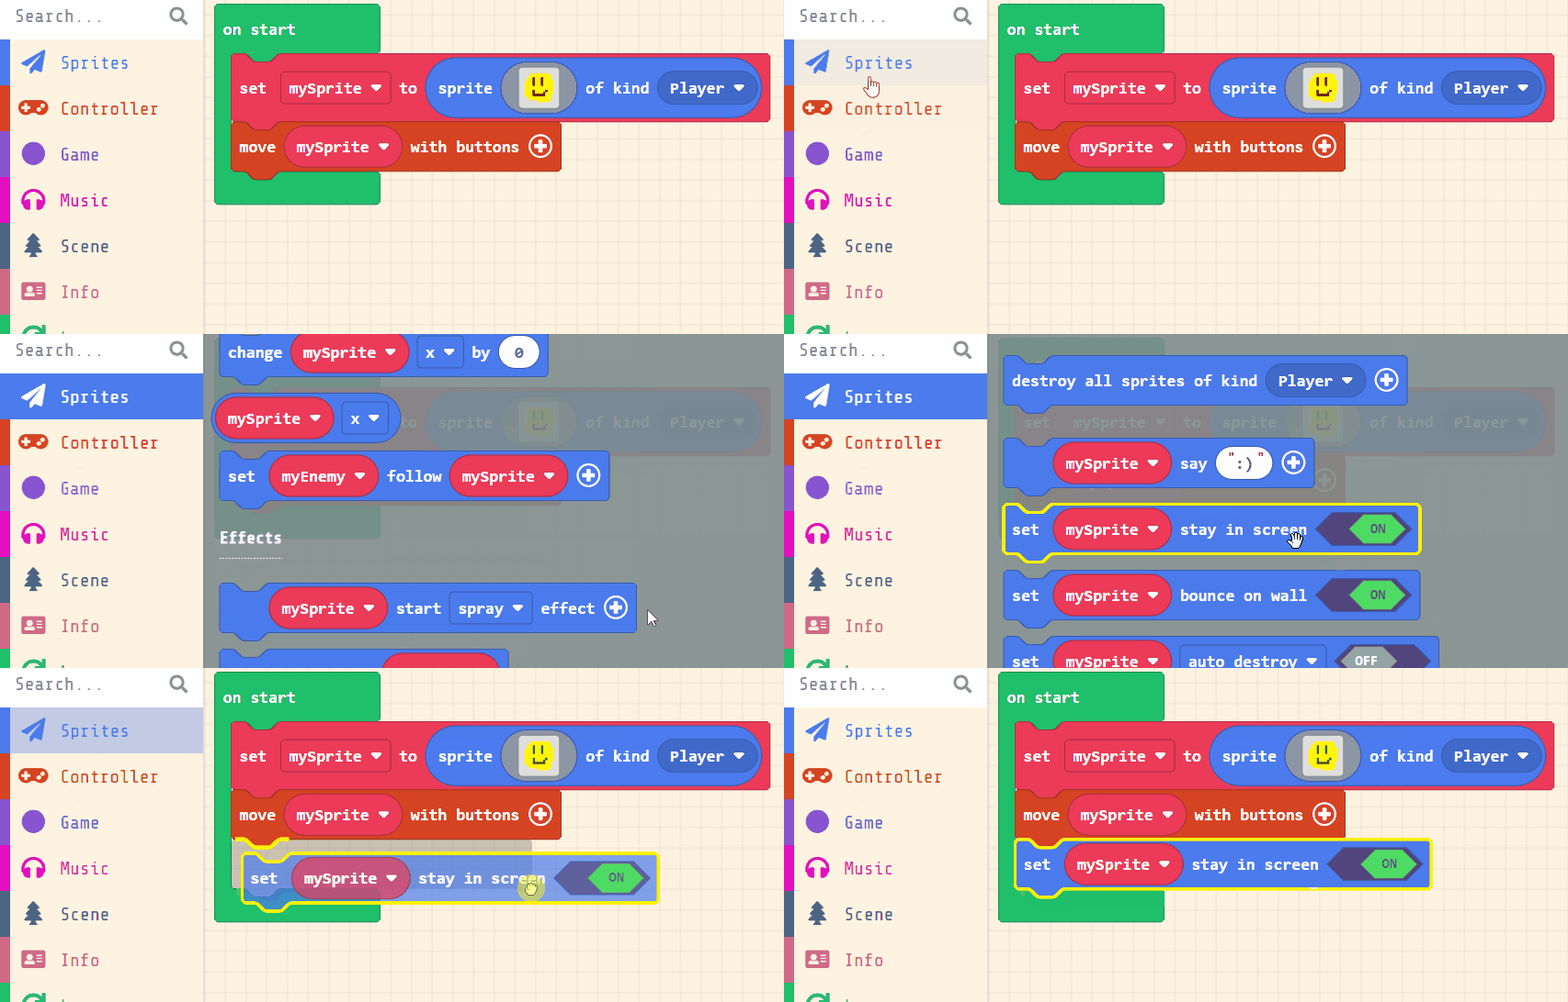
    You might have noticed that your sprite can move off the screen if it goes far enough. Let's add some code to make it stay on the screen.

    Add the following new code:

    let mySprite = sprites.create(img`
        . . . . . . . . . . . . . . . . 
        . . . . 5 5 5 5 5 5 5 5 5 . . . 
        . . . 5 5 5 5 5 5 5 5 5 5 5 . . 
        . . 5 5 5 f 5 5 5 f 5 5 5 5 . . 
        . . 5 5 5 f 5 5 5 f 5 5 5 5 5 . 
        . 5 5 5 5 f 5 5 5 f 5 5 5 5 5 . 
        . 5 5 5 5 f 5 5 5 f 5 5 5 5 5 . 
        . 5 5 5 5 5 5 5 5 5 5 5 5 5 5 . 
        . 5 5 5 5 5 5 5 5 5 5 5 5 5 5 . 
        . 5 5 5 5 f 5 5 5 5 5 f 5 5 5 . 
        . 5 5 5 5 f 5 5 5 5 f 5 5 5 5 . 
        . 5 5 5 5 f f f f f f 5 5 5 . . 
        . . 5 5 5 5 5 5 5 5 5 5 5 5 . . 
        . . . 5 5 5 5 5 5 5 5 5 5 5 . . 
        . . . . . . . 5 5 5 5 5 5 . . . 
        . . . . . . . . . . . . . . . . 
        `, SpriteKind.Player)
    controller.moveSprite(mySprite)
    mySprite.setStayInScreen(true)
    
    
    Now test it again and your sprite should stay on the screen no matter how far you try and make it go.


    8 - Add an effect

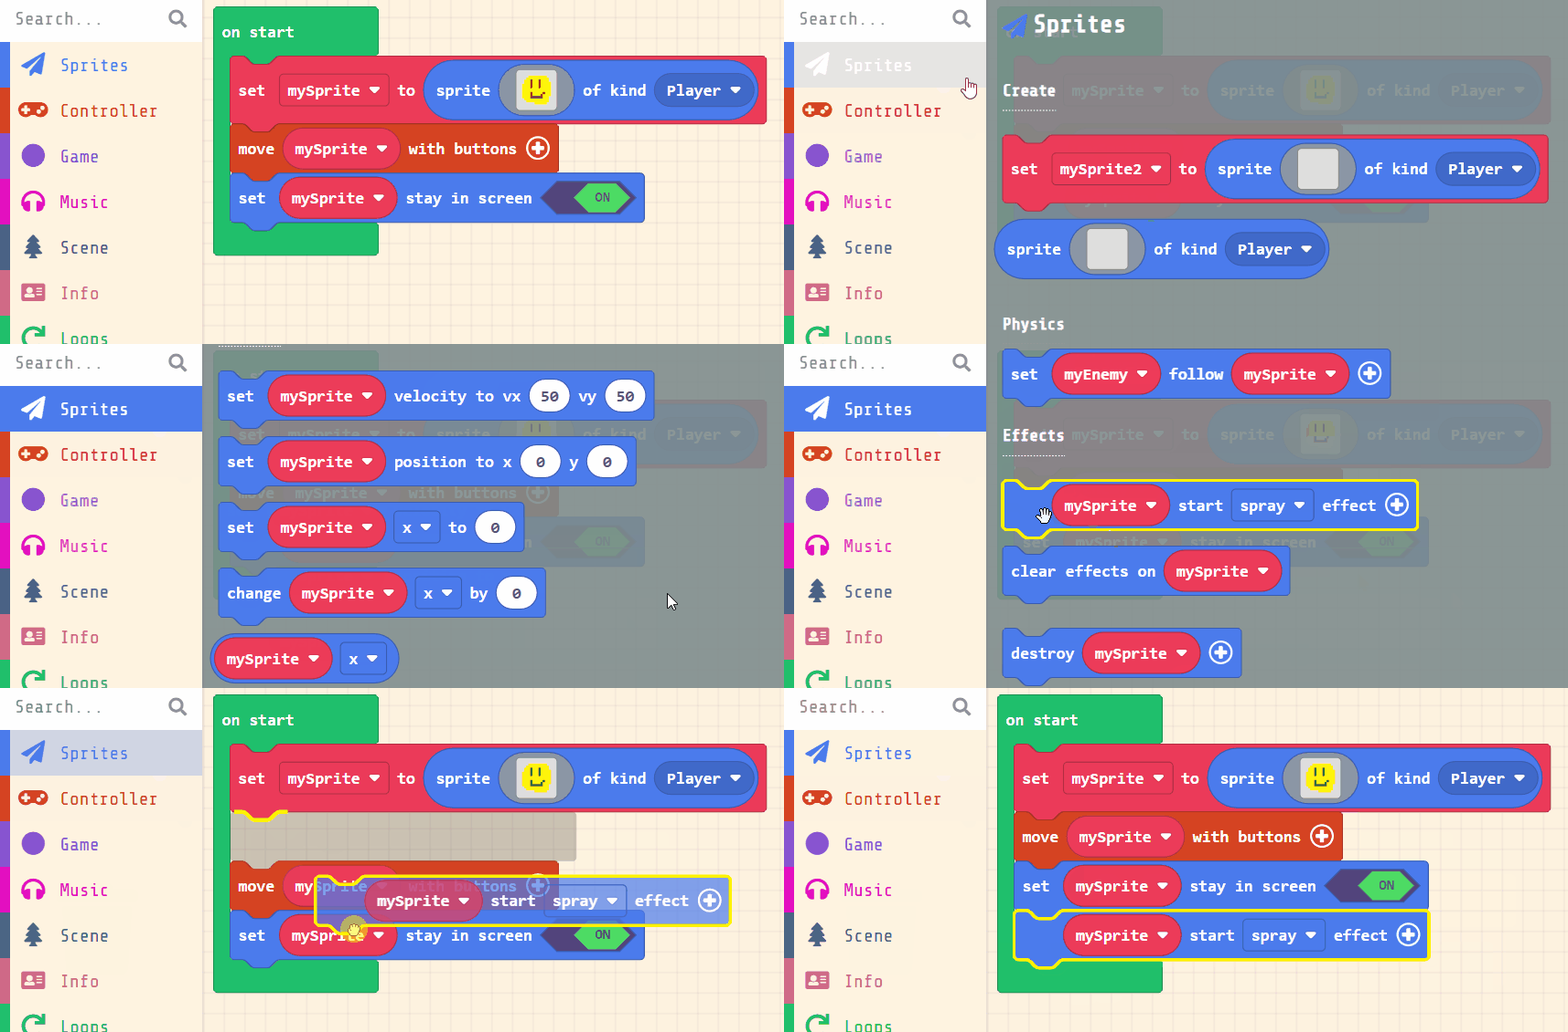
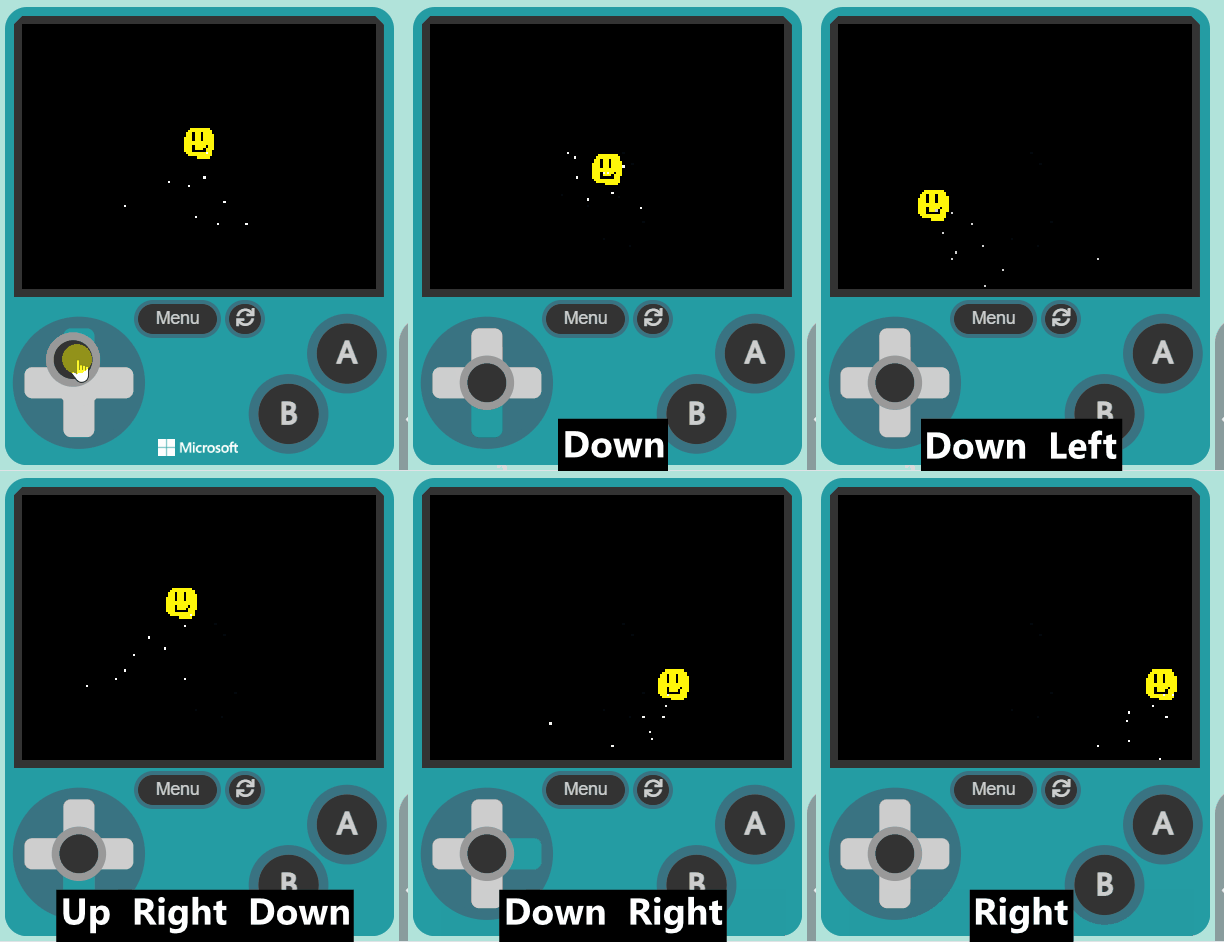
    Finally let's add an effect to your sprite!

    Add the following new code:

    let mySprite = sprites.create(img`
        . . . . . . . . . . . . . . . . 
        . . . . 5 5 5 5 5 5 5 5 5 . . . 
        . . . 5 5 5 5 5 5 5 5 5 5 5 . . 
        . . 5 5 5 f 5 5 5 f 5 5 5 5 . . 
        . . 5 5 5 f 5 5 5 f 5 5 5 5 5 . 
        . 5 5 5 5 f 5 5 5 f 5 5 5 5 5 . 
        . 5 5 5 5 f 5 5 5 f 5 5 5 5 5 . 
        . 5 5 5 5 5 5 5 5 5 5 5 5 5 5 . 
        . 5 5 5 5 5 5 5 5 5 5 5 5 5 5 . 
        . 5 5 5 5 f 5 5 5 5 5 f 5 5 5 . 
        . 5 5 5 5 f 5 5 5 5 f 5 5 5 5 . 
        . 5 5 5 5 f f f f f f 5 5 5 . . 
        . . 5 5 5 5 5 5 5 5 5 5 5 5 . . 
        . . . 5 5 5 5 5 5 5 5 5 5 5 . . 
        . . . . . . . 5 5 5 5 5 5 . . . 
        . . . . . . . . . . . . . . . . 
        `, SpriteKind.Player)
    controller.moveSprite(mySprite)
    mySprite.setStayInScreen(true)
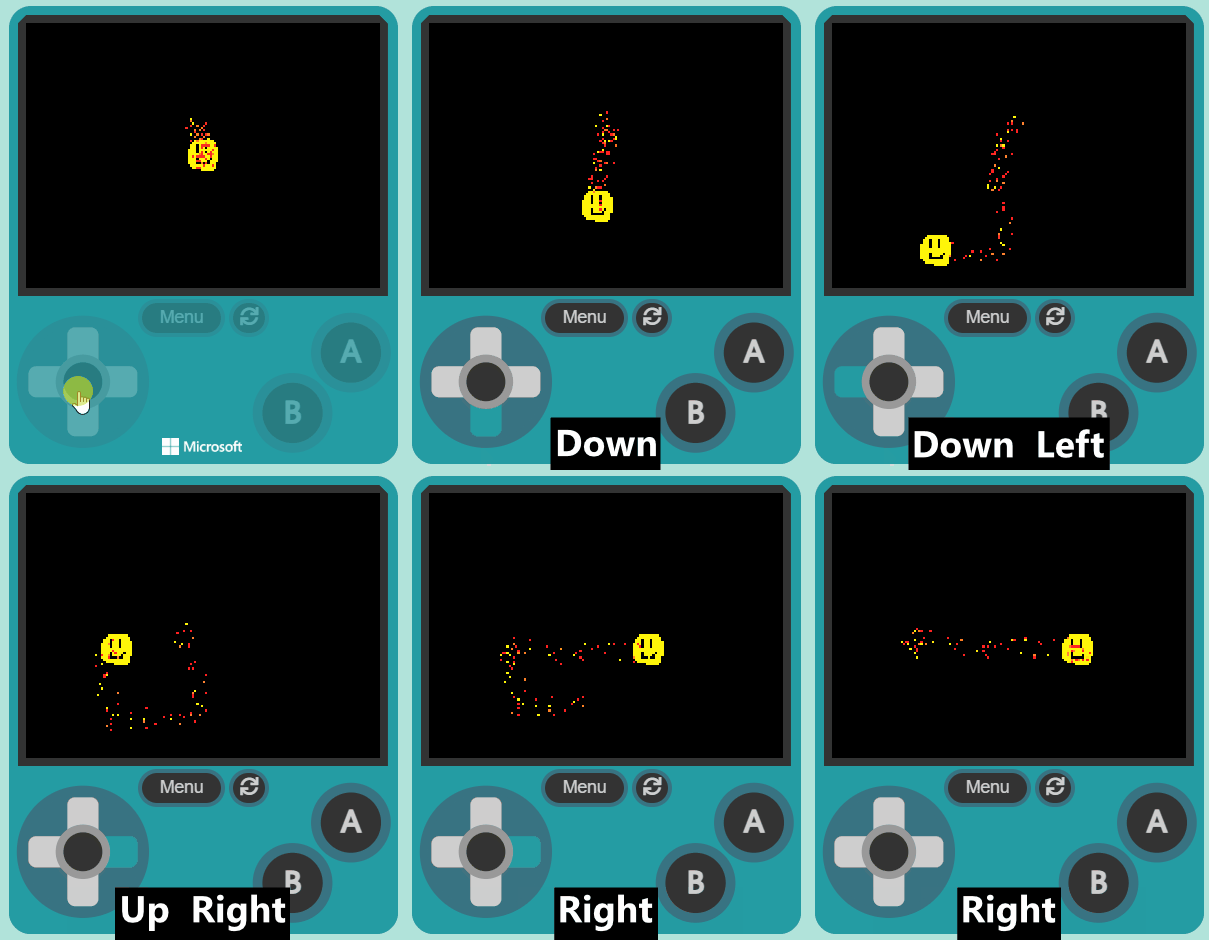
    mySprite.startEffect(effects.spray)
    
    Now test it again and your sprite should stay on the screen no matter how far you try and make it go.


    9 - Change the effect

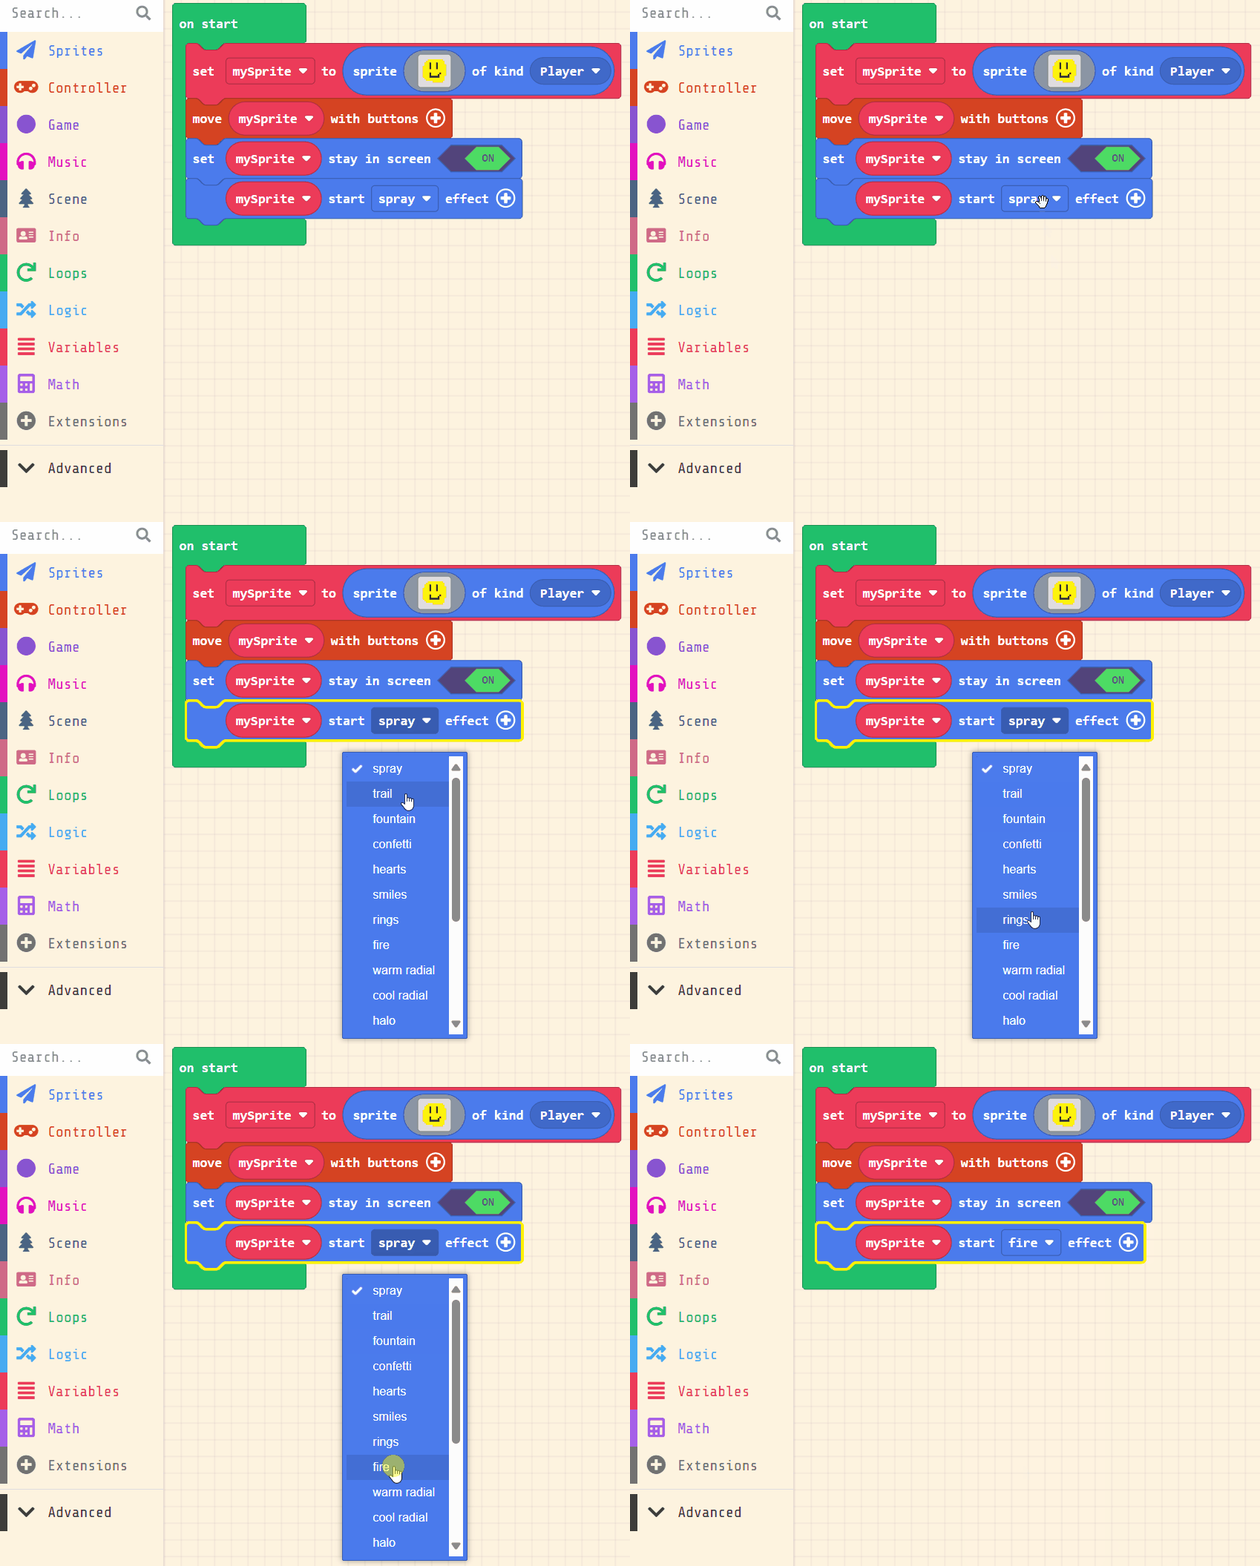
    Try changing what effect is selected in the code block. Try out some different effects and see what they look like!


    10 - Time to Explore

    Now that you've learned how to create and control a sprite in MakeCode Arcade, it's time to explore more! If you have some extra time, try to create more sprites, add different effects, or even start building your own game. Remember, the only limit is your imagination!

    11 - Wrapping Up

    Great job! You've just finished your first MakeCode Arcade project. You've learned how to create a sprite, design your character, control your character, keep your character on the screen, and add cool effects to your character. This is just the beginning. There's so much more you can do with MakeCode Arcade. Keep exploring and keep coding!

    End of lesson
    123learn · Sample lesson

    That was a sample lesson from Introduction to Game Design

    Every lesson in the course is ready to teach like this one. See what else comes with it, and how to order it.

    Copyright Notice
    This lesson is copyright of Coding Ireland 2017 - 2026. Unauthorised use, copying or distribution is not allowed.
    🍪 Our website uses cookies to make your browsing experience better. By using our website you agree to our use of cookies. Learn more