Welcome to the lesson on Creating Your First Animation! In this exciting beginner's guide, you'll dive into the world of animation using Wick Editor. You'll start by exploring the editor's interface, then create a new project where you'll draw a simple circle and make it bounce up and down like a ball.
Along the way, you'll learn how to add frames, use tools like onion skinning for smoother animations, preview your work, adjust settings, save your project, and even export it to share with others. By the end, you'll have your very own animated creation and a solid foundation for more advanced projects. Let's jump in and have some fun animating!
Wick Editor is a free online tool that allows you to create animations, games, and interactive projects directly in your web browser. It's designed to be easy and fun for beginners, similar to old tools like Flash but modern and accessible.
To get started, visit the Wick Editor website at https://www.wickeditor.com/ and click on 'Editor' to launch it. Then, create a new animation project.
To create a new animation project and open up the editor in Wick go to this website: https://www.wickeditor.com/editor
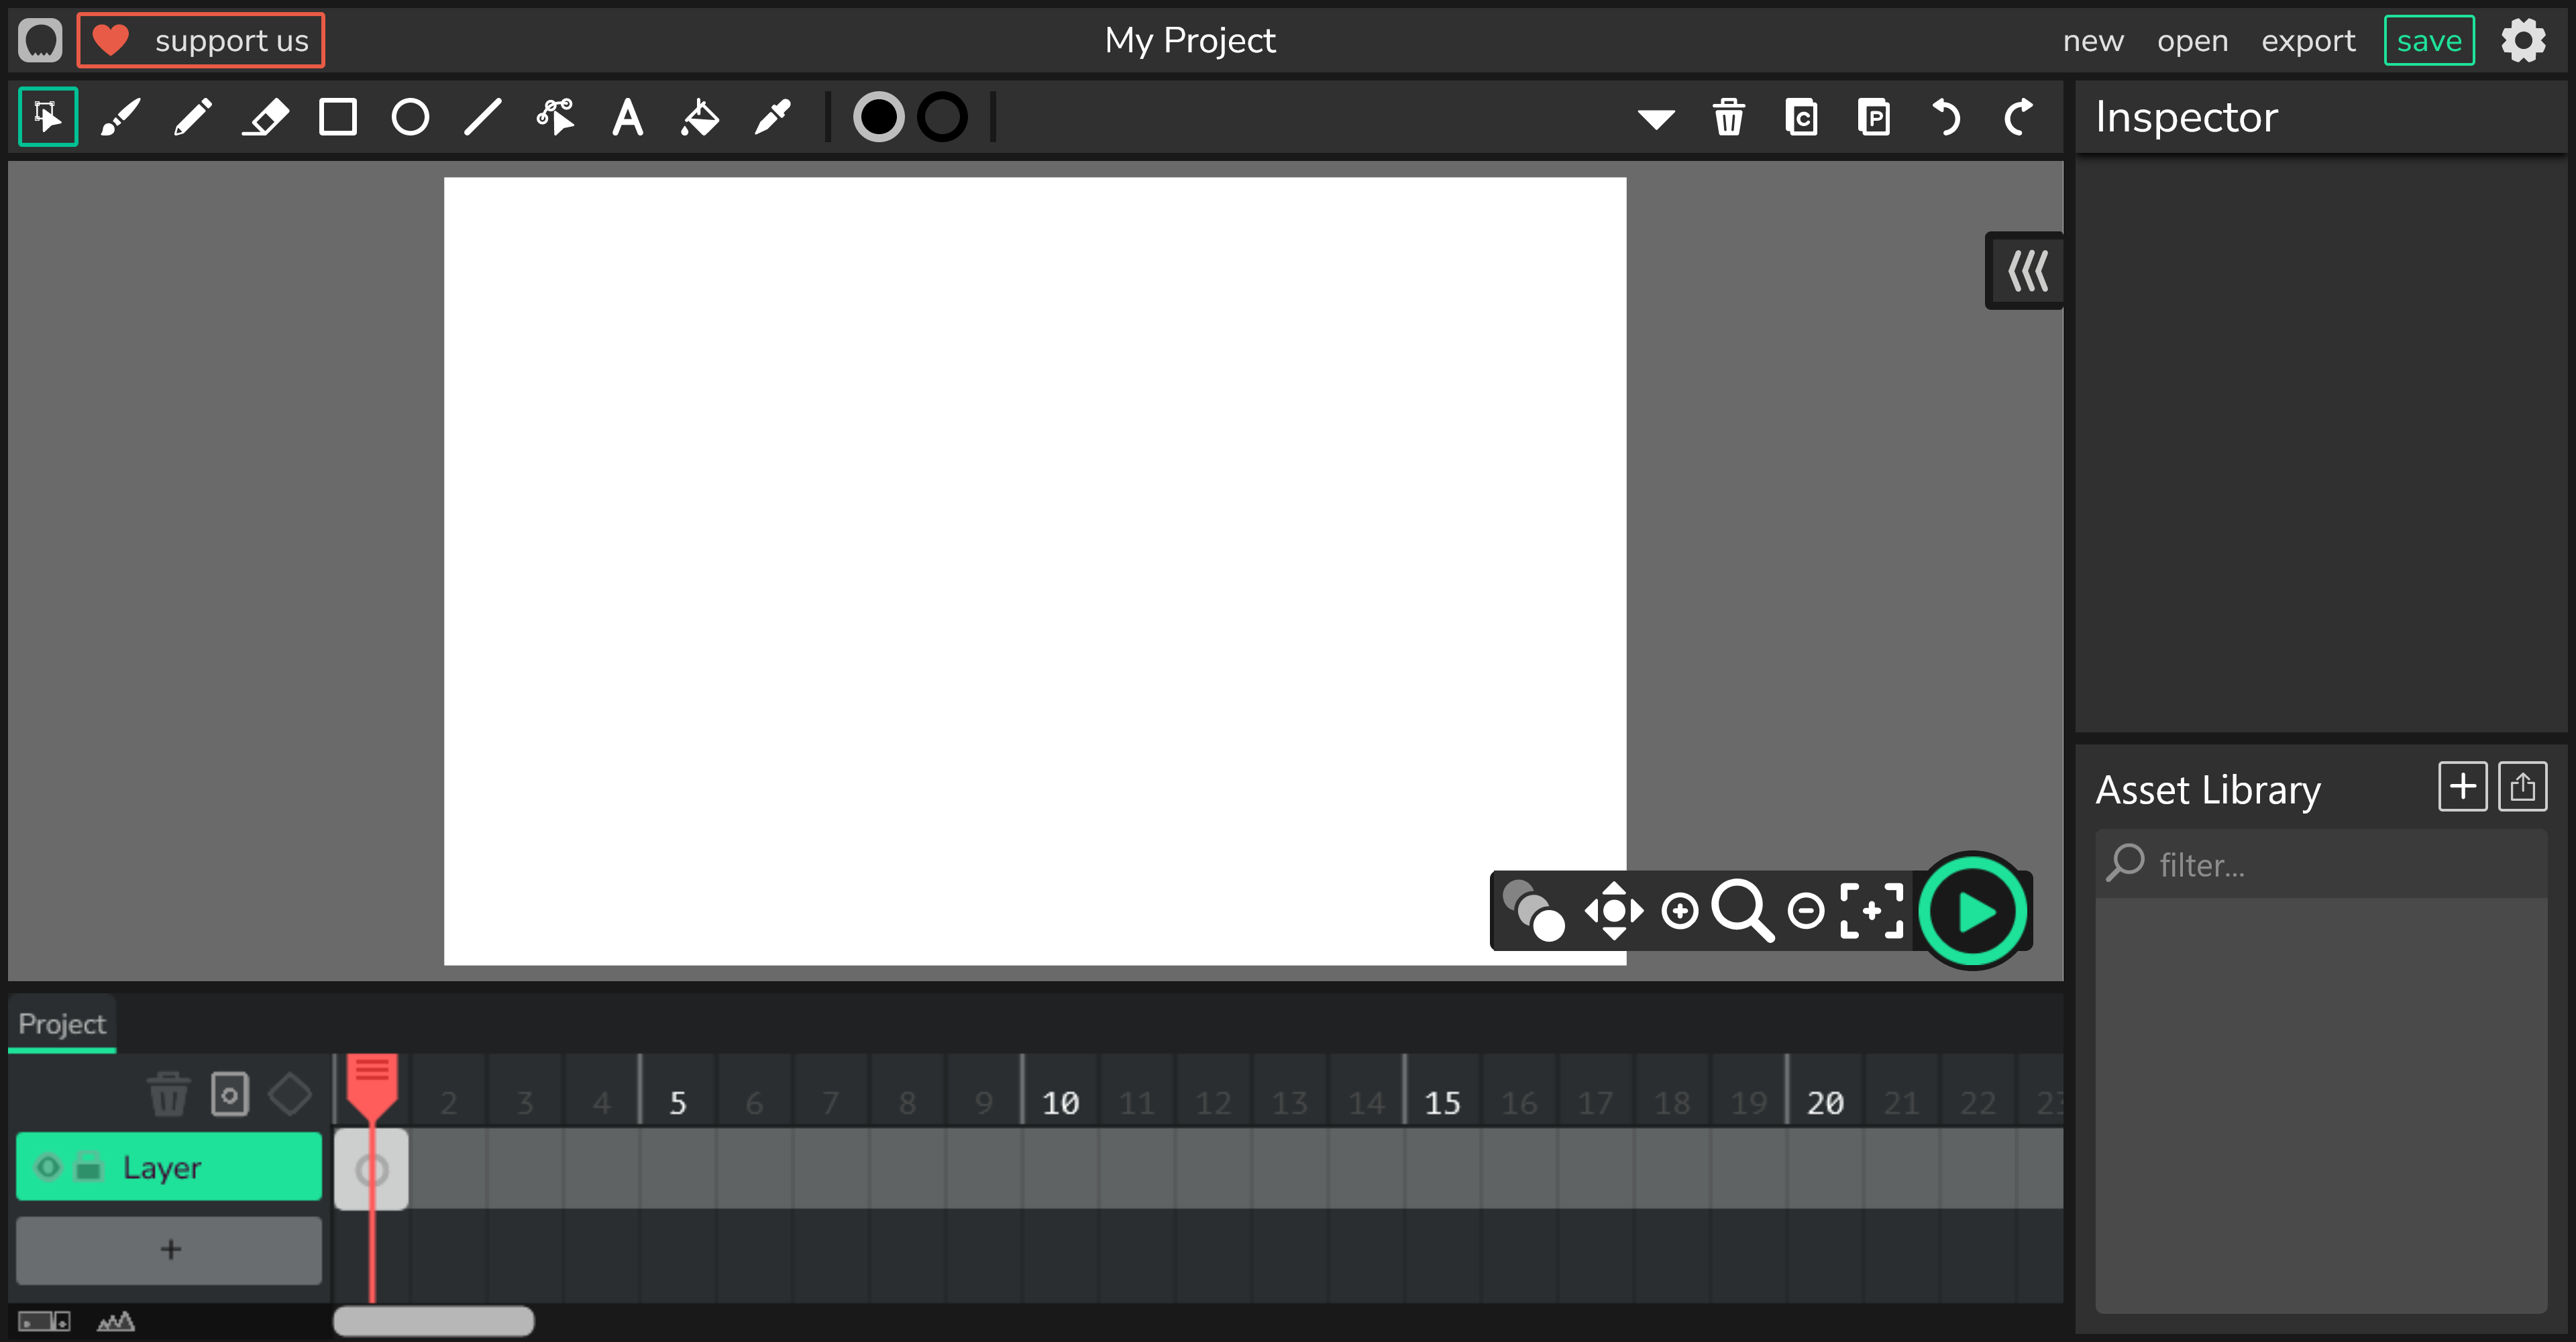
Let's begin by getting to know the Wick Editor interface. It's like the control center for all your animation creations! Take a moment to look around and see where everything is located. This will help you feel more comfortable as you start creating your first animation.
At the top, you'll find the toolbar which contains drawing tools like the brush, eraser, and shape tools. These tools will help you create and modify your animations.
On the right, you'll find the inspector panel where you can adjust properties of your selected objects. You'll also see the project library where you can manage your assets like images, sounds, and fonts.
The center of the screen is your canvas, this is where you'll create your animation.
At the bottom, you'll see the timeline where you can manage your frames and layers.
Now that you're familiar with the interface, let's start drawing your first frame!
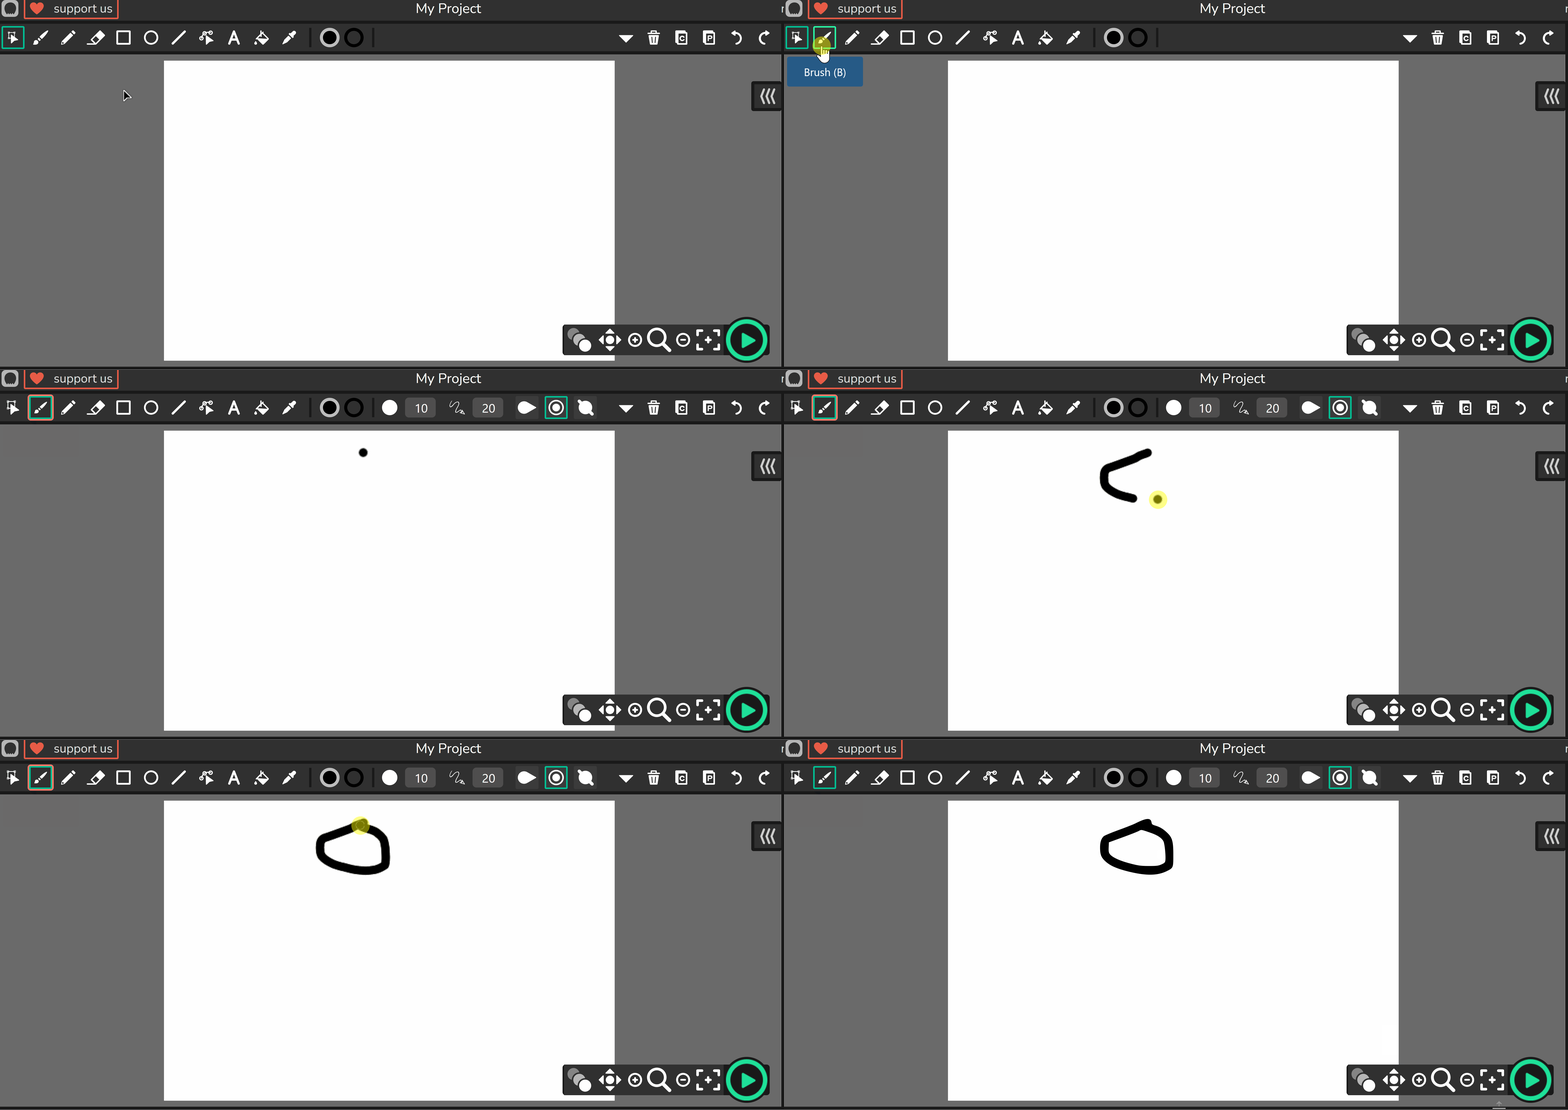
From the toolbar at the top, select the Brush tool – it looks like a paintbrush icon.
If you want, you can adjust the brush size or colour in the inspector panel on the right side of the screen. For now, the default settings are fine.
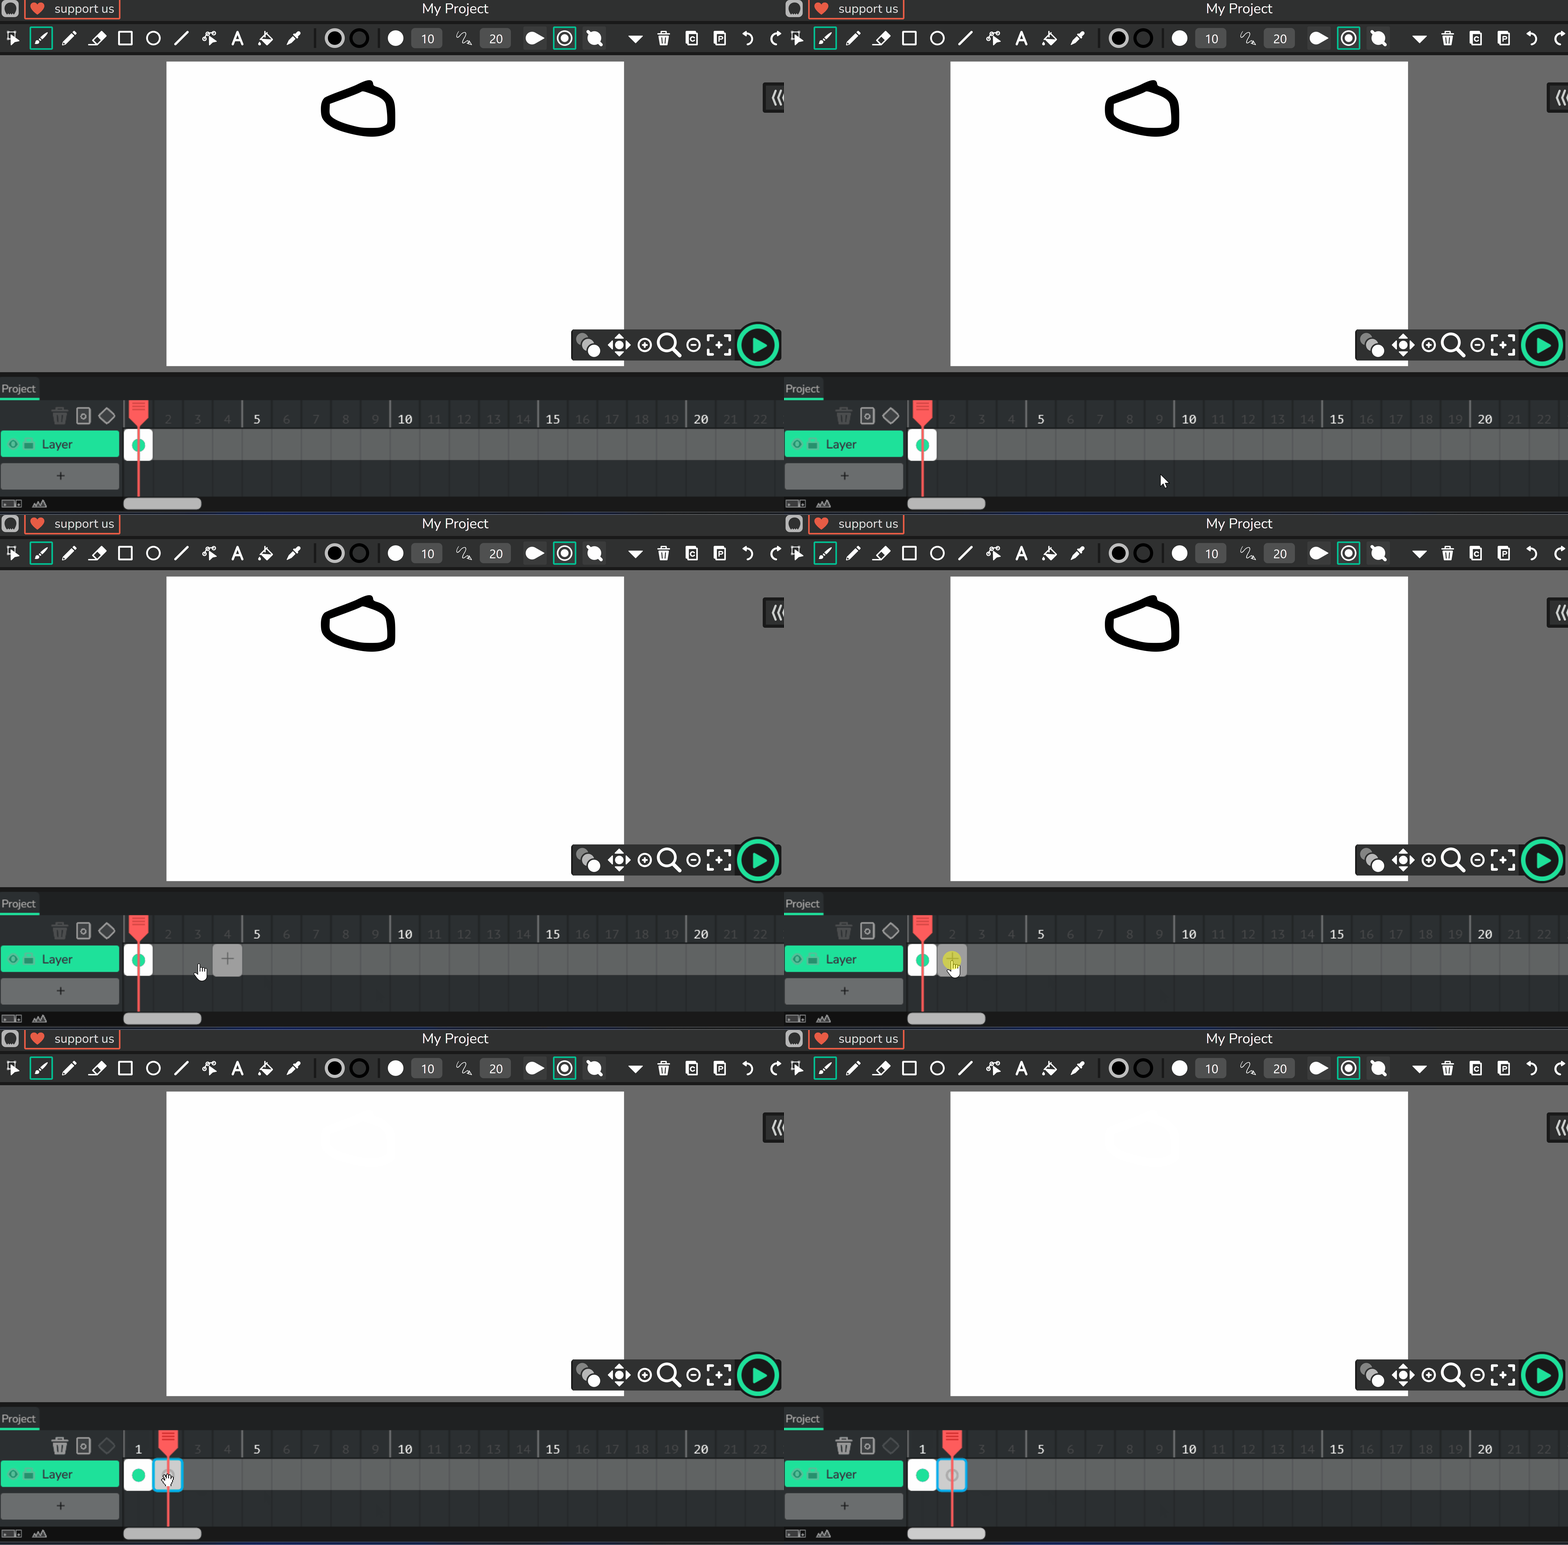
We're going to animate a ball bouncing up and down, so for this first frame, draw a simple circle freehand at the top of the canvas. Just click and drag on the canvas to draw it.
Don't worry if it's not perfectly round – animations are all about having fun and practising!
Now that you've drawn your first frame with a circle at the top of the canvas, it's time to add more frames to make your ball start moving!
Locate the timeline at the bottom of the screen. This is where you control the sequence of your animation.
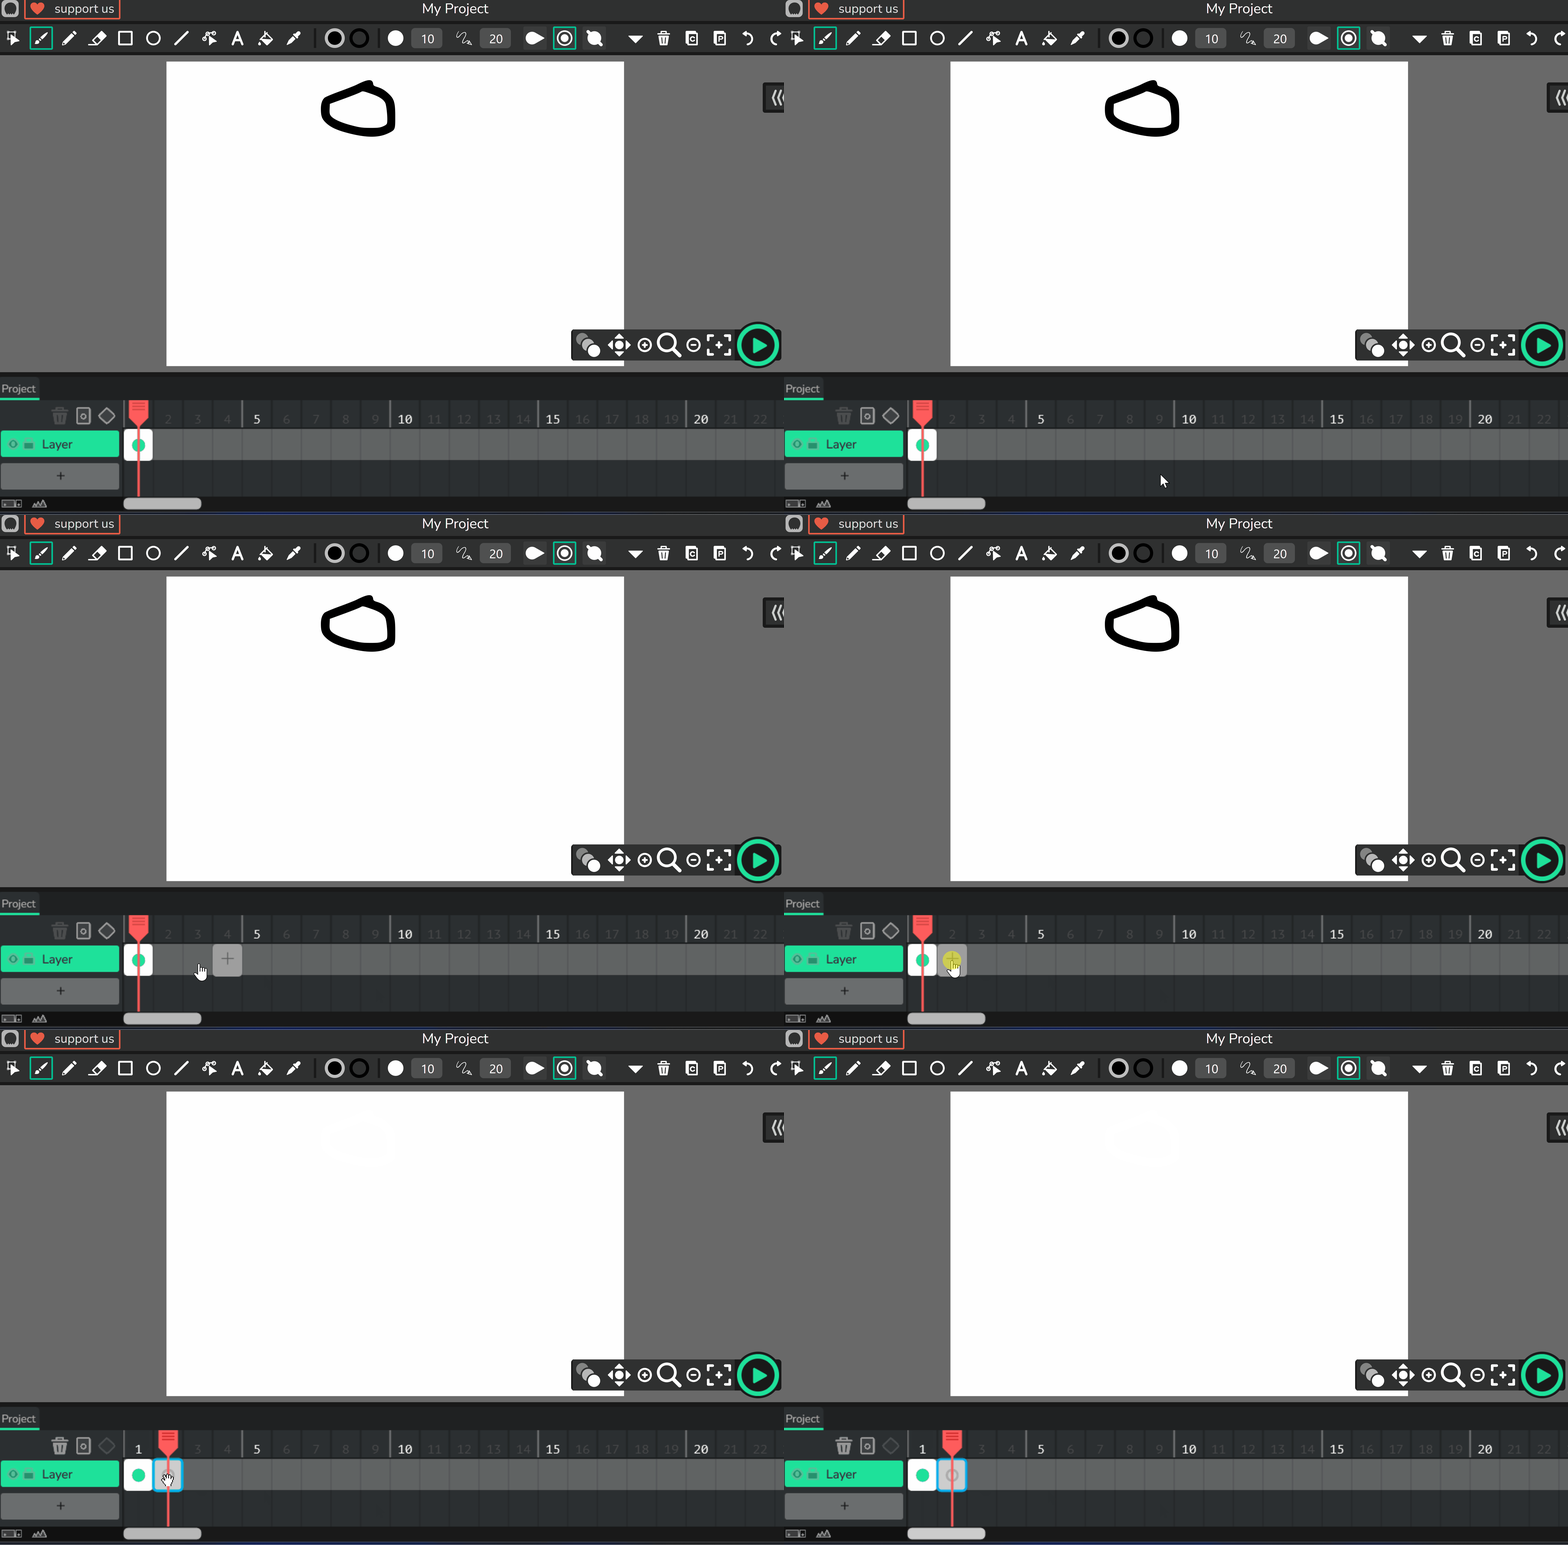
To add a new frame, click on an empty spot in the timeline next to your existing frame. You can also right-click in the timeline and select 'Add Frame' from the menu that appears.
For now, add at least one new frame. In the next steps, we'll draw in these frames to create the bouncing effect.
Remember, each new frame is like a new page in a flipbook – small changes between frames will create the illusion of movement when played back.
To add a new frame to your project, click an empty spot in the timeline at the bottom of the screen.
Now that you've added some frames, let's make your animation smoother with a cool feature called onion skinning! Onion skinning is a technique used in animation that allows you to see several frames at once, like looking through semi-transparent layers. This makes it easier to understand how your animation is progressing over time and helps you draw the next positions more accurately.
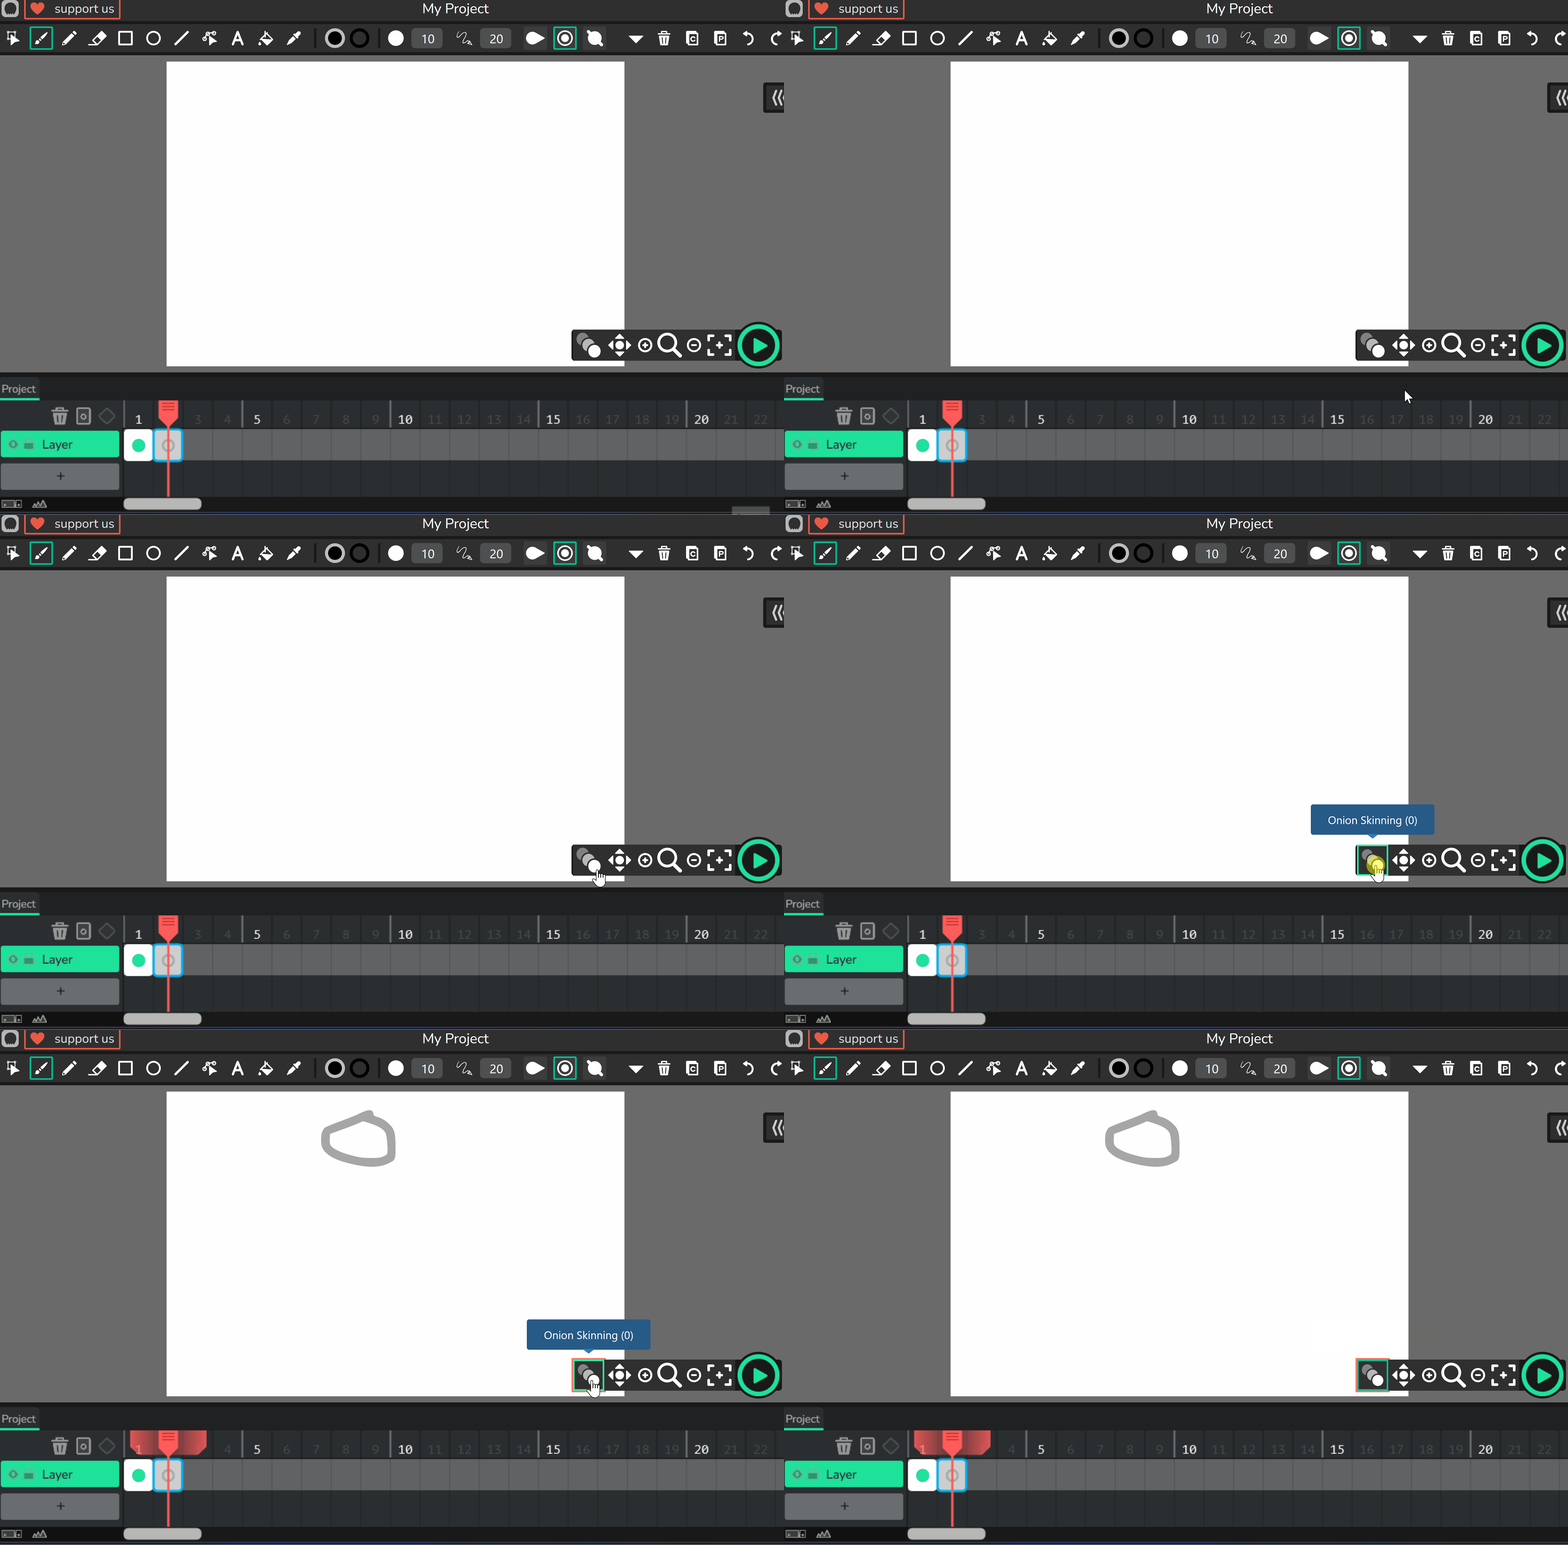
To use onion skinning in Wick Editor, look for the canvas tools at the bottom right of the screen. Click on the onion skinning icon – it usually looks like an onion or layered frames. Once activated, you'll see faint versions of the previous and following frames on your canvas. This will really help as you draw the ball moving down or bouncing up, ensuring the movement looks natural.
Try it out while adding more frames to your bouncing ball – you'll notice how much easier it is to position the circle just right!
Onion skinning is a technique used in animation that allows you to see several frames at once. This makes it easier to understand how your animation is progressing over time.
To use onion skinning in Wick Editor, find the canvas tools at the bottom right. Click on the onion skinning tool to see previous and following frames. This will help you to create smoother, more natural animations.
Layers in Wick Editor are like see-through sheets stacked together. They help you keep your drawings organised by separating different parts, like having one layer for the background and another for your bouncing ball. This way, you can change one thing without messing up the others.
Let's add a layer for your ball:
Layers stop things from overlapping by mistake. Put your background on one layer so it stays still, and moving stuff like the ball on another. Try adding a layer for a simple background, like grass. Then preview your animation to see them work together. Use the eye icon to hide a layer or the lock icon to protect it.
Now that you've added frames and enabled onion skinning, it's time to draw the sequence that makes your ball bounce! Start with your first frame where the circle is at the top of the canvas.
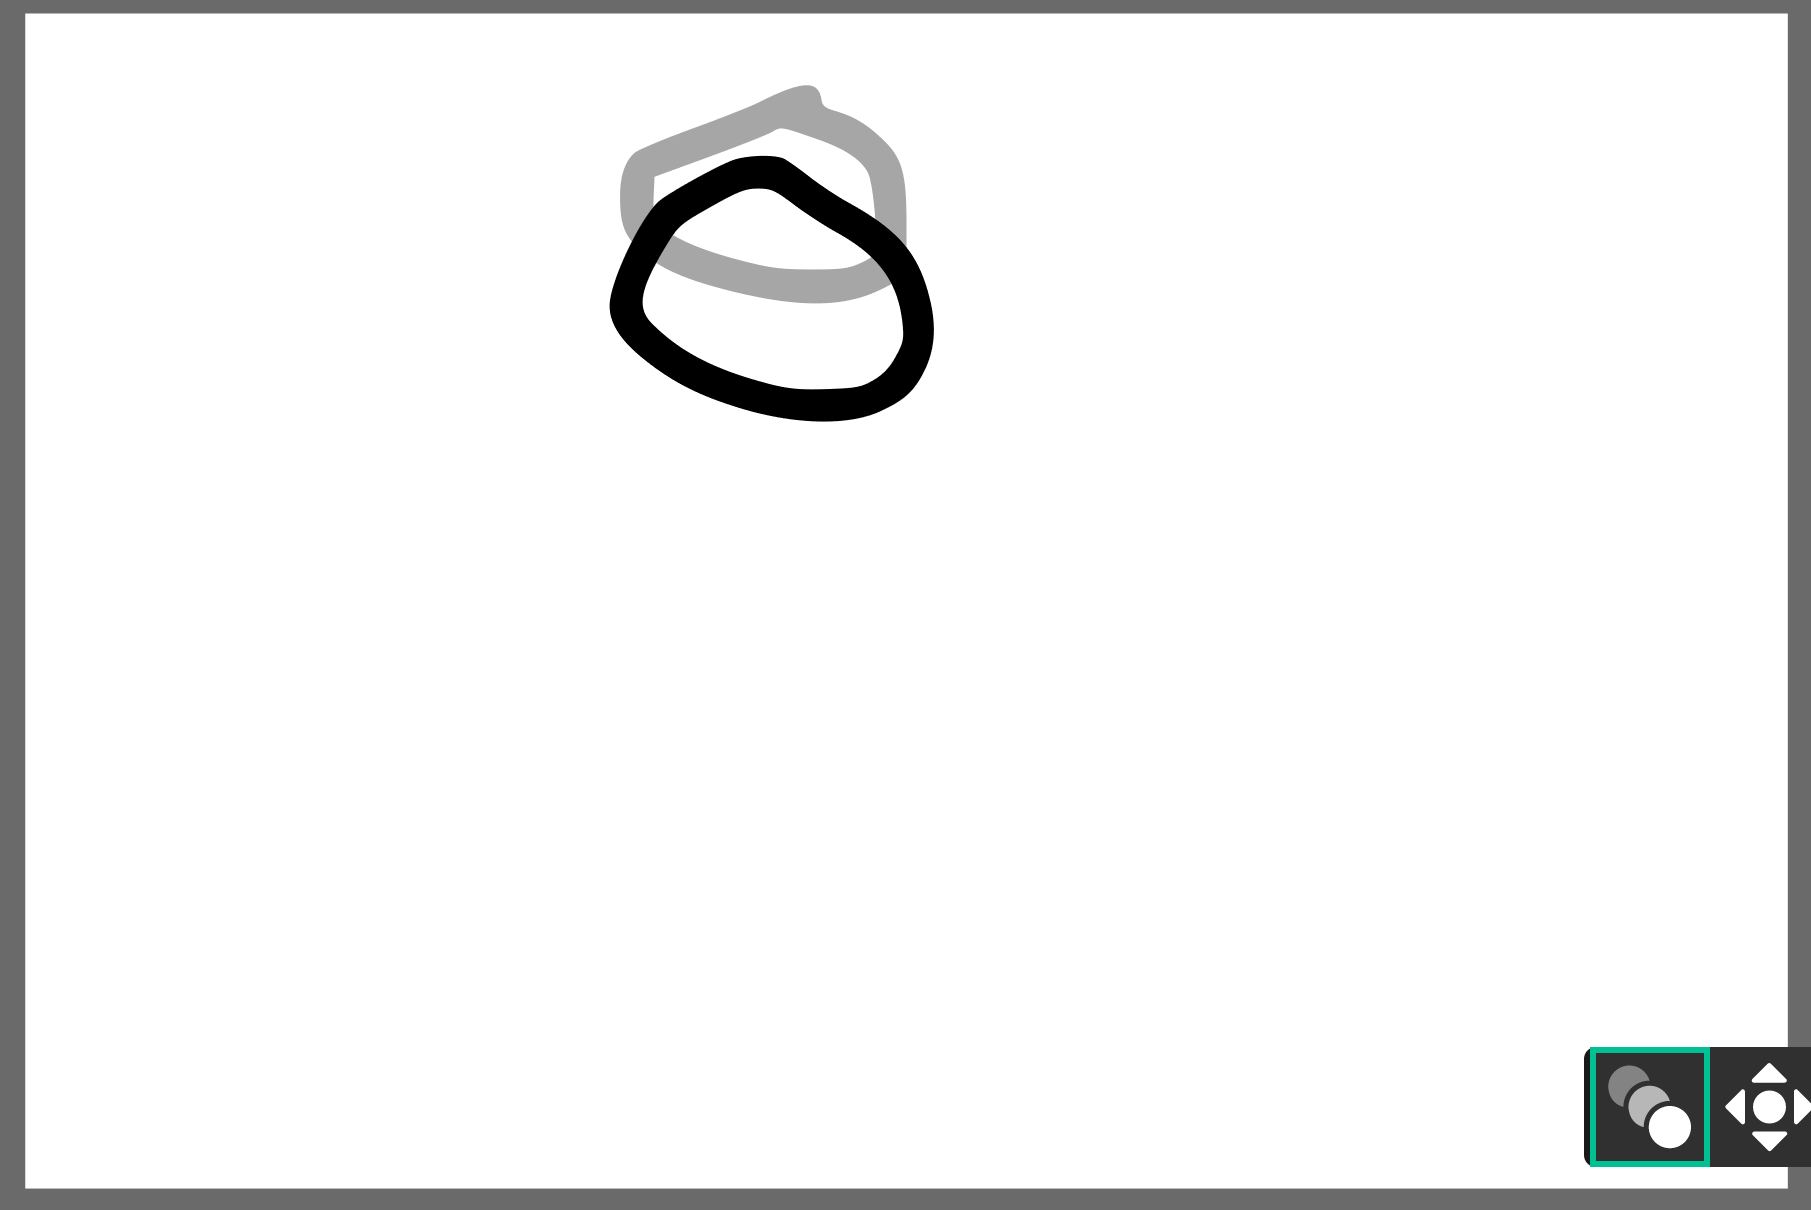
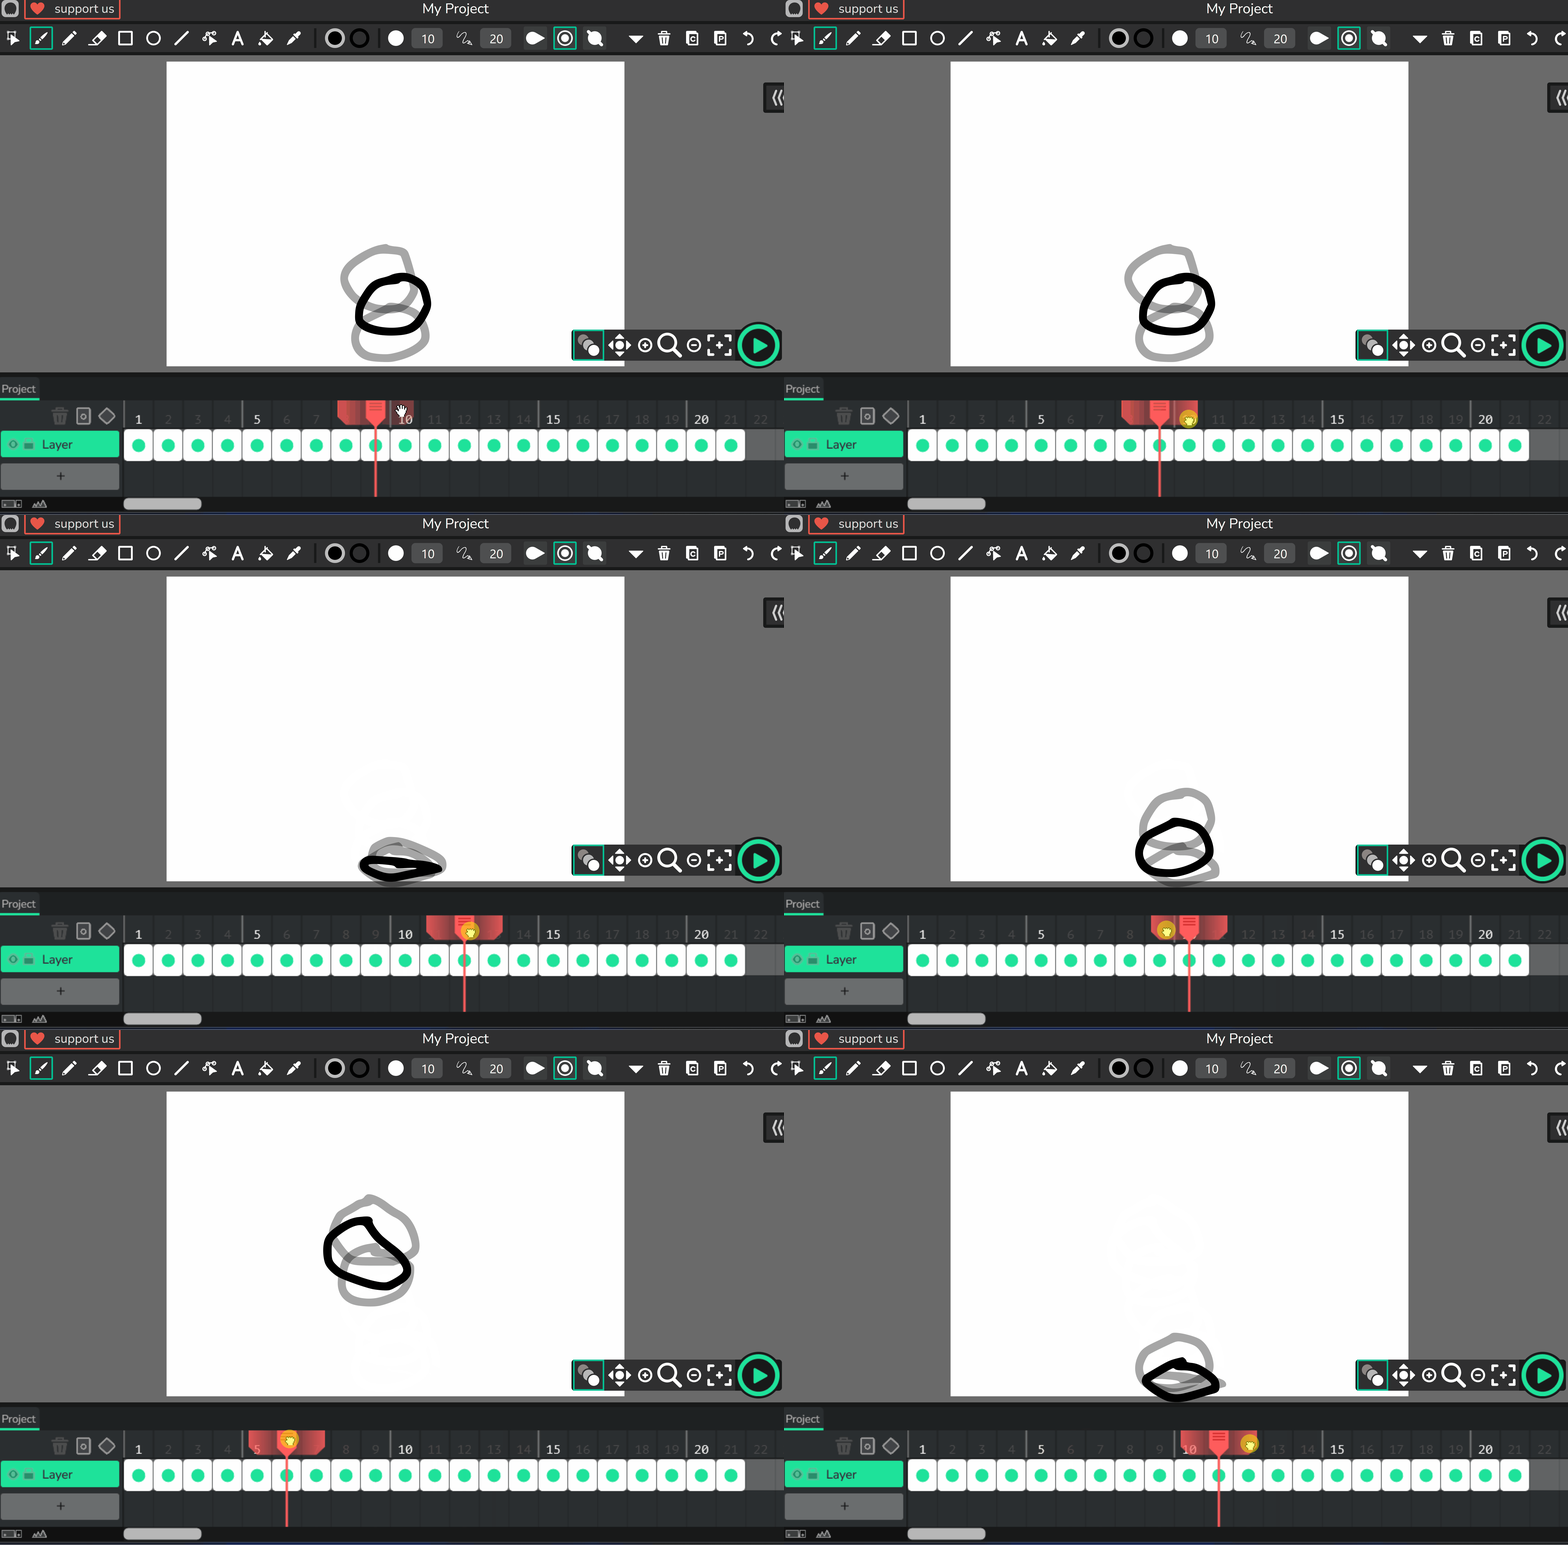
In the next frame, use the Brush tool to draw another circle just beneath the position of the previous one. The onion skinning will show a faint outline of the last frame, helping you position it accurately for smooth movement.
Keep adding new frames by clicking in the timeline, and in each one, draw the circle a little lower to make it look like the ball is falling towards the bottom of the canvas. When it reaches the bottom, draw it slightly squished to show the bounce impact.
Then, continue adding frames to show the ball rising back up, drawing the circle higher in each subsequent frame until it returns to the top. Don't worry if it's not perfect – we're just learning how to create the illusion of movement!
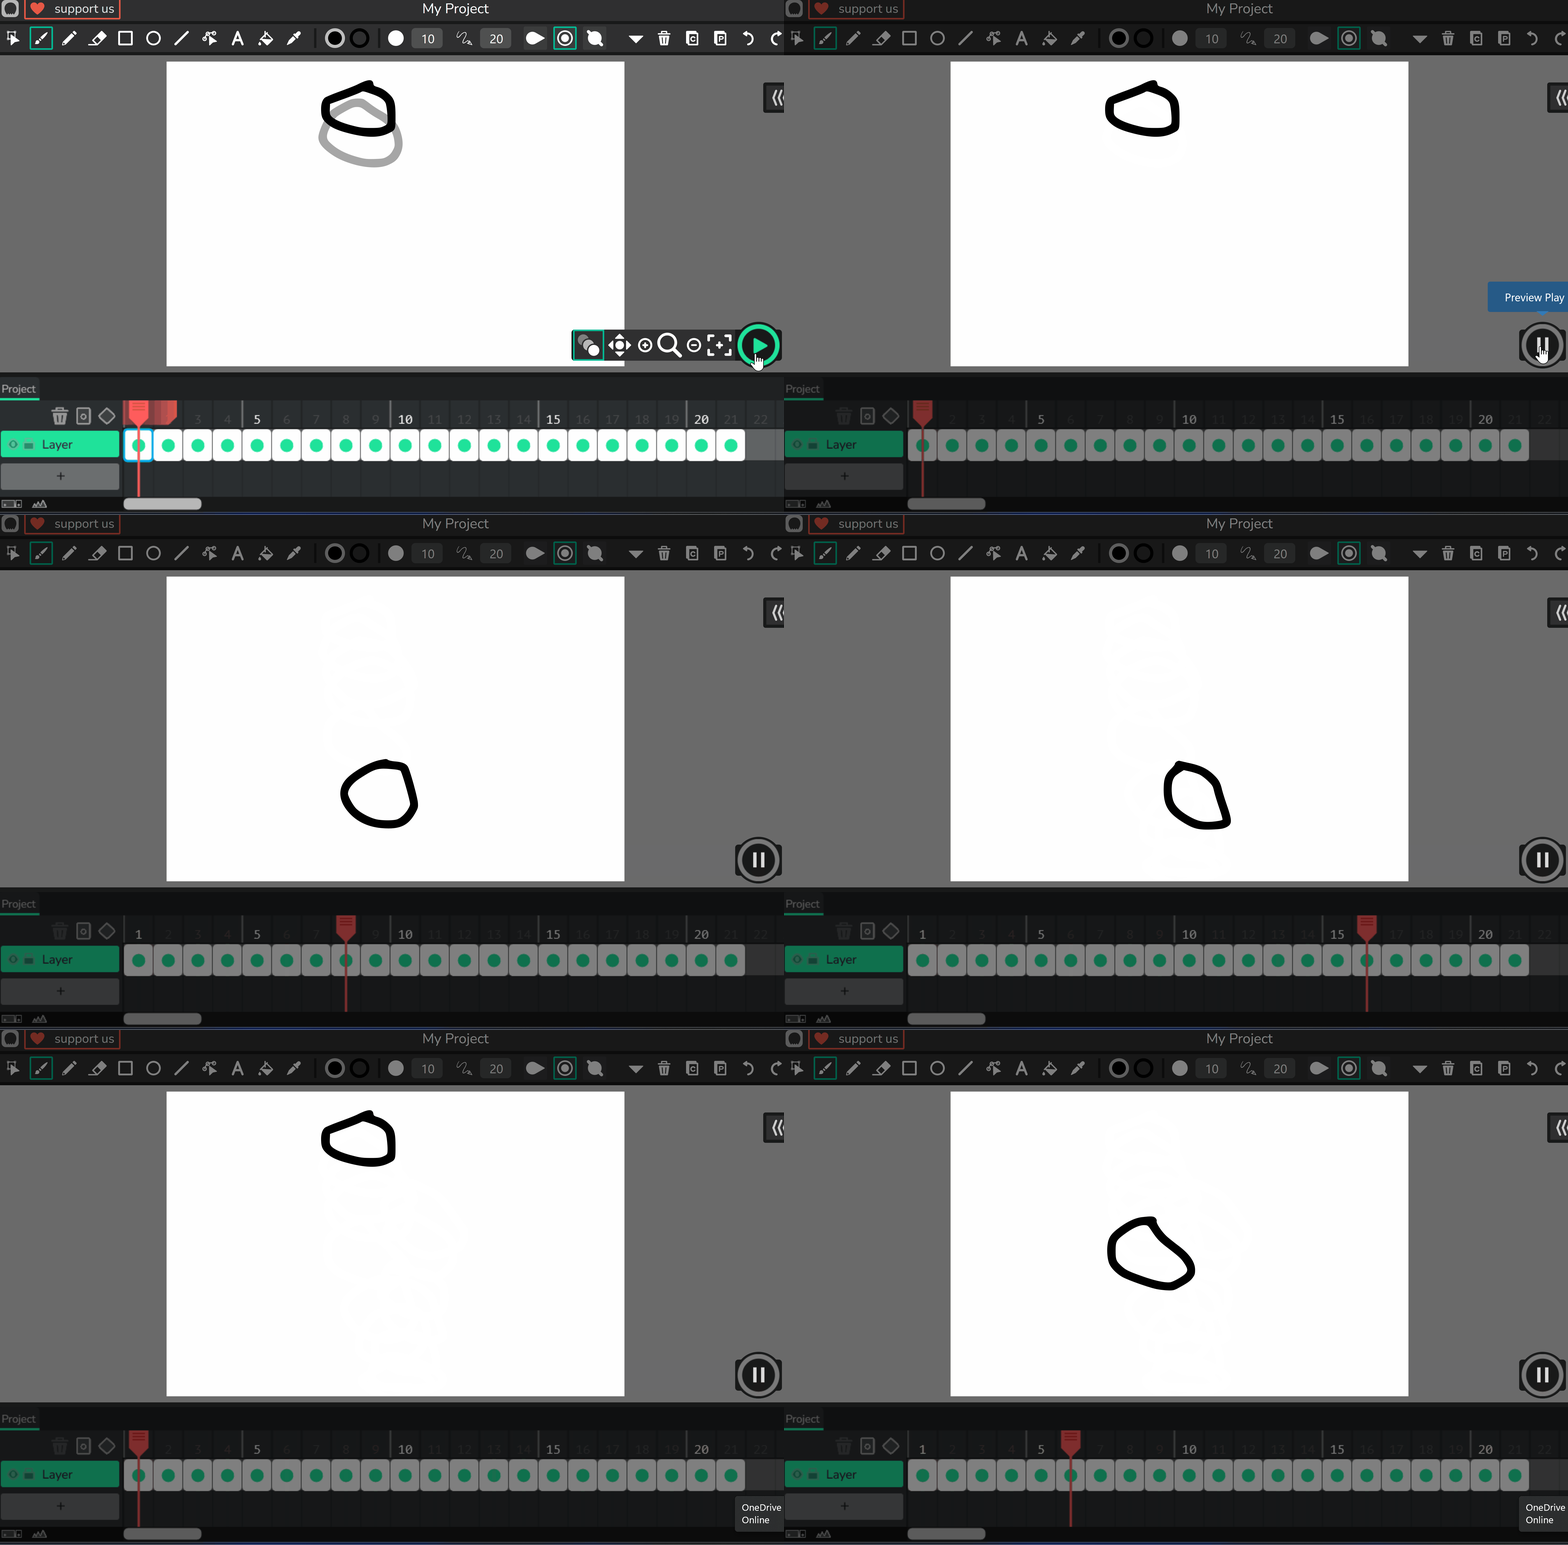
Now that you've drawn your bouncing ball across several frames, it's time to see your animation come to life. Start by locating the timeline at the bottom of the screen. You'll notice a red line called the playhead – this shows which frame you're currently viewing.
To preview individual frames, simply click and drag the red playhead along the timeline. This lets you jump to different parts of your animation and check how it looks step by step.
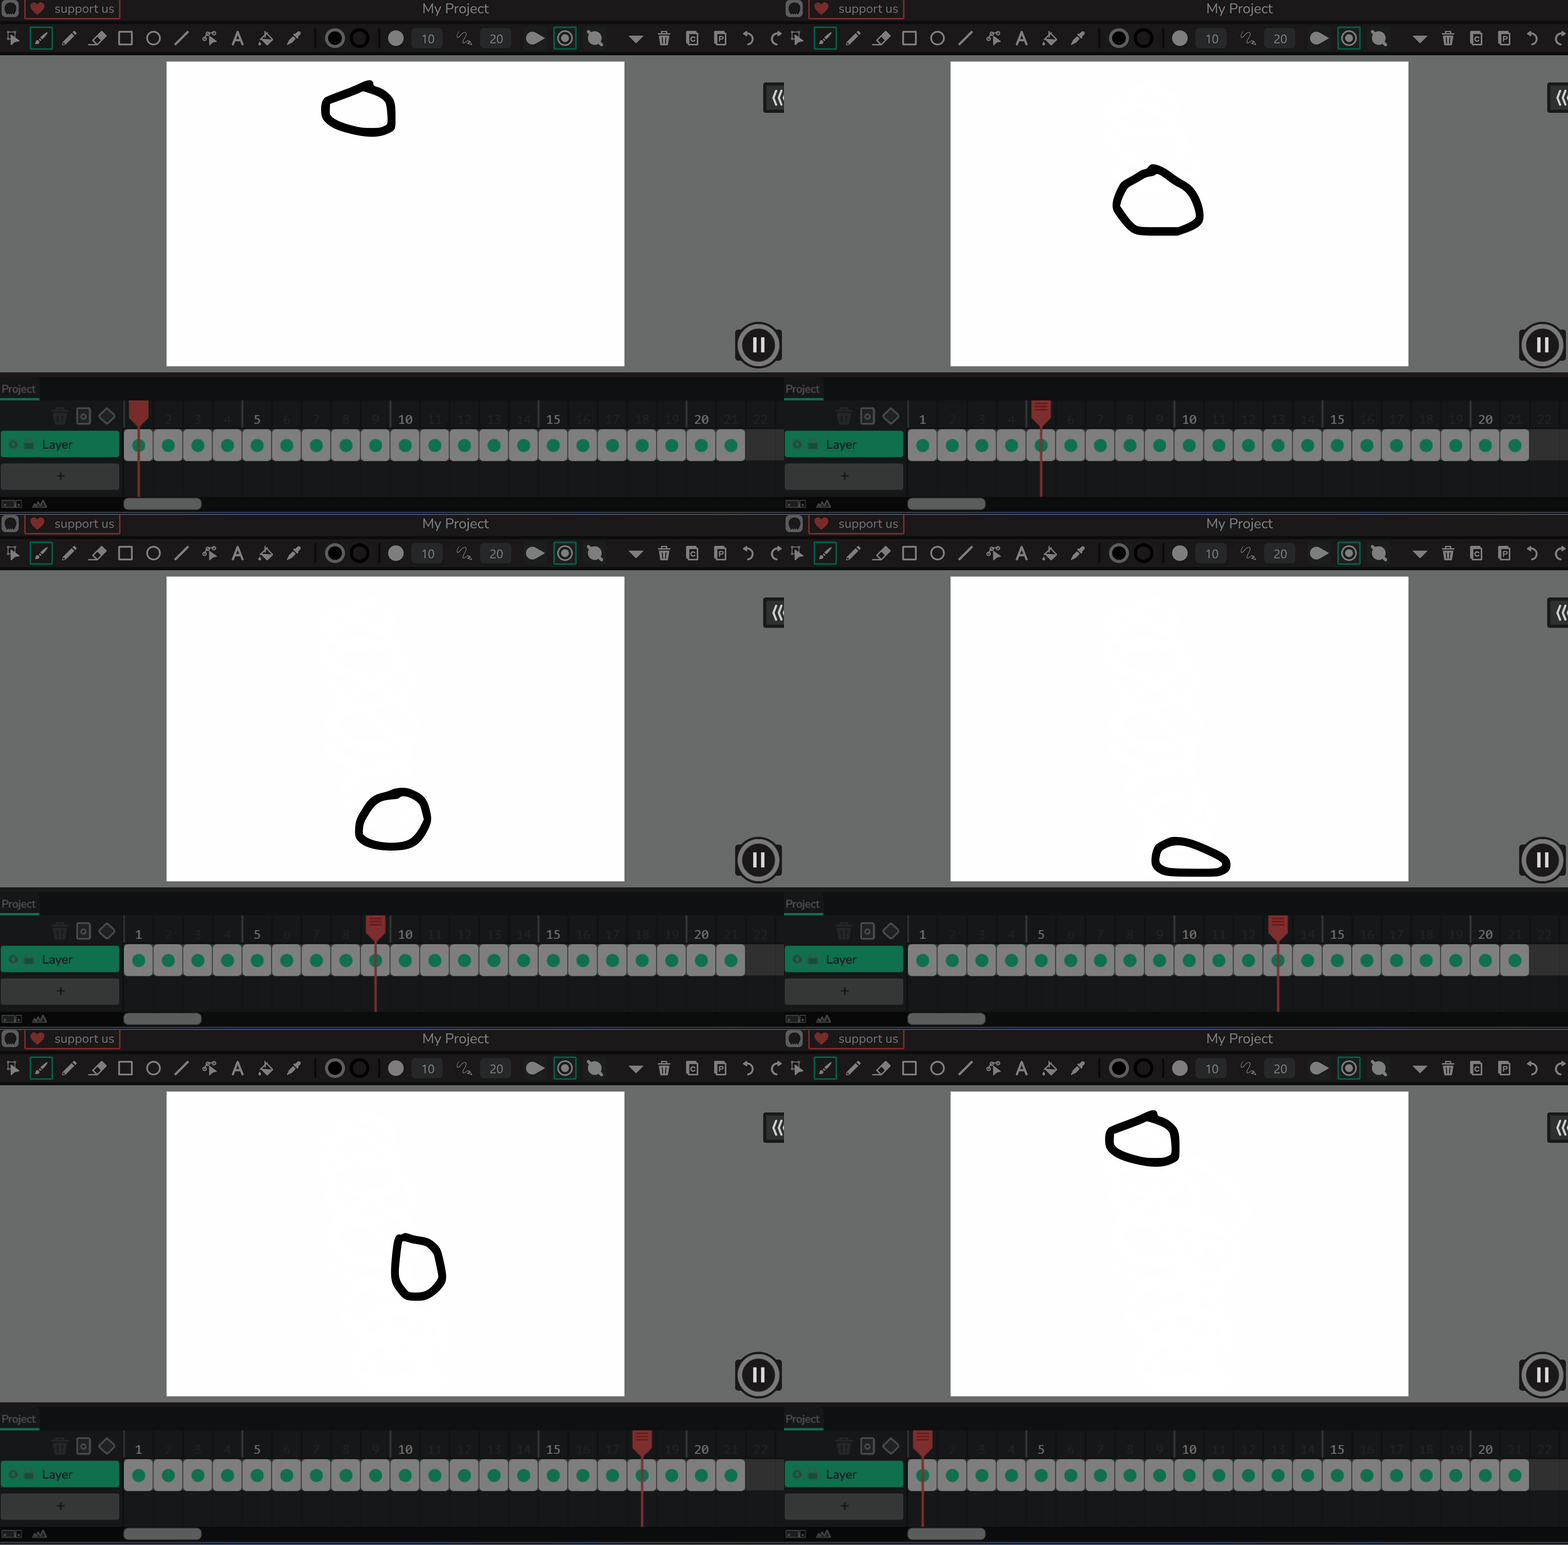
For the full effect, let's play it in real time! First, make sure onion skinning is turned off (you can toggle it using the icon in the canvas tools at the bottom right) – this will give you a clean view without the faint overlays. Then, find the big green play button near the timeline and click it to start your animation. Watch your ball bounce up and down!
If you need to stop, just click the pause button next to it. Feel free to play it a few times and see if you'd like to make any adjustments to your frames for a smoother bounce.
You can preview a part of your animation by dragging the red playhead back and forth.
Now that you've drawn your bouncing ball across several frames, it's time to watch your full animation in action! This will help you see how all the frames come together to create movement.
Look at the timeline at the bottom of the screen. Near it, you'll find the play button – it looks like a green arrow or triangle pointing to the right.
Simply click on this play button to start your animation from the beginning. Sit back and watch as your circle bounces up and down like a ball!
If you want to stop the playback, click the pause button next to it (it looks like two vertical lines). You can play it multiple times to check if the bouncing looks smooth and natural.
Feel free to go back to previous frames and make adjustments if needed – that's all part of perfecting your animation!
To play your animation in real time press the big green play button. Use the pause button to stop the animation.
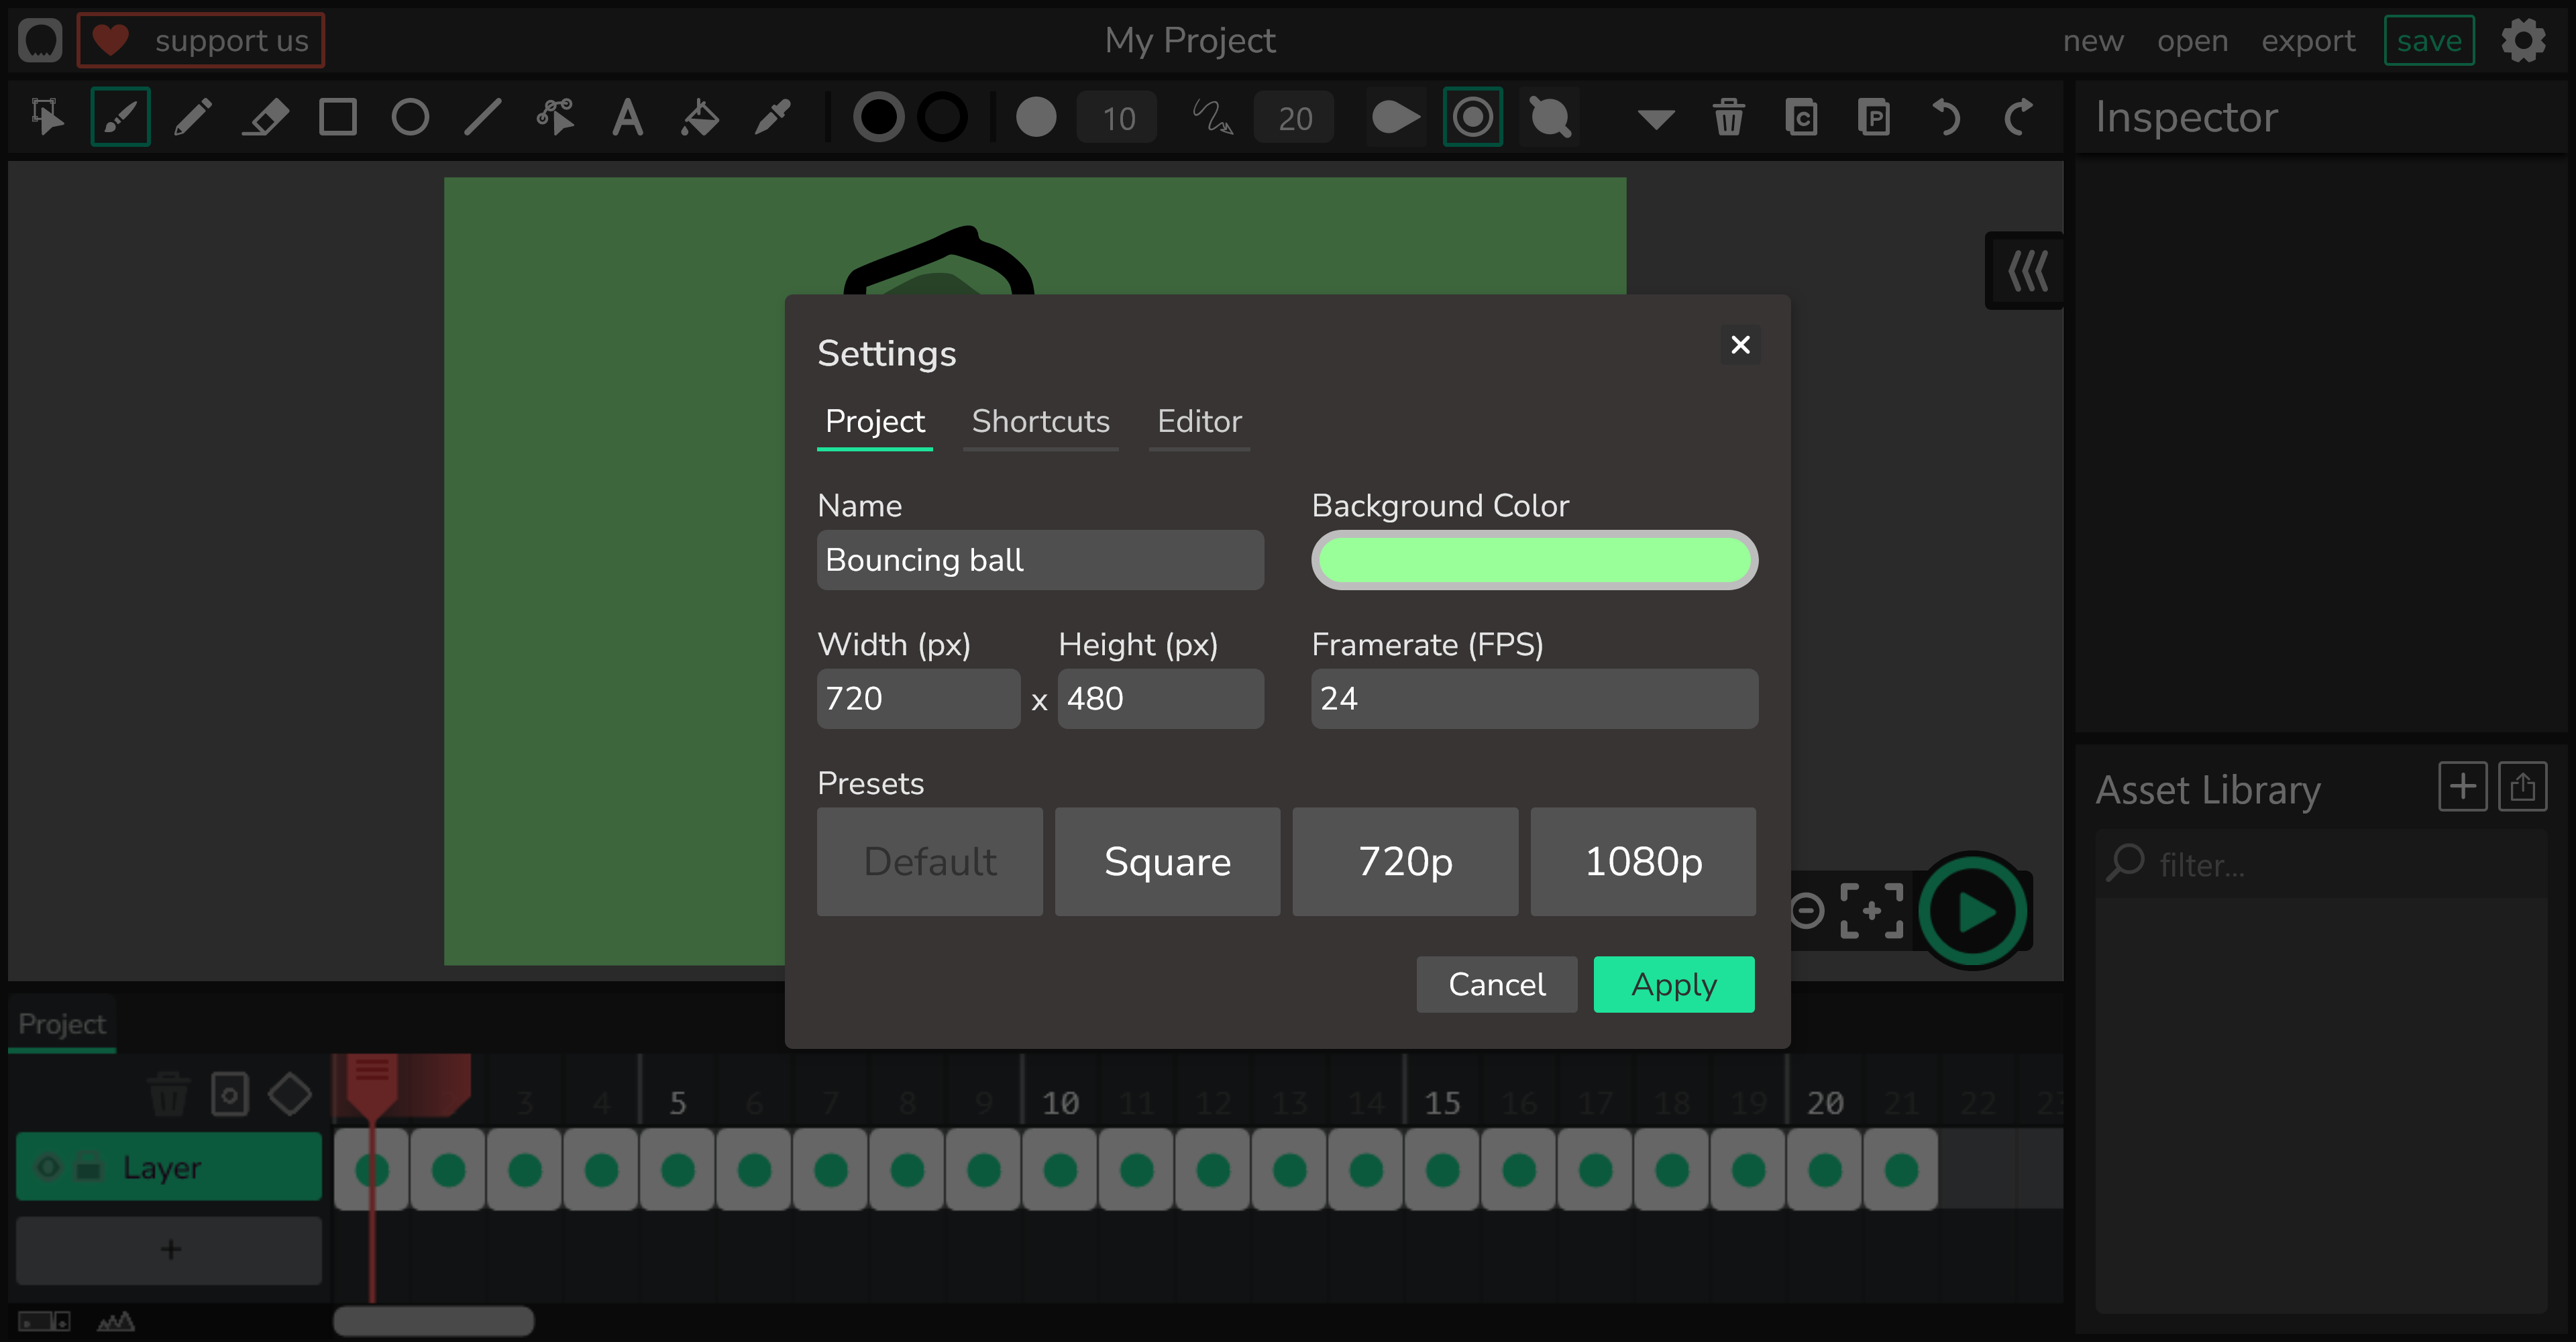
Click the gear icon in the top right for project settings. This is where you can adjust various aspects of your project:
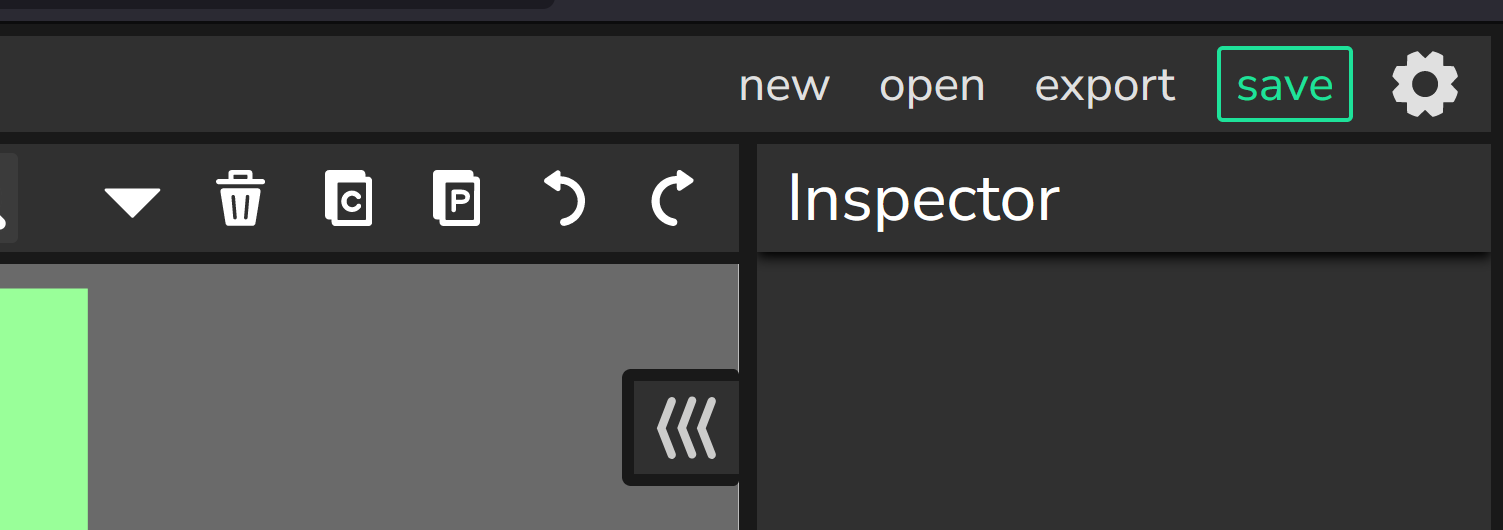
It's important to save your work so you can come back to it later or continue editing your animation. Look for the Save button in the top menu of Wick Editor – it might look like a floppy disk icon or simply say 'Save'.
Click on it, and you'll be prompted to choose a location on your computer to save the file. Wick Editor saves projects as .wick files, which are special files that keep all your frames, drawings, and settings intact.
Give your file a name like 'MyBouncingBall.wick' so it's easy to find later. Remember to save regularly as you work on bigger projects to avoid losing any progress!
Now, let's learn how to export it so you can share your creation with friends and family. Exporting turns your project into a file that can be viewed outside of Wick Editor, like a video or image sequence.
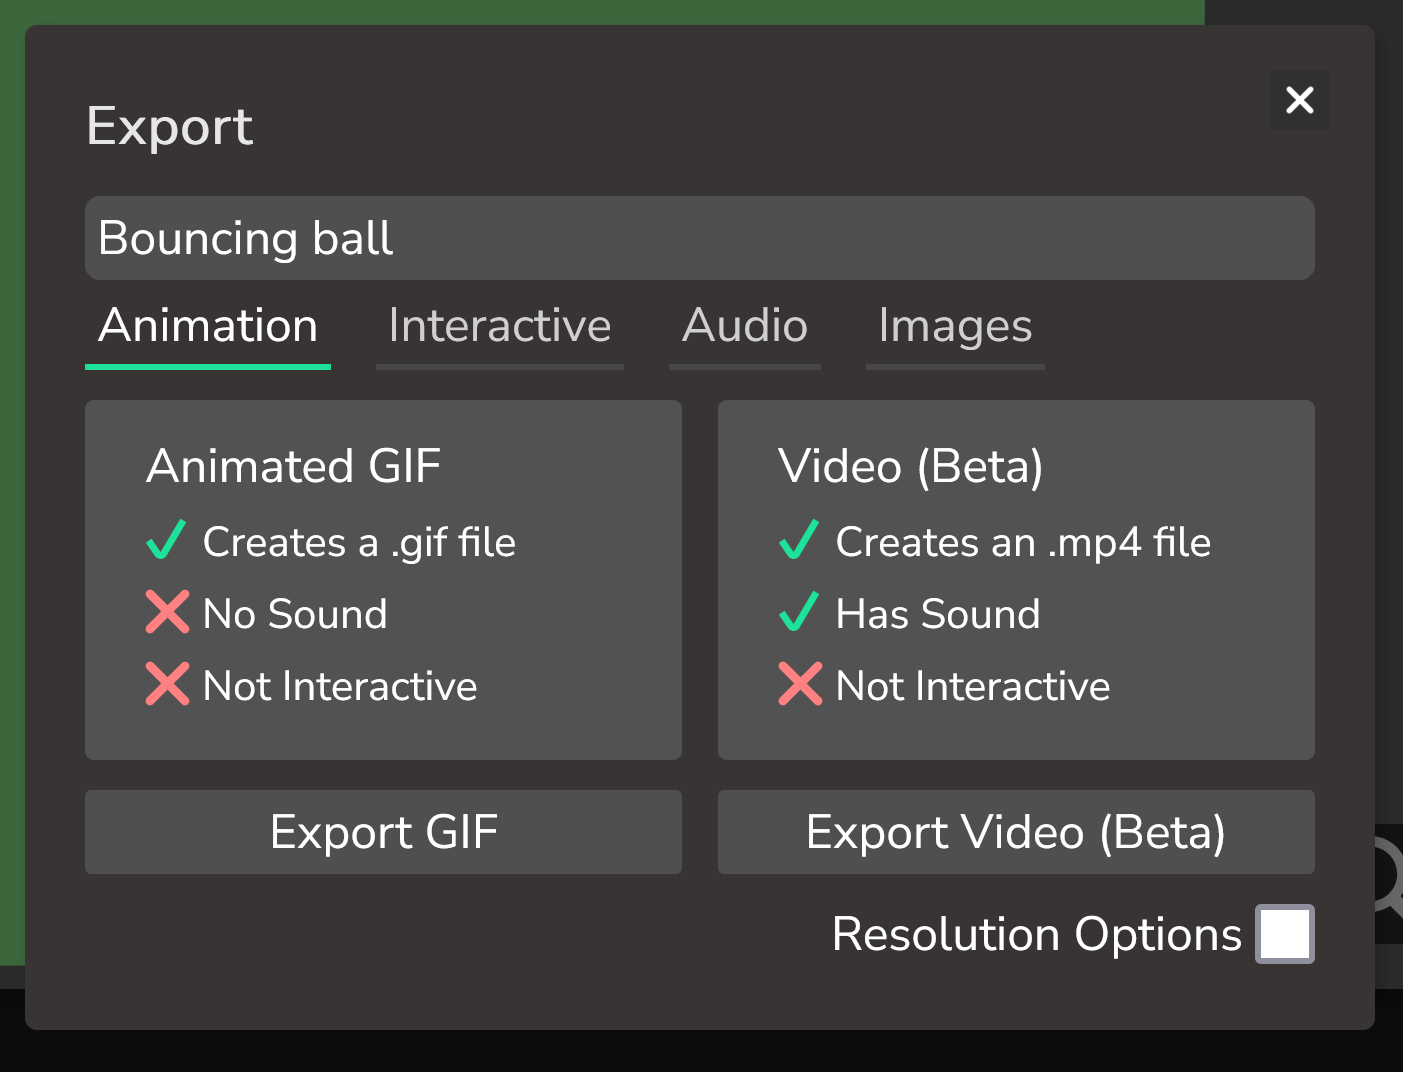
To start, look for the Export button in the top right corner of the screen – it might look like an arrow pointing out of a box or simply say 'Export'. Click on it, and a menu will appear with different options for saving your animation in various formats.
Here are the main options you'll see:
Animated GIF
Video
Choose the option that best fits what you want to do with your animation, then follow the prompts to save the file to your computer. You can name it something fun like 'MyBouncingBall.gif' or 'BouncingBallVideo.mp4'. Once exported, try opening the file to see your animation in action outside of Wick Editor!
Every lesson in the course is ready to teach like this one. See what else comes with it, and how to order it.