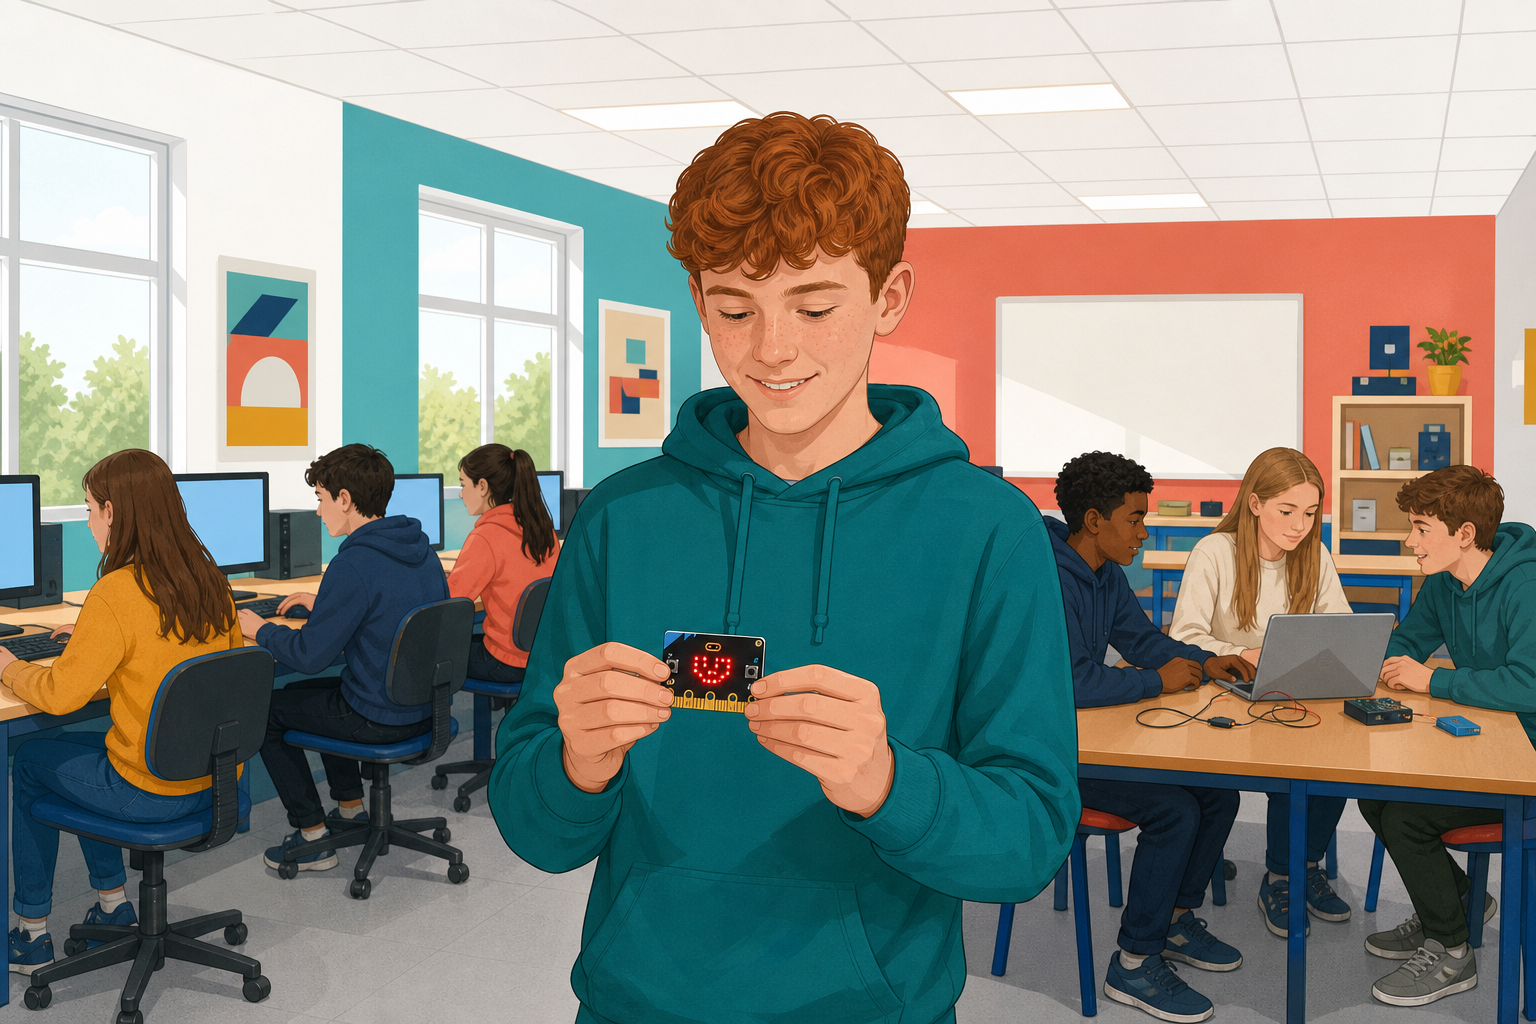
 Today you build a number-guessing game on the micro:bit. The micro:bit picks a secret number from 1 to 9 and keeps it hidden. You press button A to change your guess, and button B to check it: a happy face means you got it, an arrow tells you to guess higher or lower.
Then you flip the very same project to its Python view and read your own code.
MakeCode is the editor you write micro:bit programs in. You drag coloured blocks together and it turns them into a real program.
Go to makecode.microbit.org and click New Project. Call it Number Guesser and click Create.
You should see an empty workspace with two blocks already in it: on start and forever. You will use on start. Leave forever where it is. The blocks are grouped by colour down the left: Basic blue, Input pink, Variables red, Math purple, Logic teal.
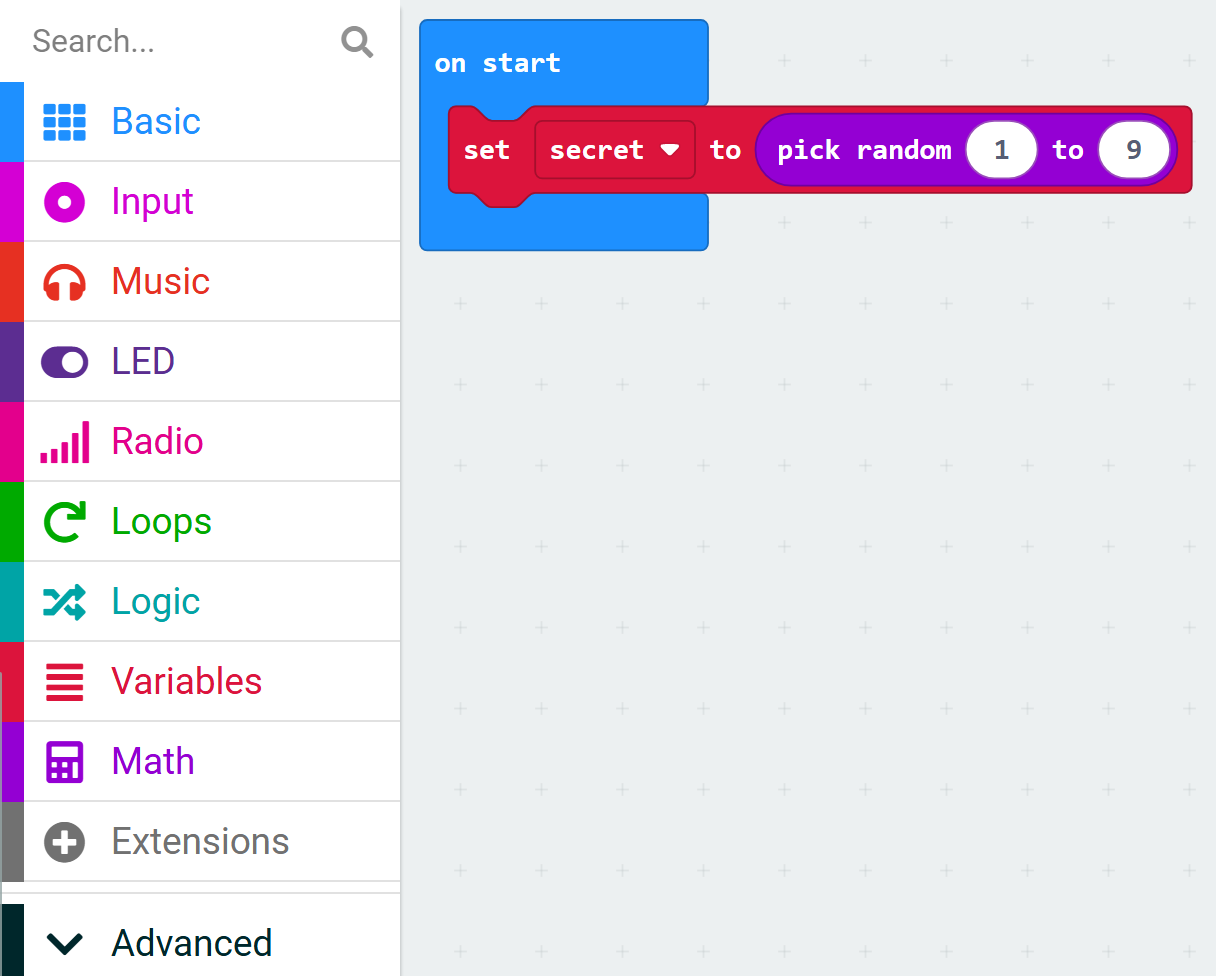
In the Variables category (red), click Make a Variable, call it secret and click OK. Drag set secret to 0 into the on start block.
Now from Math (purple), drag pick random 0 to 10 into the slot where the 0 is, and change the numbers to 1 and 9.
Read it and predict what the micro:bit will show before you press Run.
let secret = randint(1, 9)
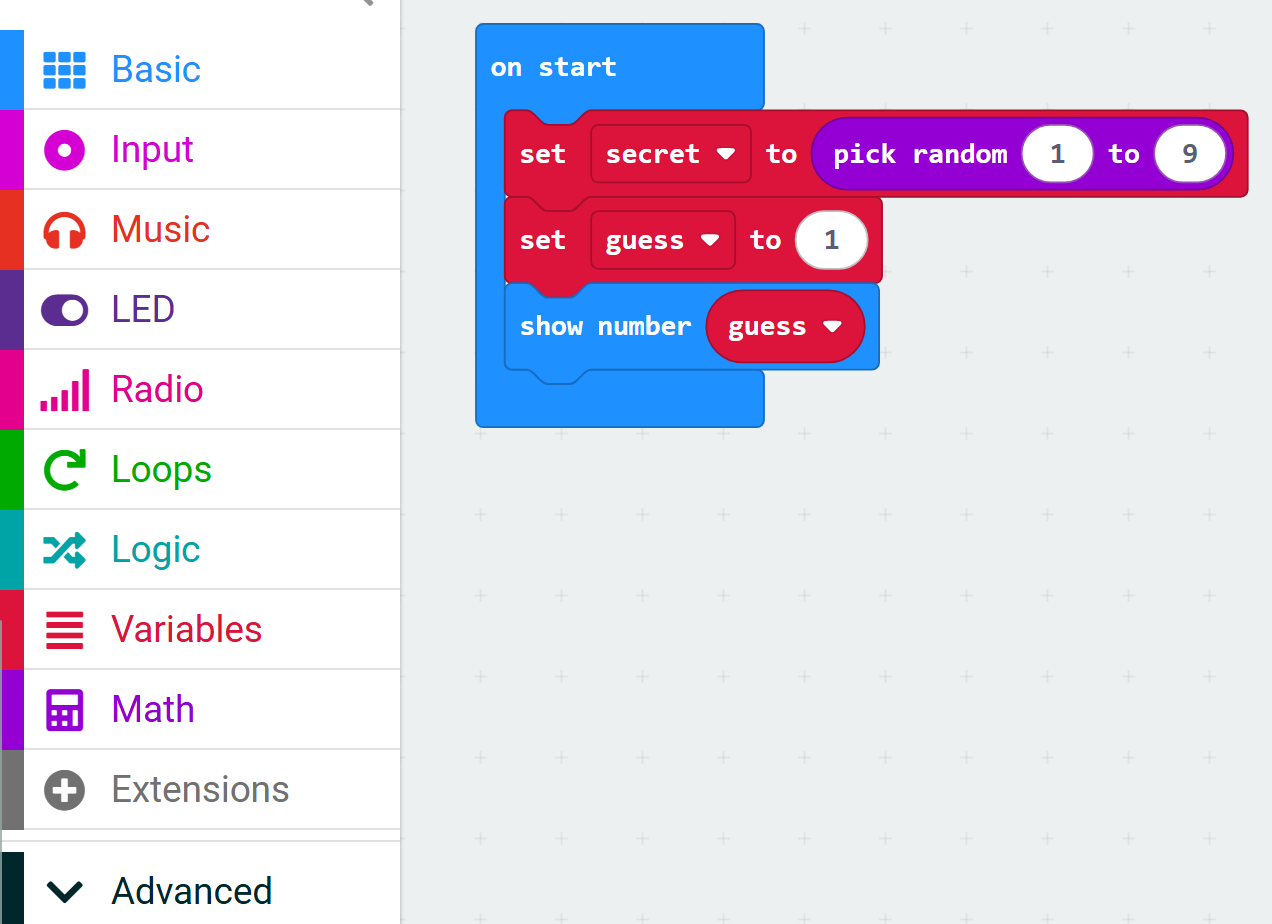
Make a second variable called guess. Drag set guess to 0 into on start, underneath the secret line, and change the 0 to 1.
Then from Basic (blue), drag show number under it and drop the guess variable into its slot. Press Run. The screen should show 1.
let secret = randint(1, 9)
let guess = 1
basic.showNumber(guess)
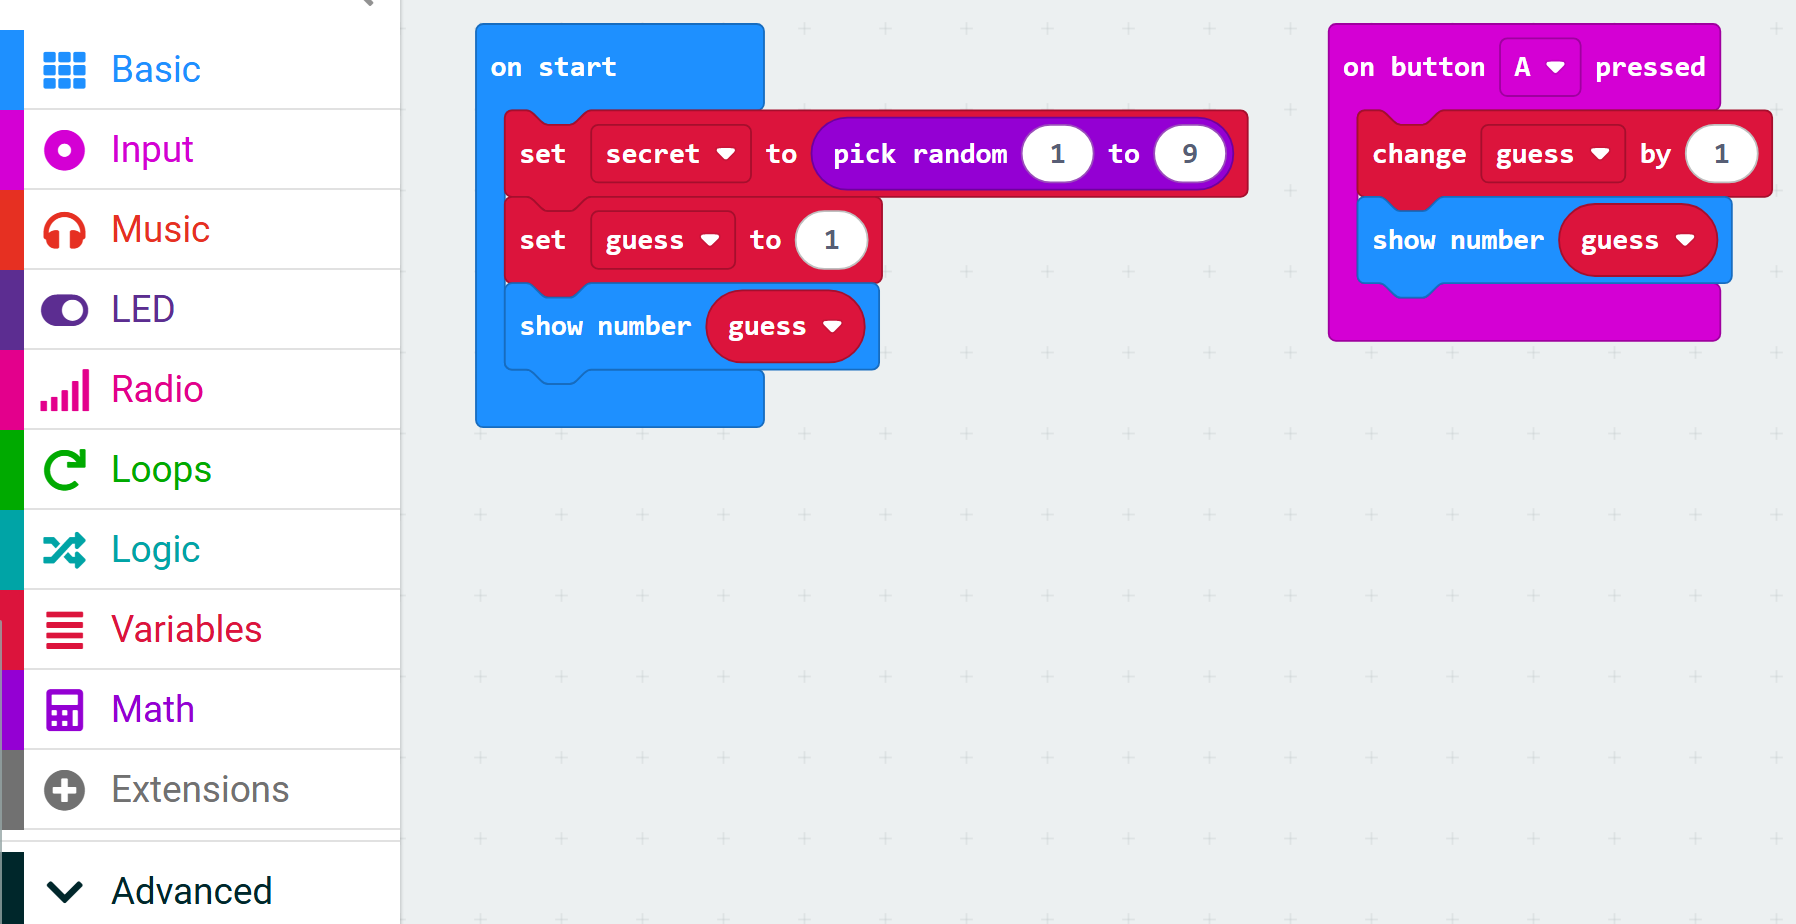
From Input (pink), drag on button A pressed onto an empty part of the workspace. Do not put it inside on start.
Inside it, put change guess by 1 from Variables, then show number guess from Basic. Press A a few times in the simulator and watch the number climb.
let secret = randint(1, 9)
let guess = 1
basic.showNumber(guess)
input.onButtonPressed(Button.A, function () {
    guess += 1
    basic.showNumber(guess)
})
Unlock the full learning experience
You're previewing this lesson. Get full access to this lesson and hundreds more — each one ready to teach, with interactive activities, printable resources and pupil progress tracking built in.
This lesson is copyright of Coding Ireland 2017 - 2025. Unauthorised use, copying or distribution is not allowed.