1 - Start: What We're Building ~5 mins
Quick recap: last day we used if conditions and events to make things happen on screen — who can give me one event block we used?
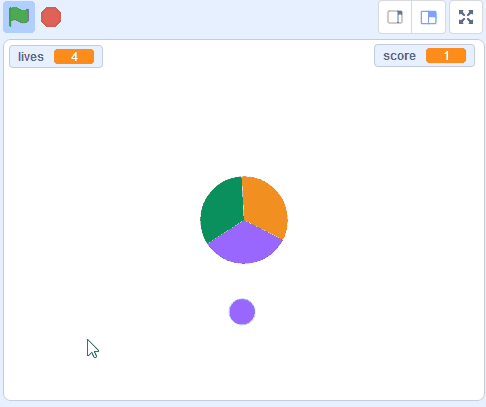
Today you'll build Attack of the Dots in Scratch at your own device. You'll control a spinning disc and match its colour to the dots flying towards it. We'll predict first, then build, run and fix it together.
Open with a quick recap of conditionals and events, then set the scene: today everyone builds the same game at their own device. Show the board and explain the rhythm — predict, build, run, fix. Keep this brief so students get building.
2 - Predict Before You Run ~10 mins
Before anyone clicks the green flag: look at what we are about to build. Commit to a prediction. When the program runs, what will the disc do, and what will you see first on the screen?
Say your prediction to your partner before you touch any blocks — we'll come back to these later.
This is the PRIMM predict beat. Stop students before they click anything and collect two or three predictions about what the disc and dots will do; write them on the board to revisit at the make-sense step. Ask 'what will you see first?' to keep it concrete.
3 - Introduction ~3 mins
Welcome to the 'Attack of the Dots' game project! In this exciting lesson, you will learn how to create a fun and interactive game using Scratch. You will control a colored disc in the middle of the screen, and your mission is to match the color of the disc with the colored dots that are attacking it. You will learn how to make the disc spin, clone the attacking dots, and detect the color of the dots. Let's get started and have some fun!
Read the goal of the game aloud so students know what they're aiming for. Keep it short — the detail comes in the build steps. Ask: in your own words, what is the player's job in this game?
4 - Remix the Starter Project ~3 mins
We've created a starter project that has some custom sprites for this game.
Go to the starter project at the below link and click on the Remix button to create a copy of the project.

Model the remix on the board so every pair makes their own copy and works from it, not the shared original. Point out the Remix button clearly. Differentiation cue: direct students who need a gentler start to the beginner version of the starter project.
5 - Make the Disc Spin ~3 mins
In this game coloured balls will move towards the disc in the middle. You need to spin the wheel to match the colour of each ball as it hits the wheel. So we'll program the left and right arrow keys on our keyboard to spin the wheel in each direction.
Add the following code to the 'wheel' sprite:
when green flag clicked
go to x[0] y [0] // place it in the center
set size to [30]% // resize the wheel to 30%
forever
if < key (left arrow v) pressed? >  then
turn ccw (3) degrees // turn anti clockwise
end
if < key (right arrow v) pressed? >  then
turn cw (3) degrees // turn clockwise
end
end
If you're using a tablet or iPad without a physical keyboard, you won't be able to use keyboard keys like the arrow keys in your project. Instead, we'll add simple on-screen buttons (using sprites) that you can tap to do the same things. This keeps your project working great! Just follow these steps wherever the lesson talks about pressing a key.
First, add a new sprite for your button:
- Click the "Choose a Sprite" button in the bottom right.
- Pick a simple shape, like an arrow or a circle. Make it small and place it on the screen where it's easy to tap, like the bottom corner.
Now, program your button sprite to make things happen when you tap it. Here's how it works for different situations:
Example 1: If the lesson uses a key to trigger an action on a specific sprite (like making something move, turn, or jump)
Instead of code like this on your target sprite:
when [left arrow v] key pressed
change x by (-10)  // or any action
Or this:
if < key [left arrow v] pressed? > then
change x by (-10)  // or any action
end
Add this code to your new button sprite:
when this sprite clicked
broadcast [do action v]
Then, on your target sprite, add this to receive the message:
when I receive [do action v]
change x by (-10)  // or any action
Tap the button on the screen, and the action will happen, just like pressing the key! Use a unique broadcast name for each different action or key.
Example 2: If the lesson uses a key to change a variable (like adding to a score or setting a value)
Instead of code like this:
when [space v] key pressed
change [score v] by (1)
Or this:
if < key [space v] pressed? > then
change [score v] by (1)
end
Add a new button sprite. Then, put this code on the button sprite:
when this sprite clicked
change [score v] by (1)
(If the variable is "for this sprite only," make sure it's set to "for all sprites" so the button can change it.)
Tap the button, and the variable changes, no message needed since it's something shared!
Make sure students have the wheel sprite selected before adding blocks — the most common error here is adding spin code to the wrong sprite. On the board, point to the key-press conditions inside the forever loop. Ask: why do we need a forever loop here? Have early finishers test both arrow keys.
Unlock the full learning experience
You're previewing this lesson. Get full access to this lesson and hundreds more — each one ready to teach, with interactive activities, printable resources and pupil progress tracking built in.
This lesson is copyright of Coding Ireland 2017 - 2025. Unauthorised use, copying or distribution is not allowed.
Scratch is developed by the Lifelong Kindergarten Group at the MIT Media Lab. It is available for free at https://scratch.mit.edu