1 - Create a new Microbit project
A light-emitting diode (LED) is a light source that emits light when electrical current flows through it. RGB LEDs (red green blue) contain three different LED emitters in one case. Each emitter can be controlled on it's own so together they can create different colours by mixing their colours.
In this project we will program the A, B and A+B buttons on our Microbit to control the level of red, green and blue that is shown.
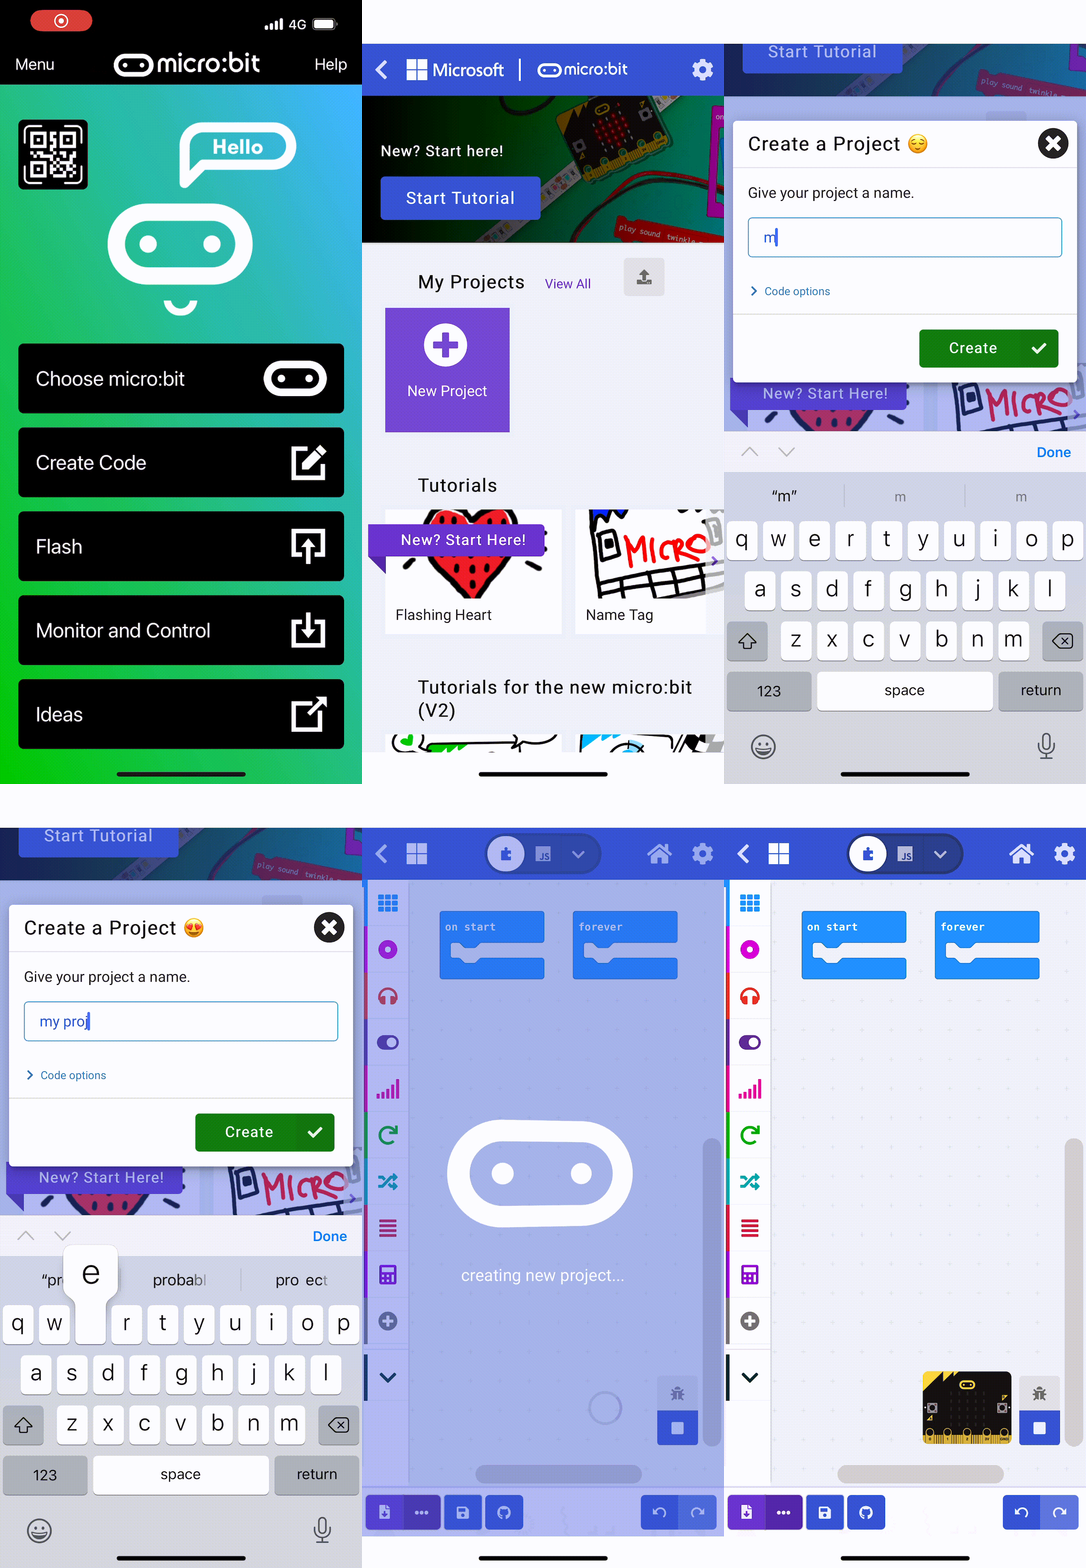
First create a new Microbit project.
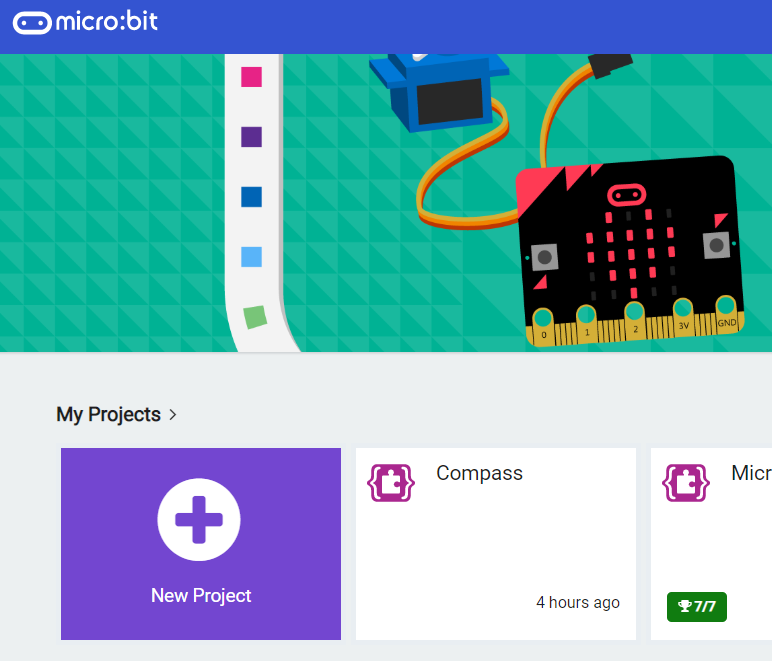
Go to the Makecode.com Microbit website using the link below and click on the 'New Project' button underneath the 'My Projects' heading.
https://makecode.microbit.org/
Install the micro:bit app on your iPad or tablet.
Open the app, tap 'Create code' and then create a new project.


2 - Create 3 variables
The RGB LED board has three channels, a red, a green and a blue channel. We can control the LED by setting a value for each of these channels and 'mix' a colour. We do this by using the analog write pin block.
- Pin 0 (P0) is the red channel (min 0 max 1023).
- Pin 1 (P1) is the green channel (min 0 max 1023).
- Pin 2 (P2) is the blue channel (min 0 max 1023).
To start create 3 variables that will store the level of red, green and blue that we will mix and show.
- red - this will store the level of red.
- green - this will store the level of green.
- blue - this will store the level of blue.
Once you have created the variables, add the following code to start them off at 0.
let red = 0
let green = 0
let blue = 0
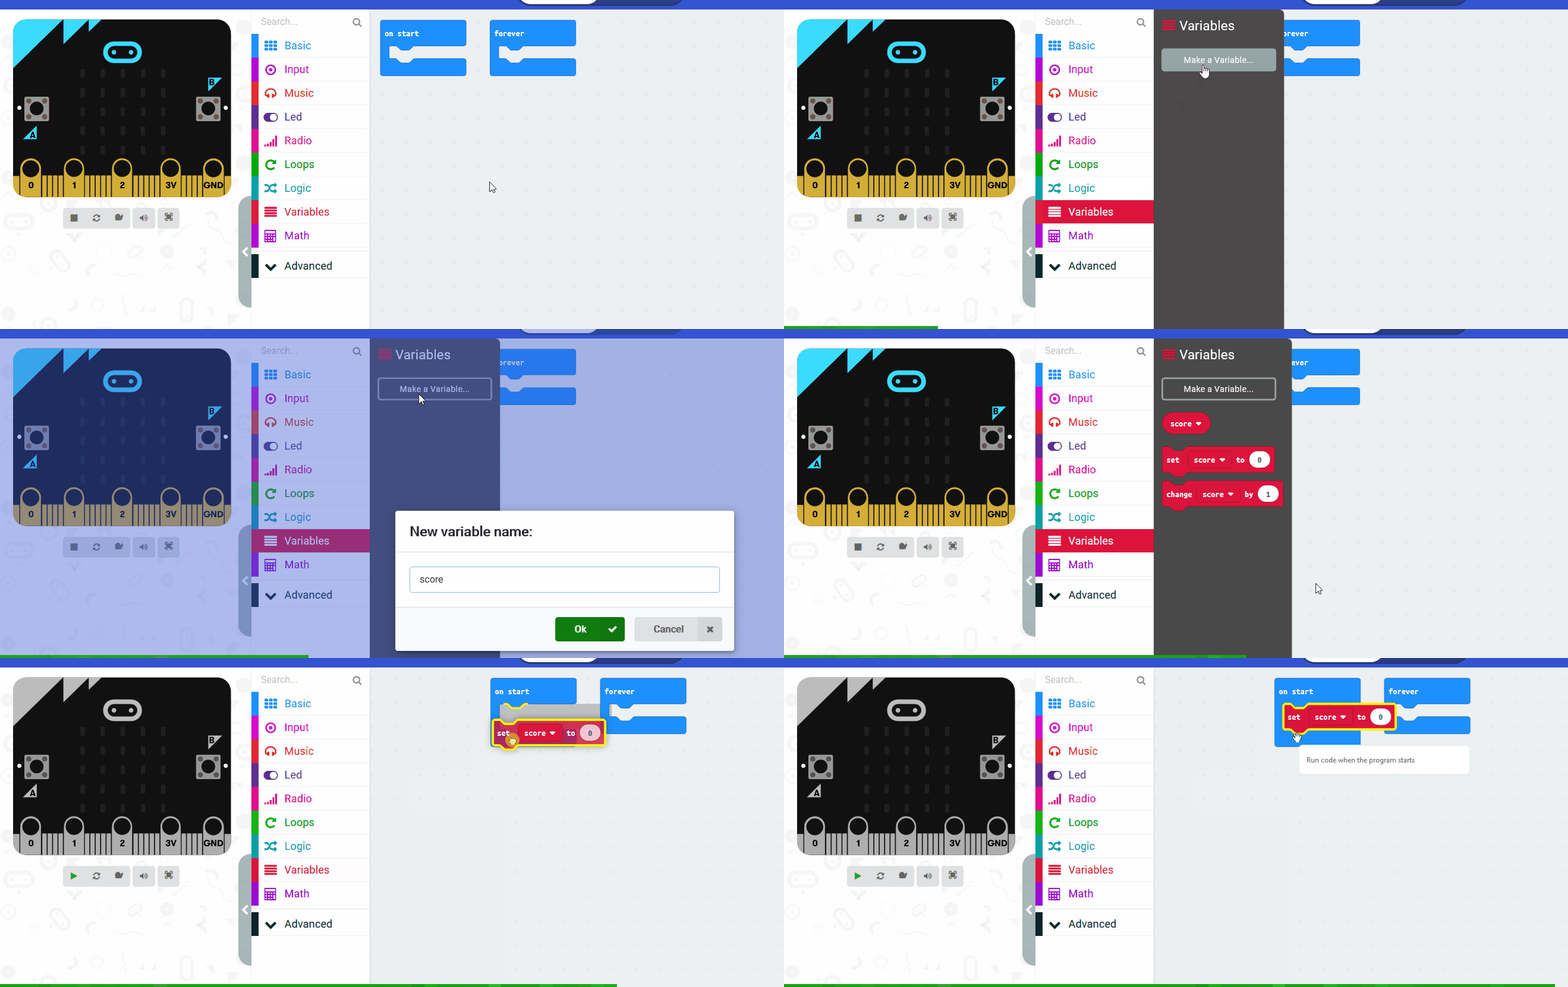
In the Variables toolbox, create a new variable by clicking the 'Make a Variable' button.
Once you click this button a box will appear asking what you want to call your variable. Give it a name that reminds you what you will be using it for. For example, if you wanted to keep track of your score in a game, you would create a variable called 'score'.

3 - Increase their values
Now let's program the A, B and A+B buttons to add 20 to variables each time you press the btton.
- The A button will add 20 to the red variable.
- The B button will add 20 to the green variable.
- The A+B buttons will add 20 to the blue variable.
Add the following code.
input.onButtonPressed(Button.A, function () {
    red += 20
})
input.onButtonPressed(Button.AB, function () {
    blue += 20
})
input.onButtonPressed(Button.B, function () {
    green += 20
})
4 - Mix the colours
Now let's use the variables to write to the pins and mix the colour. Add the following code.
basic.forever(function () {
    pins.analogWritePin(AnalogPin.P0, red)
    pins.analogWritePin(AnalogPin.P1, green)
    pins.analogWritePin(AnalogPin.P2, blue)
})
5 - Download the project and send it to your microbit
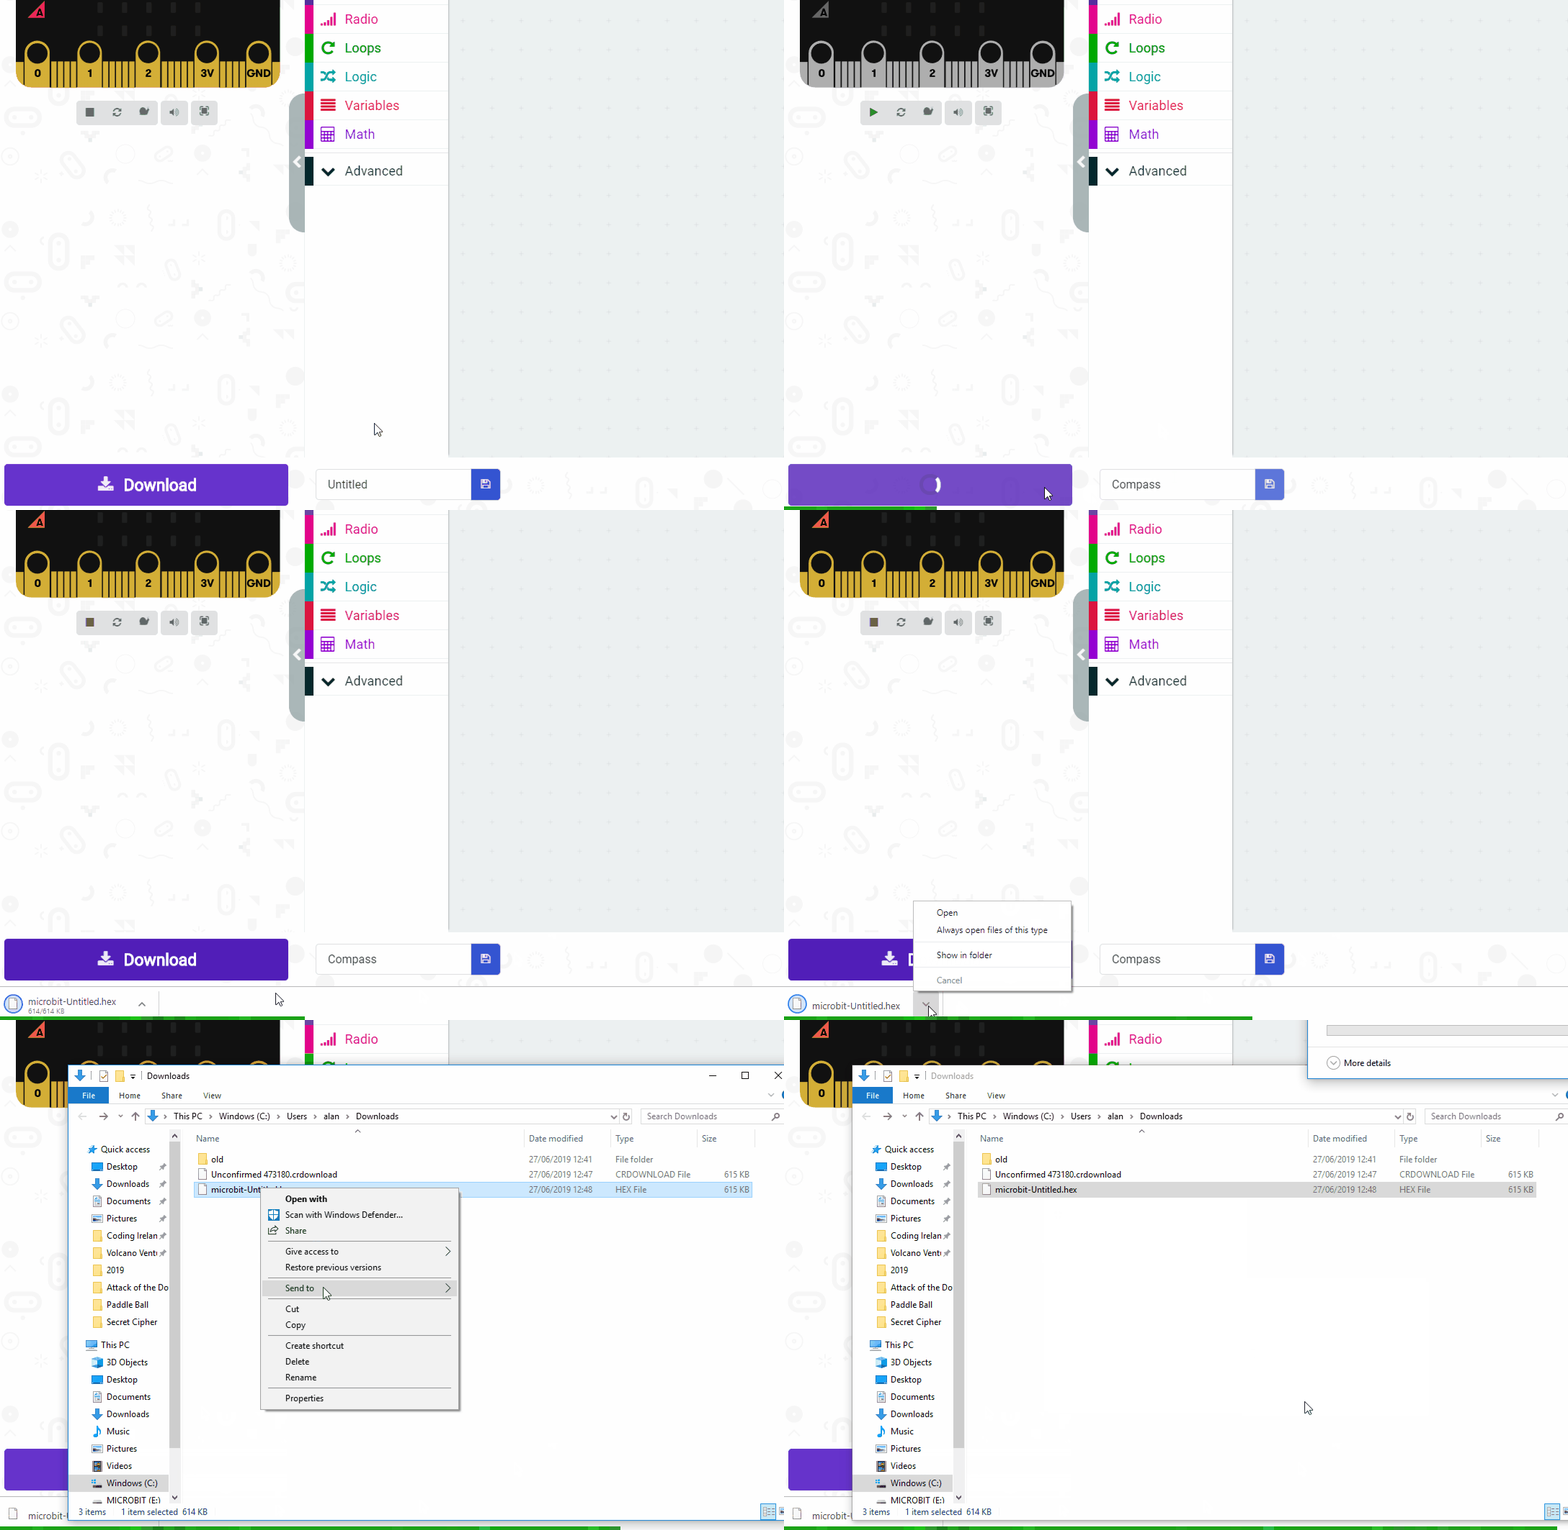
Give your project a name and send it to your Microbit by following these steps:
- Type "your project name" into the Project Name box.
- Connect your Microbit to your computer using the USB cable.
- Click the 'Download' button (a file called 'microbit-project-name.hex' will be downloaded to your computer).
- Open the folder on your computer where the file downloaded to.
- Right click on the file.
- Click Send To.
- Click Microbit.

- Power your microbit with a USB cable or battery pack
- Pair your microbit with your iPad/tablet (hold the A and B buttons and press and release the Reset button)
- Flash your project to your microbit
This lesson is copyright of Coding Ireland. Unauthorised use, copying or distribution is not allowed.

