1 - Create a new Arcade project
Go to the Arcade MakeCode website and create a new project.

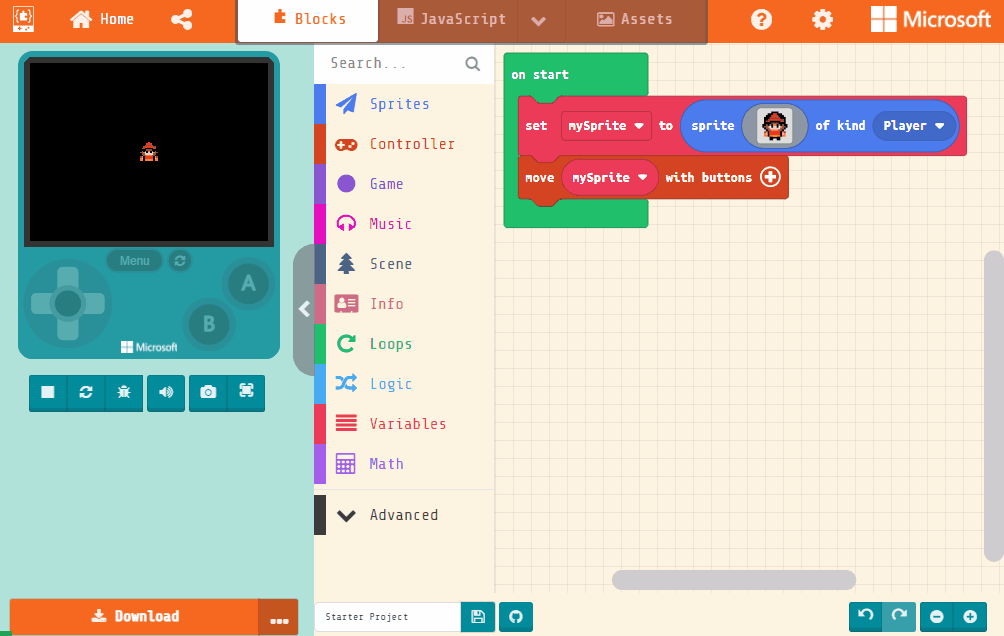
2 - Add a sprite
When we add a sprite to an Arcade project, we add it by putting it into a variable. We normally use variables to store numbers and text but we can also put more complicated things in them like sprites!
Add the following code to your project.
let mySprite = sprites.create(img`
    . . . . . . . . . . . . . . . .
    . . . . . . . . . . . . . . . .
    . . . . . . . . . . . . . . . .
    . . . . . . . . . . . . . . . .
    . . . . . . . . . . . . . . . .
    . . . . . . . . . . . . . . . .
    . . . . . . . . . . . . . . . .
    . . . . . . . . . . . . . . . .
    . . . . . . . . . . . . . . . .
    . . . . . . . . . . . . . . . .
    . . . . . . . . . . . . . . . .
    . . . . . . . . . . . . . . . .
    . . . . . . . . . . . . . . . .
    . . . . . . . . . . . . . . . .
    . . . . . . . . . . . . . . . .
    . . . . . . . . . . . . . . . .
    `, SpriteKind.Player)
This creates a variable called 'mySprite' and stores a sprite of kind Player in the variable. There are different types of sprites such as:
- Player - for sprites that are your character in the game.
- Projectile - for bullets, rockets or anything you want to fire!
- Food - for health packs, potions etc.
- Enemy - for enemy sprites that you play against or attack you.
- or you can even create your own kind of sprite!
Click on the gray box in the sprite block to open the Editor. You can choose a sprite from the Gallery or you can paint your own sprite using the Editor.
3 - Choose a sprite from the gallery
You can paint and design your own sprite or you can choose one from the gallery. For now choose a sprite from the gallery.
let mySprite = sprites.create(img`
    . . . . . . f f f f . . . . . .
    . . . . f f f 2 2 f f f . . . .
    . . . f f f 2 2 2 2 f f f . . .
    . . f f f e e e e e e f f f . .
    . . f f e 2 2 2 2 2 2 e e f . .
    . . f e 2 f f f f f f 2 e f . .
    . . f f f f e e e e f f f f . .
    . f f e f b f 4 4 f b f e f f .
    . f e e 4 1 f d d f 1 4 e e f .
    . . f e e d d d d d d e e f . .
    . . . f e e 4 4 4 4 e e f . . .
    . . e 4 f 2 2 2 2 2 2 f 4 e . .
    . . 4 d f 2 2 2 2 2 2 f d 4 . .
    . . 4 4 f 4 4 5 5 4 4 f 4 4 . .
    . . . . . f f f f f f . . . . .
    . . . . . f f . . f f . . . . .
    `, SpriteKind.Player)
4 - Move your sprite
In Arcade we have a total of eight buttons (4 directions, A, B, MENU and RESET) and we can program each of these.
Arcade also comes with useful blocks that let's us program somethings quickly. Add the following new code block to your project to program your sprite to move with the up, down, left and right buttons.
let mySprite = sprites.create(img`
    . . . . . . f f f f . . . . . .
    . . . . f f f 2 2 f f f . . . .
    . . . f f f 2 2 2 2 f f f . . .
    . . f f f e e e e e e f f f . .
    . . f f e 2 2 2 2 2 2 e e f . .
    . . f e 2 f f f f f f 2 e f . .
    . . f f f f e e e e f f f f . .
    . f f e f b f 4 4 f b f e f f .
    . f e e 4 1 f d d f 1 4 e e f .
    . . f e e d d d d d d e e f . .
    . . . f e e 4 4 4 4 e e f . . .
    . . e 4 f 2 2 2 2 2 2 f 4 e . .
    . . 4 d f 2 2 2 2 2 2 f d 4 . .
    . . 4 4 f 4 4 5 5 4 4 f 4 4 . .
    . . . . . f f f f f f . . . . .
    . . . . . f f . . f f . . . . .
    `, SpriteKind.Player)
controller.moveSprite(mySprite)
After you add the block try moving the sprite using the direction buttons in the simulator.
5 - Draw the tile map
In Arcade we can create tile maps that our players can move around and through.
Add the following new code block and then go into the editor to draw a simple map that just has a border all the way around the edge.
let mySprite = sprites.create(img`
    . . . . . . f f f f . . . . . .
    . . . . f f f 2 2 f f f . . . .
    . . . f f f 2 2 2 2 f f f . . .
    . . f f f e e e e e e f f f . .
    . . f f e 2 2 2 2 2 2 e e f . .
    . . f e 2 f f f f f f 2 e f . .
    . . f f f f e e e e f f f f . .
    . f f e f b f 4 4 f b f e f f .
    . f e e 4 1 f d d f 1 4 e e f .
    . . f e e d d d d d d e e f . .
    . . . f e e 4 4 4 4 e e f . . .
    . . e 4 f 2 2 2 2 2 2 f 4 e . .
    . . 4 d f 2 2 2 2 2 2 f d 4 . .
    . . 4 4 f 4 4 5 5 4 4 f 4 4 . .
    . . . . . f f f f f f . . . . .
    . . . . . f f . . f f . . . . .
    `, SpriteKind.Player)
controller.moveSprite(mySprite)
tiles.setTilemap(tilemap`level3`)
Once you have drawn your map, use the direction buttons to move your sprite again, you will notice that your sprite can move over the tiles you have drawn. This is because we have not drawn any walls yet.


Join our club 😃
To view the remaining 7 steps and access hundreds of other coding projects please login or create an account.
This lesson is copyright of Coding Ireland. Unauthorised use, copying or distribution is not allowed.